Saturday, May 30, 2015

This tutorial is written for those with knowledge of PSP
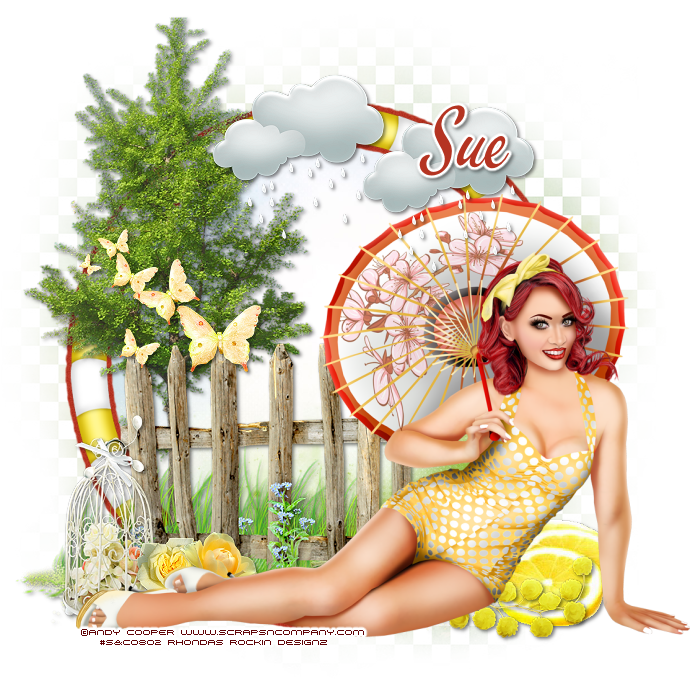
Supplies Needed:
Tube of choice: I'm using the wonderful art work of Keith Garvey
You can find his art HERE
PTU Scrap Kit by Jen from Sweet Temptations called "Citrus Cooler "
You an purchase this awesome kit from one of her stores HERE
Template #25 by Just Like Candy Designs HERE
Mask of choice
Ok lets get started:
Open template - Shift D to duplicate then close out original
Resize template 84% all layers
Canvas size 700x700
Delete copyright
Click on center light brown selections,select all, float,defloat
paste a paper of choice from the kit - I used paper4
selection invert delete
select none delete the original
Click on left vertical rectangle selections,select all, float,defloat
paste a paper of choice from the kit - I used paper2
selection invert delete
select none delete the original
Click on middle rectangle selections,select all, float,defloat
paste a paper of choice from the kit - I used paper1
selection invert delete
select none delete the original
Click on right light brown sq selections,select all, float,defloat
paste a paper of choice from the kit - I used paper6
selection invert delete
select none delete the original
Click on left peach circle selections,select all, float,defloat
paste a paper of choice from the kit - I used paper10
selection invert delete
select none delete the original
Click on right upper brown circle selections,select all, float,defloat
paste a paper of choice from the kit - I used paper8
selection invert delete
select none delete the original
Place your main tube
Now time to add our elements
I used the following:
BFly 1
Bird
Birdhouse
Cupcake
Flower 1
Glass
Honey
Hummingbird
Lolli
Orange
Oranges
Palm Tree
Peach
Pitcher
Ribbon 1
Merge your layers
Open paper 10 & apply mask of choice
Place your name where you like it
Add the Copyright and your License Number for the tube
Resize to your liking and save as PNG
This tutorial was created on May 30, 2015 by Rhonda
Any resemblance to another Tag or Tutorial is purely coincidental

Friday, May 29, 2015

This tutorial is written for those with knowledge of PSP
Supplies Needed:
Tube of choice: I'm using the wonderful art work of Jose Cano
You can purchase his tubes HERE
FTU Scrap Kit by Bookworm Dezines HERE
Mask of choice
Ok lets get started:
Open a blank image 700x700
Open element 19 and place as a new image
Click inside frame with magic wand
Selction modify expand by 10
Add new layer under frame
Open paper 2 and paste into selection
Select none
Place your main tube
Now time to add our elements
I used the following:
Element 7
Element 9
Element 14
Element 20
Element 27
Element 28
Element 34
Element 35
Element 38
Element 43
Element 48
Element 60
Element 61
Element 62
Element 63
Merge your layers
Open paper 10 and apply mask
Place your name where you like it
Add the Copyright and your License Number for the tube
Resize to your liking and save as PNG
This tutorial was created on May 29,2015 by Rhonda
Any resemblance to another Tag or Tutorial is purely coincidental

This tutorial is written for those with knowledge of PSP
Supplies Needed:
Tube of choice: Im using the wonderful art work of Eugene Rzhevskii
You can purchase these tubes at PFD HERE
PTU Scrap Kit by Purple Dream Scraps called Summer Fun
You can purchase this awesome kit from one of her stores HERE
Mask of choice
Ok lets get started:
Open a blank image 700x700
Open pothole 2 and place as a new image
Grab the freehand tool and draw circle around frame
Add new layer under element
Open paper 2 and paste into selection
Select none
Place your main tube
Now time to add our elements
I used the following:
Bottle
Bubbles
Fish 1&2
Fishs
Flower
Flower 2
Palm Tree
Parrot
Sand 2
Seaweed
Shell
Shell 3&4
Starfish
Suncream
Merge your layers
Open paper 4 and apply mask
Place your name where you like it
Add the Copyright and your License Number for the tube
Resize to your liking and save as PNG
This tutorial was created on May 29,2015 by Rhonda
Any resemblance to another Tag or Tutorial is purely coincidental
Sunday, May 24, 2015

This tutorial is written for those with knowledge of PSP
Supplies Needed:
Tube of choice: I'm using the wonderful art work of Vi Nina
You must obtain a license to use this art at S&Co HERE
PTU Scrap Kit from Bibi called "Vroom"
You can purchase this awesome kit at S&Co HERE
Mask of choice
Ok Lets get Started:
This is a very quick and easy tutorial
Open element 45 & place in center of tag
Grab the magic wand & click inside frame
Selections modify expand by 10
Add new layer under frame
Open paper 7 & paste into selections
Place your main tube
Now time to add our elements
I used the following:
Element 8
Element 15
Element 17
Element 18
Element 19
Element 25
Element 49
Element 52
Element 62
Element 73
Element 83
Merge your layers
Open paper of choice & apply mask
Place your name where you like it
Add the Copyright and your License Number for the tube
Resize to your liking and save as PNG
This tutorial was created on May 25,2015 by Rhonda
Any resemblance to another Tag or Tutorial is purely coincidental
Saturday, May 23, 2015

This tutorial is written for those with knowledge of PSP
Supplies Needed:
Tube of choice: I'm using the wonderful art work of Very Many
You can purchase these tubes HERE
PTU Scrap Kit by Tiny Turtle Design called "Spring Road"
You an purchase this awesome kit at her store HERE
Mask of choice
Ok lets get started:
Open blank canvas 700x700
Open element 34 & place in center of canvas
Grab the selection tool and draw a rectangle around the frame
Add new layer under frame
Open paper 20 and place into selection
Add Xero Radiance
Now add any other elements you want from kit
I used:
Element 8
Element 14
Element 30
Element 33
Element 49
Element 51
Element 59
Element 60
Element 76
Element 77
Element 89
Element 98
Element 101
Element 110
Element 114
Element 127
Element 128
Element 133
Element 134
Merge layers and apply mask of choice
Open paper of choice and apply mask
Place your name where you like it
Add the Copyright and your License Number for the tube
Resize to your liking and save as PNG
This tutorial was created on May 24,2015 by Rhonda
Any resemblance to another Tag or Tutorial is purely coincidental
This tutorial is written for those with knowledge of PSP
Supplies Needed:
Tube of choice: I'm using the wonderful art work of Andy Cooper
You must obtain a license to use his art at S&Co HERE
Matching PTU Scrapkit by Designs by Sue at S&CO HERE
Mask #107 by Vaybs HERE
Ok Lets get Started:
This is a very quick and easy tutorial
Open blank canvas 700x700
Open element 007 and place in center
Grab the magic wand & click inside frame
Selections modify expand by 10
Add new layer under frame
Open paper 14 & paste into selections
Select none
Place main tube to bottom of tag
Add any other elements you want from the kit
I used:
Element 30
Element 43
Element 44
Element 45
Element 56
Element 57
Element 60
Element 61
Element 63
Merge layers
Open paper 15 & apply mask of choice
Place your name where you like it
Add the Copyright and your License Number for the tube
Resize to your liking and save as PNG
This tutorial was created on May 23,2015 by Rhonda
Any resemblance to another Tag or Tutorial is purely coincidental
Friday, May 22, 2015

This tutorial is written for those with knowledge of PSP
Supplies Needed:
Tube of choice: Im using the wonderful art work of Celinart Pinup
You must obtain a license to use this art at S&Co HERE
Matching PTU Scrap Kit from Bibi called "Amy Steampunk"
You can purchase this awesome kit at S&Co HERE
Mask #6 from Allison's Addiction HERE
Resize elements to your liking
Ok lets get started:
This is a very quick and easy tutorial
Open canvas size 700x700
Open element 3 & place in center of tag
Grab the magic wand & click inside frame
Selections modify expand by 10
Open paper 4 & paste as new layer
Selections invert delete
Place your main tube
Now time to add our elements
I used the following:
Element 11
Element 18
Element 27
Element 46
Element 49
Element 55
Element 71
Element 76
Element 77
Element 79
Element 80
Element 81
Element 92
Element 94
Merge your layers
Open paper 7 & apply mask
Place your name where you like it
Add the Copyright and your License Number for the tube
Resize to your liking and save as PNG
This tutorial was created on May 22,2015 by Rhonda
Any resemblance to another Tag or Tutorial is purely coincidental
Thursday, May 21, 2015

This tutorial is written for those with knowledge of PSP
Supplies Needed:
Tube of choice: I'm using the wonderful art work of GraphFreaks
You must obtain a license to use this art at S&Co HERE
PTU Scrap Kit from CCDesigns Scraps called "Breezy Summer"
Kit can be purchased at S&CO HERE
Template #20 by Wendy HERE
Mask #12 by Brutal Designs HERE
Ok lets get started:
Open template - Shift D to duplicate then close out original
Increase canvas size to 700x700
delete copyright
Click on circle selections,select all, float,defloat
paste a paper of choice from the kit - I used paper1
selection invert delete
select none delete the original
Click on big rectangle selections,select all, float,defloat
paste a paper of choice from the kit - I used paper6
selection invert delete
select none delete the original
add border with noise
Click on small rectangles selections,select all, float,defloat
paste a paper of choice from the kit - I used paper5
selection invert delete
select none delete the original
add border with noise
Click on circle bkg left & right selections,select all, float,defloat
paste a paper of choice from the kit - I used paper12
selection invert delete
select none delete the original
Add close-up of tube inside circles
apply Xero Porcelin
Click on circle frame left & right selections,select all, float,defloat
paste a paper of choice from the kit - I used paper2
selection invert delete
select none delete the original
add noise
Place your main tube
Now time to add our elements
I used the following:
Bird
Bling 2&4
Bottle
Dog
Flowers 1-10
Heart 1
Pot 2
Watercan
Wreath 1
Merge your layers
Open paper 10 & apply mask of choice
Place your name where you like it
Add the Copyright and your License Number for the tube
Resize to your liking and save as PNG
This tutorial was created on May 20,2015 by Rhonda
Any resemblance to another Tag or Tutorial is purely coincidental
Wednesday, May 20, 2015

This tutorial is written for those with knowledge of PSP
Supplies Needed:
Tube of choice: Im using the wonderful art work of Jose Cano
You can purchase his tubes at his store HERE
FTU Scrap Kit by Tasha's Playground called Skullz N Stripez HERE
Template by Dolly's Tag World HERE
Mask of choice
Don't forget to leave a thank you when downloading
Ok lets get started:
Open template - Shift D to duplicate then close out original
Increase canvas size 700x700
Delete copyright,black lines & word art
Click on left & right glitter squares selections,select all, float,defloat
paste a paper of choice from the kit - I used paper12
selection invert delete
select none delete the original
add noise
Click on left & right black squares selections,select all, float,defloat
paste a paper of choice from the kit - I used paper10
selection invert delete
select none delete the original
Click on pink circle selections,select all, float,defloat
paste a paper of choice from the kit - I used paper3
selection invert delete
select none delete the original
Click on black circle selections,select all, float,defloat
paste a paper of choice from the kit - I used paper6
selection invert delete
select none delete the original
Place your main tube
apply Xero radiance with settings of choice
Now add any other elements of choice
I used the following:
Boot
Bottle
Bow
Butterfly
Cupcake
Flameheart
Flower 2
Heart 2
Label
Motorcycle
Skull Charm
Sparkles 2
Spider
Merge your layers
Open paper 5 and apply mask
Place your name where you like it
Add the Copyright and your License Number for the tube
Resize to your liking and save as PNG
This tutorial was created on May 19,2015 by Rhonda
Any resemblance to another Tag or Tutorial is purely coincidental

This tutorial is written for those with knowledge of PSP
Supplies Needed:
Tube of choice: I'm using the wonderful art work of Keith Garvey
You can purchase his tubes at Garv - Girls PSP HERE
Template by Melissa from Unique Styles HERE
Mask of choice
Don't forget to leave a thank you when downloading
Plugins Used:
Xero Radiance
PhotoEffex Scanlines
Ok lets get started:
Open template - Shift D to duplicate then close out original
Resize all layers 124%
Canvas size 700x700
Delete copyright
Click on raster 9
Selections select all float defloat
Add close up of tube inside circle
Use as many times as you like to fill the area
Selections invert delete
Lower opacity to 70%
Change blend mode to Screen
Apply Xero Radiance with settings of choice
Click on raster 14
Selections select all float defloat
Flood fill with color/gradient of choice
Add close up of tube again
Selections invert delete
Apply Xero Radiance again
Apply PhotoEffex Scanlines
Use any other elements of your choice on tag if desired
Merge your layers
Open any paper/gradient of choice and apply mask
Place your name where you like it
Add the Copyright and your License Number for the tube
Resize to your liking and save as PNG
This tutorial was created on May 10,2015 by Rhonda
Any resemblance to another Tag or Tutorial is purely coincidental
Monday, May 18, 2015

This tutorial is written for those with knowledge of PSP
Supplies Needed:
Tube of choice: I'm using the wonderful art work of Andy Cooper
You must obtain a license to use his art at S&Co HERE
Matching PTU Scrapkit by Disturbed Scraps at S&CO HERE
Template #25 from Just Like Candy Designs HERE
Mask of choice
Ok lets get started:
Open template - Shift D to duplicate then close out original
Resize template to your liking
I like my canvas size 700x700
delete copyright
Click on center light brown selections,select all, float,defloat
paste a paper of choice from the kit - I used paper14
selection invert delete
select none delete the original
add border with noise
Click on left vertical rectangle selections,select all, float,defloat
paste a paper of choice from the kit - I used paper12
selection invert delete
select none delete the original
add border with noise
Click on middle rectangle selections,select all, float,defloat
paste a paper of choice from the kit - I used paper4
selection invert delete
select none delete the original
add border with noise
Click on right light brown selections,select all, float,defloat
paste a paper of choice from the kit - I used paper2
selection invert delete
select none delete the original
Click on left peach circle selections,select all, float,defloat
paste a paper of choice from the kit - I used paper9
selection invert delete
select none delete the original
add border with noise
Click on right upper brown selections,select all, float,defloat
paste a paper of choice from the kit - I used paper1
selection invert delete
select none delete the original
add brder with noise
Place tube to right of tag
Add any elements of your choice from the kit
I used the following:
Element 1
Element 6
Element 7
Element 8
Element 10
Element 29
Element 30
Element 34
Element 35
Element 38
Element 68
Element 71
Element 83
Element 87
Merge layers
Open paper 10 & apply mask of choice
Place your name where you like it
Add the Copyright and your License Number for the tube
Resize to your liking and save as PNG
This tutorial was created on May 18,2015 by Rhonda
Any resemblance to another Tag or Tutorial is purely coincidental
Friday, May 15, 2015

This tutorial is written for those with knowledge of PSP
Supplies Needed:
Tube of choice: Im using the wonderful art work of VeryMany
You must obtain a license to use HERE
FTU Scrap Kit by HERE
Mask of choice
Ok lets get started:
Resize elements to your liking
This is a very quick and easy tutorial
Open blank canvas 700x700
Open frame 2 from kit and place in center of canvas
Grab the magic wand & click inside frame
Selections modify expand by 10
Add new layer under cluster
Open paper 8 and paste into selections
Selections none
Place your main tube & build around it
Now time to add our elements
I used the following:
Bird 2
Butterfly 5
Butterflies
Candle Basket
Flower 1,2,3,5,10
Flower 13&14
Glitter
Waterpot
Wheelbarrel
Merge layers
Open paper of choice and apply mask
Place your name where you like it
Add the Copyright and your License Number for the tube
Resize to your liking and save as PNG
This tutorial was created on May 14,2015 by Rhonda
Any resemblance to another Tag or Tutorial is purely coincidental

This tutorial is written for those with knowledge of PSP
Supplies Needed:
Tube of choice: I'm using the wonderful art work of Lightartist_XXX
You must obtain a license to use at PFD HERE
PTU Scrap Kit from Icy Blue Mystic Designs called Friends Across The Miles
You can purchase this kit at one of her stores HERE
Mask of choice
Ok lets get started:
Resize elements to your liking
This is a very quick and easy tutorial
Open blank canvas 700x700
Open frame 4 and place in center
Click inside of frame with magic wand
Selections modify expand by 10
Open new layer under frame
Open paper 5 and paste into selections
Select none
Place tube and build around it
Now time to add our elements
I used the following:
Bee
Bouquet of Flowers 2&4
Butterfly 1&2
Cherry Blossom 1
Corner Flowers 1&3
Daisies 1&2
Home Tweet Home
LilElf
Vine 2
Merge layers
Open paper 10 and apply mask
Place your name where you like it
Add the Copyright and your License Number for the tube
Resize to your liking and save as PNG
This tutorial was created on May 13,2015 by Rhonda
Any resemblance to another Tag or Tutorial is purely coincidental

This tutorial is written for those with knowledge of PSP
Supplies Needed:
Tube of choice: I'm using the wonderful art work of Andy Cooper
You must obtain a license to use his art at S&Co HERE
Matching PTU Scrapkit by Kai Kreationz at S&CO HERE
Mask of choice
Ok Lets get Started:
This is a very quick and easy tutorial
Open blank canvas 700x700
Open frame 2 and place in center
Grab the magic wand & click inside frame
Selections modify expand by 10
Add new layer under frame
Open paper 2 & paste into selections
Select none
Place main tube to center
Add any other elements you want from the kit
I used:
Element 2
Element 8
Element 9
Element 12
Element 19
Element 21
Element 29
Element 35
Element 41
Element 54
Merge layers
Open paper 5 & apply mask of choice
Place your name where you like it
Add the Copyright and your License Number for the tube
Resize to your liking and save as PNG
This tutorial was created on May 15,2015 by Rhonda
Any resemblance to another Tag or Tutorial is purely coincidental
Monday, May 11, 2015

This tutorial is written for those with knowledge of PSP
Supplies Needed:
Tube of choice: I'm using the wonderful art work of Very Many
You can purchase his tubes at their store HERE
FTU Scrap Kit by Wicked Princess HERE
Template #754 by Millie HERE
Mask by Rachel HERE
Don't forget to leave a thank you when downloading
Ok lets get started:
Open template - Shift D to duplicate then close out original
Canvas size 700x700
Delete copyright,layers 1,2,6
Click on layer 3 selections,select all, float,defloat
paste a paper of choice from the kit - I used paper10
selection invert delete
select none delete the original
add border with noise
Click on layer 4 selections,select all, float,defloat
paste a paper of choice from the kit - I used paper4
selection invert delete
select none delete the original
Click on layers 5 selections,select all, float,defloat
paste a paper of choice from the kit - I used paper5
selection invert delete
select none delete the original
add border with noise
Click on layer 7 selections,select all, float,defloat
paste a paper of choice from the kit - I used paper4
selection invert delete
select none delete the original
Click on layers 8&9 selections,select all, float,defloat
paste a paper of choice from the kit - I used paper3
selection invert delete
select none delete the original
Place your main tube
apply Xero Radiance with settings of choice
Now add any other elements of choice
I used the following:
Cards Tack
Angel
Babysbreath
Bauganvilla
Birdhouse
Books
Butterfly
Callalily
CamilliaFlower
Cloud
Cluster Frame
Daisy
Dove
House
LeafBranch
Roses
Tree 2
Tulip
Wordart
Merge your layers
Open paper 6 and apply mask
Place your name where you like it
Add the Copyright and your License Number for the tube
Resize to your liking and save as PNG
This tutorial was created on May 11,2015 by Rhonda
Any resemblance to another Tag or Tutorial is purely coincidental
Sunday, May 10, 2015

This tutorial is written for those with knowledge of PSP
Supplies Needed:
Tube of choice: I'm using the wonderful art work of Alex Prihodko
You can purchase his work at PFD HERE
FTU Scrap Kit by Lorenzen Design HERE
Mask by Rocked by Rachel HERE
Texture by Jennifer Scrap HERE
Don't forget to leave a thank you when downloading
Ok lets get started:
Open a white blank canvas 700x700
Open frame 11 from kit and place as a new layer
Click inside frame with magic wand
Selections modify expand by 10
Open paper 23 and paste as new layer
Move paper under frame
Place tube to right of frame
Now let's add our elements to the tag
I used the following:
Apple Blossom
Birdhouse
Butterfly 1,3&4
Chipmunk
Flower 5,6,9&10
LilElf
Merge your layers
Open texture of choice & apply mask
Place your name where you like it
Add the Copyright and your License Number for the tube
Resize to your liking and save as PNG
This tutorial was created on May 10,2015 by Rhonda
Any resemblance to another Tag or Tutorial is purely coincidental

This tutorial is written for those with knowledge of PSP
Supplies Needed:
Tube of choice: Im using the wonderful art work of Ellie_Milk
You can purchase these tubes at PFD HERE
FTU Scrap Kit by Tasha's Playground called Ladybug Garden HERE
Mask of choice
Don't forget to leave a thank you when downloading
Ok lets get started:
Open blank 700x700 canvas
Open frame 2, resize & place in center
Grab magik wand and click inside
Selections modify expand by 8
Add new layer under frame
Open paper 2 and paste into selection
Open grass 2 and place to right of cluster
Duplicate grass and mirror
Open flowermug and place to right behind grass
Duplicate and mirror
Open tree and place behind flowers to the left
Open flower 3 and paste beside flowermug to left
Open flower 7 and paste beside flowermug to right
Open flower 1 and paste behind flowermug to left
Duplicate and mirror
Open branch 2 and paste behind all flowers
Open flowerscatter and paste behind branch
Open scatter and place to right upper side of frame
Open frog and place to left in front of grass
Open watercan, bucket & bucket and place in center of grass
Open bush and place to the right behind one of the buckets
Open the 3 ladybugs and place where you want them
Open tube and place in center of tag
Open sparkles of choice and apply
Merge your layers
Open paper 5 & apply mask
Place your name where you like it
Add the Copyright and your License Number for the tube
Resize to your liking and save as PNG
This tutorial was created on May 1,2015 by Rhonda
Any resemblance to another Tag or Tutorial is purely coincidental

This tutorial is written for those with knowledge of PSP
Supplies Needed:
Tube of choice: I'm using the wonderful art work of Zindy S.D.Nielsen
You must obtain a license to use HERE
FTU Scrapkit from Crafted by Gina HERE
Mask of choice
Resize elements to your liking
This is a very quick and easy tutorial
Open blank canvas 700x700
Open frame & paste in center of canvas
Click inside with magic wand & expand by 10
Open paper 3 and paste as new layer
Selections invert delete
Move paper under frame
Place your main tube & build around it
Now time to add our elements
I used the following:
Awareness Ribbon 2
Bird 2
Bow 2
Flower 2,4,5&6
Ivy
Leaf 1,2&3
Spots
Merge layers
Open paper of choice and apply mask
Place your name where you like it
Add the Copyright and your License Number for the tube
Resize to your liking and save as PNG
This tutorial was created on May 10,2015 by Rhonda
Any resemblance to another Tag or Tutorial is purely coincidental
Saturday, May 9, 2015

This tutorial is written for those with knowledge of PSP
Supplies Needed:
Tube of choice: Im using the wonderful art work of GraphFreaks
You must obtain a license to use this art at S&Co HERE
PTU Scrap Kit from Lizquis Scraps called "Lily"
Kit can be purchased at S&CO HERE
Mask of choice
Ok lets get started:
Resize elements to your liking
This is a very quick and easy tutorial
Open blank canvas 700x700
Open frame 3 & place in center of tag
Grab the magic wand & click inside frame
Selections modify expand by 10
Add new layer under frame
Open paper 1 and paste into selection
Select none
Now time to add our elements
I used the following:
Berries
Birdfeeder
Boot House
Lily Branch 1&2
Decor 1
Dragonflies
Flower 4
Flowers 1&4
Ladder
Leaves 1
Mushroom 1,2&3
Rocks
Roses Cart
Roses
Sources
Sparkles 3
Merge layers
Open paper 8 and apply mask
Place your name where you like it
Add the Copyright and your License Number for the tube
Resize to your liking and save as PNG
This tutorial was created on May 9,2015 by Rhonda
Any resemblance to another Tag or Tutorial is purely coincidental
Tuesday, May 5, 2015

This tutorial is written for those with knowledge of PSP
Supplies Needed:
Tube of choice: I'm using the wonderful art work of Keith Garvey
You can purchase his work at his store HERE
FTU Scrap Kit by Addictive Pleasures HERE
Template #98 by Scrap It Studio HERE
Mask by Maria HERE
2nd Mask in set
Don't forget to leave a thank you when downloading
Plugins Used:
Xero Porcelin
Ok Lets get Started:
Open template - Shift D to duplicate then close out original
Canvas size 700x700
Deleted copyright,layers 14,16,17 & 18
Click on raster 1&2 selections,select all, float,defloat
paste a paper of choice from the kit - I used paper6
selection invert delete
select none delete the original
Click on raster 3 selections,select all, float,defloat
paste a paper of choice from the kit - I used paper8
selection invert delete
select none delete the original
Click on raster 4&5 selections,select all, float,defloat
paste a paper of choice from the kit - I used paper9
selection invert delete
select none delete the original
Click on raster 6 selections,select all, float,defloat
paste a paper of choice from the kit - I used paper2
selection invert delete
select none delete the original
Click on raster 7 selections,select all, float,defloat
paste a paper of choice from the kit - I used paper6
selection invert delete
select none delete the original
Click on raster 8 selections,select all, float,defloat
paste a paper of choice from the kit - I used paper12
selection invert delete
select none delete the original
Click on raster 9&10 selections,select all, float,defloat
paste close-up of tube inside each
selection invert delete
select none delete the original
apply Xero Porcelin to tubes
Click on raster 11&12 selections,select all, float,defloat
paste a paper of choice from the kit - I used paper10
selection invert delete
select none delete the original
add noise with settings of choice
Click on raster 13&15 selections,select all, float,defloat
paste a paper of choice from the kit - I used paper7
selection invert delete
select none delete the original
Place your main tube
Xero Porcelin with settings of choice
Now time to add our elements
I used the following:
Box 3
Butterfly
Butterflys
Clock 2
Fan
Flower 2
Hat
Ivy
Lace 2
Letter
Medaillon
Powder Box
Ribbon Bow 2
Rose
Sunflower 1&2
Merge your layers
Open paper of choice and apply mask
Place your name where you like it
Add the Copyright and your License Number for the tube
Resize to your liking and save as PNG
This tutorial was created on May 5,2015 by Rhonda
Any resemblance to another Tag or Tutorial is purely coincidental
Monday, May 4, 2015

This tutorial is written for those with knowledge of PSP
Supplies Needed:
Tube of choice: I'm using the wonderful art work of Alehandra Vanek
You must obtain a license to use this art at S&Co HERE
PTU Scrap Kit from Bibi called "Sensual"
You can purchase this awesome kit at S&Co HERE
Mask of choice
Ok lets get started:
This is a very quick and easy tutorial
Open element 1 & place in center of tag
Grab the magic wand & click inside frame
Selections modify expand by 10
Add new layer under frame
Open paper 2 & paste into selections
Place your main tube
Now time to add our elements
I used the following:
Element 4
Element 6
Element 11
Element 23
Element 27
Element 29
Element 34
Element 43
Element 67
Element 78
Element 87
Element 101
Merge your layers
Open paper of choice & apply mask
Place your name where you like it
Add the Copyright and your License Number for the tube
Resize to your liking and save as PNG
This tutorial was created on May 4,2015 by Rhonda
Any resemblance to another Tag or Tutorial is purely coincidental
Friday, May 1, 2015

This tutorial is written for those with knowledge of PSP
Supplies Needed:
Tube of choice: I'm using the wonderful art work of Toriya
You must obtain a license to use his art at S&Co HERE
Matching PTU Scrapkit by Designs by Joan called Freya
You can purchase this kit from S&CO HERE
Mask of choice
Resize elements to your liking
Ok lets get started:
This is a very quick and easy tutorial
Open blank canvas 700x700
Open element 66 and place in center
Grab the magic wand & click inside frame
Selections modify expand by 10
Add new layer under frame
Open paper 3 & paste into selections
Select none
Place main tube to center of tag
Add any other elements you want from the kit
I used:
Element 13
Element 30
Element 35
Element 39
Element 41
Element 44
Element 61
Element 69
Element 74
Element 80
Element 87
Element 101
Element 102
Element 109
Element 112
Element 115
Merge layers
Open paper 7 & apply mask of choice
Place your name where you like it
Add the Copyright and your License Number for the tube
Resize to your liking and save as PNG
This tutorial was created on May 1,2015 by Rhonda
Any resemblance to another Tag or Tutorial is purely coincidental
Subscribe to:
Posts
(Atom)
Grab My Blinkie

I CT For


Blogs I Visit


