Saturday, April 27, 2024
My motivational quote for today is by Michael Jordan
"You must expect great things of yourself before you can do them."

Very true statement.
Everything starts with you or by you.
When difficult situations come into our lives
We can choose to stay with the pain OR
we can choose to begin a different path.
We must believe in ourselves first, 
we must believe we have the strength to keep going.

I love Carrie Underwood and have seen her twice in concert.
Her songs tell a story of real life.
I listen to one of her songs often when feeling down
Song is The Champion
I repeat the chorus all the time to remind myself, 
I am the Champion.

"I am invincible, unbreakable
unstoppable,unshakeable
They knock me down
I get up again
I am the champion."

tk-Rhonda-siggy
This tutorial is written for those with knowledge of PSP
Supplies Needed:
Tube of choice: I'm using the wonderful artwork of VeryMany
Tube purchased at store HERE
FTU tubes downloaded from internet HERE
These are tubes I used - Download links credited in zip
Paper texture from dierat at DeviantArt HERE
I used paper 2
WA by Simply Siobhan HERE
Mask #100 by Moonbeams & Spiderwebs HERE

Ok let's  get started:
Open canvas 725x725 
Open window frame from supplies and place to canvas
Move a little to right, depends on tube used
Using freehand tool, draw around the window frame
New layer under window
Open paper texture and paste into selection.
Open the misted background and paste as new layer
Arrange to your liking, erase any left showing outside frame
Open tube of choice and place to tag

Using my tutorial, complete your tag
Place elements I used or elements of your choice

Open background provided and apply mask

I leave all my layers open to use later if needed & save

Place your name where you like it
Add the Copyright and your License Number for the tube
Resize to your liking and save as PNG
This tutorial was created on April 26,2024 by Rhonda
Any resemblance to another Tag or Tutorial is purely coincidental

tk-Rhonda-siggy
Friday, April 26, 2024
I am slow posting this morning.
Still need some positive motivation for the day

This quote by John D Rockefeller relates to me right now:
"Don't be afraid to give up the good to go for the great"!

I recently made a decision to walk away from something very
near and dear to my heart. 
I questioned my reasoning for leaving many times but
I felt I needed to leave that past behind.

When I read the quote above it gives me a peace that the
decision I made was for the GOOD, now I am striving
for the GREAT

Let's all strive to be great in everything we do!
Be kind to a stranger today, it cost nothing

Have an awesome day!!!!!!!!!!!!!!

tk-Rhonda-siggy
This morning, I had a lot of thoughts racing through my mind.
I have several things going on in my personal life.
There are days I feel completely in control and
other days I feel like a lost Easter egg trying to find myself.
Today is one of those days.
As I was reading some motivational verses this one
caught my eye and I leaned into it.
It was said by Reba Mcentire:
"To succeed in life, you need three things:
a wishbone, a backbone and a funny bone."
How true this is!!!!!!!!!!!!!!!

Life can be cruel at times, but we have to grow
and learn through these unpleasant times.
We either stop at the end of the road,
or we begin a new road to find ourselves.

We should all have a wishbone, backbone 
and funny bone!!!!!!!!

Have an awesome day.


tk-Rhonda-siggy
Tuesday, April 23, 2024
This tutorial is written for those with knowledge of PSP
Supplies Needed:
Tube of choice: I'm using the wonderful artwork of Steve Blair
Tube purchased at CDO HERE
FTU Classical Records at DeviantArt HERE
Texture used for WA at DeviantArt HERE
Credit belongs to kuschelirmel-stock 
Tubes used from internet HERE
Download links credited in zip
WA of choice. I made mine but forgot to save and share
Mask of choice

Ok let's get started:
Open canvas 725x725 
Open circle frame, paste as new layer, resize
Open background paper and apply mask of choice
Open the decor element and place where desired
Open the records you downloaded and apply (use my image as example)
Apply record player to canvas
Add other elements where desired
Apply tube of choice

I leave all my layers open to use later if needed & save

Place your name where you like it
Add the Copyright and your License Number for the tube
Resize to your liking and save as PNG
This tutorial was created on April 23,2024 by Rhonda
Any resemblance to another Tag or Tutorial is purely coincidental

tk-Rhonda-siggy
Saturday, April 20, 2024
This tutorial is written for those with knowledge of PSP
Supplies Needed:
Tube of choice: I'm using the wonderful artwork of Elias Chatzoudis
Tube was purchased at MPT many years ago
Store has now closed
Tubes are still available at CDO HERE
Mask #278 by Scrappy Bit of Fun HERE
Materials downloaded from various blogs
These can be downloaded HERE
I can't remember where WA was obtained
Feel free to use any tubes of your choice
A tutorial is just a guideline, add your twist!!!
Links to blogs are supplied in zip with tubes
If ANY of these materials are yours
PLEASE let me know and I will remove

This will be short and sweet
Review my tag for any tube placement.

Open blank canvas 725x725
Open frame and paste as new layer
Resize to your desired like
Click inside frame with magic wand and expand by 15
Open new layer under frame
Add a background of your choice

Open tube of choice and place in frame
Begin adding tubes to decorate your tag
Add background paper and apply mask
When everything is to your liking
You have a created an awesome tag!!!!!!!!!!!!!!

I would love to see any creations made
I will post them in my show-off thread

I leave my layers open and save as duplicate

Place your name where you like it
Add the Copyright and your License Number for the tube
Resize to your liking and save as PNG
This tutorial was created on July 4,2022 by Rhonda
Any resemblance to another Tag or Tutorial is purely coincidental


tk-Rhonda-siggy

Tube from Kajenna Art purchased at PFD
Various tubes supplied HERE
WA from Creative Misfits Spring 2021 by Mythical HERE
Texture Overlays by Foxxie-Chan downloaded HERE
Textures used in WA
Scrap papers downloaded from freebies found
Mask of choice

Tubes used in this tutorial are supplied with DL links
Feel free to use any of your choice
Use my tag as example to create
I would love to see any tags made by you
Have fun creating!!!!!!!!!

tk-Rhonda-siggy

 This tutorial is written for those with knowledge of PSP

Supplies Needed:

Tube of choice: I'm using the wonderful artwork of Nocturne

Tube purchased at PFD HERE

PTU kit Designz by Anorie HERE

Several stores to purchase from

Check out her blog and great freebies!!!!!

WA of choice

I thought it was on CM blog but can't find post

Mask #04 by Wendez Watermark HERE

Ok Let's get started:

Open canvas 725x725

Open tube of choice and place on canvas

Open elements 49 & 88 place to bottom of canvas

Duplicate as you choose, place to your liking

I used grass tube I had to add as fill in (Anorie approved)

Build up grass area

Open element 73, place to top right hand side

Start building your tag with other elements from kit

I used the following:

Element 5

Element 54

Element 61

Element 63

Element 71

Element 72

Element 74

Element 75

Element 79

Element 80

Element 84

Element 85

Element 89

Open paper of choice as new layer

Add mask, I mirrored mask I used

Open element 61, place on top of mask 

Rotate 90 to right

Change blend mode to screen 

I keep my layers open to reuse 

Place your name where you like it

Add the Copyright and your License Number for the tube

Resize to your liking and save as PNG

This tutorial was created on March 24,2024 by Rhonda

Any resemblance to another Tag or Tutorial is purely coincidental


Monday, February 26, 2024

This tutorial is written for those with knowledge of PSP
Supplies Needed:
Tube of choice: I'm using the wonderful artwork of Alex Prihodko
Tube was purchased at VMA HERE
FTU cluster designed by Pammers HERE
FTU kit created by Catty Creationz Dezines HERE
WA of choice
Check out Pammers and Catty's blog for more freebies!!!!!

Ok Let's get Started:
Open cluster frame
Shift D to duplicate, close original
I resized mine but totally your choice
Using freehand tool, draw around cluster
Open paper 6 from kit
Drop down a layer and paste as new layer
Arrange how desired in background - select none
Add tube of choice to tag
I used elements 45,12 and 17 to my tag

I leave my layers open for future use

Place your name where you like it
Add the Copyright and your License Number for the tube
Resize to your liking and save as PNG
This tutorial was created on Feb 26,2024 by Rhonda
Any resemblance to another Tag or Tutorial is purely coincidental

Monday, February 12, 2024
This tutorial is written for those with knowledge of PSP
Supplies Needed:
Tube of choice: I'm using the wonderful artwork of Alicia Mujica
Tube purchased at store HERE
FTU kit by Pammers Passion called Sunflower Fall
Download kit HERE
Check out other goodies on her blog
WA and Mask of choice

Ok let's get started:
Open 725x725 blank canvas
Open frame 1, resize and rotate 90 to right
Move frame to far right of canvas
Click inside with magic wand and expand 12
New layer under frame, open paper of choice and paste into selection
Select none
Be sure to sharpen all resized elements and drop shadow
Open frame 2 and place to far left
Open element 9 and place to center (adjust as needed)
Apply tube to tag as desired

Use any elements of choice from kit. I used the following
Element 52
Element 47
Element 41
Element 15
Element 12
Element 11
Element 5
Element 38

Apply WA and mask of choice
I keep my layers open 

Place your name where you like it
Add the Copyright and your License Number for the tube
Resize to your liking and save as PNG
This tutorial was created on February 12,2024 by Rhonda
Any resemblance to another Tag or Tutorial is purely coincidental

Sunday, February 11, 2024

This tutorial is written for those with knowledge of PSP
Supplies Needed:
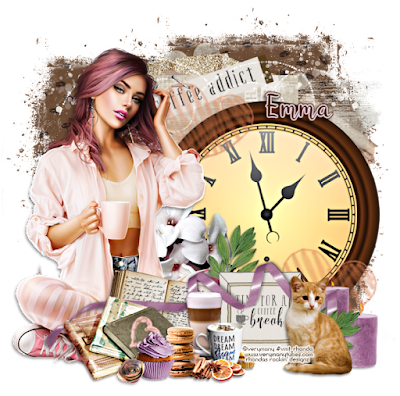
Tube of choice: I'm using the wonderful artwork of VeryMany
Tube was purchased at their store HERE
FTU kit by Diamond Creations called Expresso Tales 
Download kit HERE
Mask #277 by MizTeeques HERE

Ok Let's get started:
Open canvas 725x725
Open element 18 and place to center
Move this layer up a little
Open element 42 and place near top right
Open element 34 and place to right side
Open tube of choice and apply to left side

Start building your tag with other elements from kit
I used the following:
Element 54
Element 3
Element 4
Element 5
Element 13
Element 19
Element 25
Element 26
Element 27
Element 28
Element 33
Element 35
Element 48
Element 52

Open paper of choice from kit and apply mask
I leave my layers open to 

Place your name where you like it
Add the Copyright and your License Number for the tube
Resize to your liking and save as PNG
This tutorial was created on February 11,2024 by Rhonda
Any resemblance to another Tag or Tutorial is purely coincidental
Wednesday, January 24, 2024
This tutorial is written for those with knowledge of PSP
Supplies Needed:
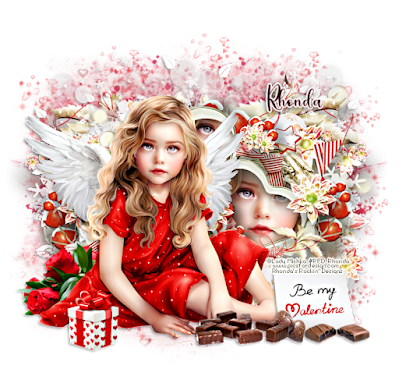
Tube of choice: I'm using the wonderful artwork of Lady Mishka
Exclusive tube purchased at PFD HERE
FTU supplies gathered from internet HERE
Paper of choice ( My paper came from DeviantArt)
Mask #5 from 2016 set at Brutal Designs HERE
The other mask I used is called "MP Tiny Hearts"
I can't remember where I got this from. Maybe you know what the MP stands for

Ok Let's get Started:
Open canvas 725x725
Open element 10 from supplies and paste to canvas
Resize and move to right side
Open tube of choice and paste to left side
I added parts of face into heart shapes on cluster
Open clusters 42,46,51 and 52 behind main cluster
Use my tag as an example - resize if needed
Open other tubes and place on tag

Make sure to sharpen tubes after resize and drop shadow of choice

I keep all my layers open to use later if needed
Open paper of choice and add to canvas
Use any masks of choice

Place your name where you like it
Add the Copyright and your License Number for the tube
Resize to your liking and save as PNG
This tutorial was created on January 20,2024 by Rhonda
Any resemblance to another Tag or Tutorial is purely coincidental

This tutorial is written for those with knowledge of PSP
Supplies Needed:
A1 FTU kit & tube by April's Snagables "Be My Valentine"
Kit and tube can be downloaded from her blog HERE
Be sure to look at all April's graphics!!!
Mask of choice

Ok Let's get Started:
Open canvas 725x725
Open frame 9, resize and place to left side of canvas
Open element 14, place to right side of frame
Open element 11, place to left in front of frame
Open element 32, place to right side of canvas
Open element 30, place to left side of canvas
Open element 29, place to right side of canvas
Open tube of choice and place where you want on tag
I used tube element 49
I used all cupcake elements and placed to left of canvas

I left all my layers open
Open paper of choice and apply mask of choice

Place your name where you like it
Add the Copyright and your License Number for the tube
Resize to your liking and save as PNG
This tutorial was created on January 20,2024 by Rhonda
Any resemblance to another Tag or Tutorial is purely coincidental

Saturday, January 13, 2024
Hope everyone is having a great 2024!!!
Hard to believe last year went by so fast.
It was a horrible year for me so not complaining.
Ready to see what 2024 has for me.

I'm planning on creating more graphics and pushing
my boundaries in PSP.
I want to learn how to create masks, templates,
more cluster frames and other small designs I
have seen on the internet.
I will still be writing tutorials, but I want to change
that style as well. 
So be patient as I take these steps along the way.
Thank you to everyone who has supported me.
I appreciate you more than you know!!!!


Quick and easy tutorial!!!
This tutorial is written for those with knowledge of PSP
Supplies Needed:
Tube of choice: I'm using the wonderful artwork of VeryMany
Tube can purchased at VMT HERE
PTU kit by Kathy's PSP Designs called Falling
Kit can be purchased at PFD HERE
Check out Kathy's blog for more freebies and goodies HERE
Mask of choice
WordArt of choice

Ok, let's get started:
I have supplied 2 clusters I created below
Choose the one you prefer
Add elements of your choice if needed
Open tube of choice and place on canvas
Apply mask and WA if needed

Place your name where you like it
Add the Copyright and your License Number for the tube
Resize to your liking and save as PNG
This tutorial was created on January 12,2024 by Rhonda
Any resemblance to another Tag or Tutorial is purely coincidental


Grab My Blinkie

tk-Rhondas-Designz-blinkie

About Me

Hello friends and welcome to my blog!!! My name is Rhonda and I live in South East Ga., little town called Lumber City. I have 2 sons, 2 DIL's and 3 grandchildren. I work in healthcare as an RN.

When not working, I enjoy playing in PSP. It has been my passion over 20 years. PSP is relaxing and takes my mind away from troubles of life. I enjoy writing tutorials on my downtime.

I am expanding my creations to frames, clusters, templates and hopefully masks. I have NEVER made a mask but I have the time to learn now and I am excited. These will be FTU, all I ask is please download from the blog and if you are in a group or forum please send others to my blog and DO NOT HOTLINK. I would love to see your creations and show them off.

If you need to contact me with any questions concerning my tutorials or creations, send me an email. I am aware some of my older tutorials have links that are no longer working due to designers closing their blog. This is beyond my control. I am unable to share anything which was not shareable before. I honor all designers TOU.

I CT For

I don't CT that much any longer but these are designers who allow me to use their kits as show-off's.
Photobucket
Photobucket
Photobucket
Photobucket

T.O.U.

All tutorials that are on my blog have been written by me. Any resemblance to another tag or tutorial is purely coincidental. Please do not copy and claim as your own. You are welcome to use these tutorials in any groups or forums but please link back to my blog. I would love to see any tag that is made using my tutorial. If you have any questions or concerns you can contact me at rsheath31549@yahoo.com.

Cluster Frames are Personal Use ONLY!!!! Please do not claim them as your own or rip them apart. You are welcome to use in forums or groups but please link back to blog. My TOU are included in the downloads. I would love to see any creations you make with my tuts or other creations. Send them to me and I will display them.

My goal for this blog is to make creations others can use and enjoy. I want to focus on being positive through difficult times. Show importance of accepting others, no judging, just respect. Showing kindness to others can change another's life, even for a brief time
Powered by Blogger.

Search

Blogs I Visit

Photobucket
Photobucket
Photobucket
Photobucket
Photobucket
Photobucket
Photobucket
Photobucket
Photobucket

Blog Archive

Followers