Tuesday, July 9, 2013

Supplies Needed:
Tube of choice: Im using the wonderful art work of Pinup Toons
This tube was purchased at CILM which has closed
You can purchase her art now at CDO HERE
PTU Scrap Kit by Cindy from Chichi Designz's called "Ice Cream Chocolate"
You an purchase this awesome kit HERE
Open blank 700x700 canvas
Open frame 2 - resize 85%
Open cluster frame - resize 85%
Click inside cluster frame with magic wand
Selections modify expand by 5
Open paper 1 and paste under frame
Selections invert delete
Move paper under frame
I used the following:
Bird
Bow
Chocolate
Chocolate Bar
Chocolates
Chocolates 2
Chocolate Strawberry
Coffee Can
Cup
Ice Cream 1&2
Lips
Mask
Ribbon
Sparkles
Wordart 2
Add the Copyright and your License Number for the tube
Resize to your liking and save as PNG
This tutorial was created on July 9,2013 by Rhonda
Any resemblance to another Tag or Tutorial is purely coincidental

Sunday, July 7, 2013

Supplies Needed:
Tube of choice: Im using the wonderful art work of Zlata_M
You must obtain a license to use this art at PFD HERE
PTU Scrap Collab Kit from Designs by Sarah called "Fresh Mojito"
You an purchase this awesome kit at Pimp My Tags With Scraps HERE
Template #387 from Divine Intentionz HERE
Mask of choice
Xero Radiance
Toadies Band Suppress Noise
Open template - Shift D to duplicate then close out original
Canvas size 700x700
delete copyright,thin rectangle,dotted line & wordart
paste a paper of choice from the kit - I used paper7
selection invert delete
select none delete the original
add new layer and flood fill with yellow
selection invert delete
select none delete the original
paste a paper of choice from the kit - I used paper3
selection invert delete
select none delete the original
paste a paper of choice from the kit - I used paper8
selection invert delete
select none delete the original
paste a paper of choice from the kit - I used paper2
selection invert delete
select none delete the original
add closeup of tube inside
selection invert delete
apply Xero Radiance with settings of choice
add new layer and flood fill with gradient of choice
selection invert delete
select none delete the original
apply Toadies Band Suppress Noise with settings of choice
Xero Radiance with settings of choice
I used the following:
Bow 3
Cupcake
Drink 2
Flower 1,2&3
Frame 2
Leaves 2
Lime 2&3
Rum
Slice 1
Sugar
Open paper 5 & apply mask of choice
Add the Copyright and your License Number for the tube
Resize to your liking and save as PNG
This tutorial was created on July 8,2013 by Rhonda
Any resemblance to another Tag or Tutorial is purely coincidental

Supplies Needed:
Tube of choice: Im using the wonderful art work of Zindy S.D. Nielsen
You must obtain a license to use her art at her store HERE
PTU Scrap Kit by Devilish Dezines Scraps called "Cherish"
You an purchase this awesome kit at Designer Scraps HERE
Template #39 by Tik Tok Creations HERE
Don't forget to leave a thank you when downloading
Xero Porcelin
Open template - Shift D to duplicate then close out original
Resize all layers 90%
Canvas 700x700
Delete copyright
paste a paper of choice from the kit - I used paper6
selection invert delete
select none delete the original
paste a paper of choice from the kit - I used paper2
selection invert delete
select none delete the original
paste a paper of choice from the kit - I used paper3
selection invert delete
select none delete the original
paste a paper of choice from the kit - I used paper6
selection invert delete
select none delete the original
paste a paper of choice from the kit - I used paper1
selection invert delete
select none delete the original
paste a paper of choice from the kit - I used paper5
selection invert delete
select none delete the original
paste a paper of choice from the kit - I used paper4
selection invert delete
select none delete the original
Add Xero Porcelin with settings of choice
I used the following:
Element 5
Element 13
Element 17
Element 19
Element 29
Element 34
Element 36
Element 40
Element 42
Element 46
Element 47
Add the Copyright and your License Number for the tube
Resize to your liking and save as PNG
This tutorial was created on July 7,2013 by Rhonda
Any resemblance to another Tag or Tutorial is purely coincidental

Supplies Needed:
Tube of choice: Im using the wonderful art work of Keith Garvey
This tube was purchased at MPT which has closed
You can purchase his tubes at Garv - Girls PSP HERE
Pink Poison Template by Blissfully Beth HERE
Don't forget to leave a thank you when downloading
For the elements I used some from an older kit I found hidden away
I can't remember where I got it from
Use any elemts you may have
Xero Radiance
PhotEffex Scanlines
Penta Dot & Cross
Toadies Band Suppress Noise
Open template - Shift D to duplicate then close out original
Canvas size 700x700
Delete copyright
add new layer - add color of choice the add noise again
select none delete the originals
apply Penta Dot & Cross with settings of choice
select none delete the original
I also added a white & black border
apply Xero Fritillary with settings of choice
apply Xero Radiance with settings of choice
apply PhotoEffex with settings of choice
add new layer and flood fill with gradient of choice
select none delete the original
apply Toadies Band Suppress Noise
select none
apply Xero Radiance with settings of choice
Add the Copyright and your License Number for the tube
Resize to your liking and save as PNG
This tutorial was created on July 6,2013 by Rhonda
Any resemblance to another Tag or Tutorial is purely coincidental
Saturday, July 6, 2013

Supplies Needed:
Tube of choice: Im using the wonderful art work of Pinup Toons
You can find purchase his art at CDO HERE
PTU Scrap Kit by Jen from Sweet Temptations called "Girls Rule"
You an purchase this awesome kit HERE
TY Jen for making this kit for me to match this awesome tube!!!!
Template #10 by Chrissy's Chaos HERE
Xero Radiance
Filters Unlimited Special Effect Blur Lightness
Open template - Shift D to duplicate then close out original
delete copyright,frame 2 & brown circle 2
paste a paper of choice from the kit - I used paper6
selection invert delete
select none delete the original
paste a paper of choice from the kit - I used paper1
selection invert delete
select none delete the original
add new layer and flood fill with solid color of choice
select none delete the original
apply Filters Unlimited Special Effect Blur Lightness
paste a paper of choice from the kit - I used paper4
selection invert delete
select none delete the original
paste a paper of choice from the kit - I used paper9
selection invert delete
select none delete the original
paste a paper of choice from the kit - I used paper2
selection invert delete
select none delete the original
add new layer and flood fill with solid color of choice
select none delete the original
apply noise of choice settings
add new layer and flood fill with solid color of choice
select none delete the original
add new layer and flood fill with solid color of choice
select none delete the original
apply noise of choice settings
paste a paper of choice from the kit - I used paper10
selection invert delete
select none delete the original
Xero Radiance with settings of choice
BFly 1
Candy 1&2
Cat 2
Cupcake
Decor 1
Drink
Feathers
Heart
Ice Cream
Money
Perfume
Pony
Skate
Add the Copyright and your License Number for the tube
Resize to your liking and save as PNG
This tutorial was created on July 7,2013 by Rhonda
Any resemblance to another Tag or Tutorial is purely coincidental
Thursday, July 4, 2013
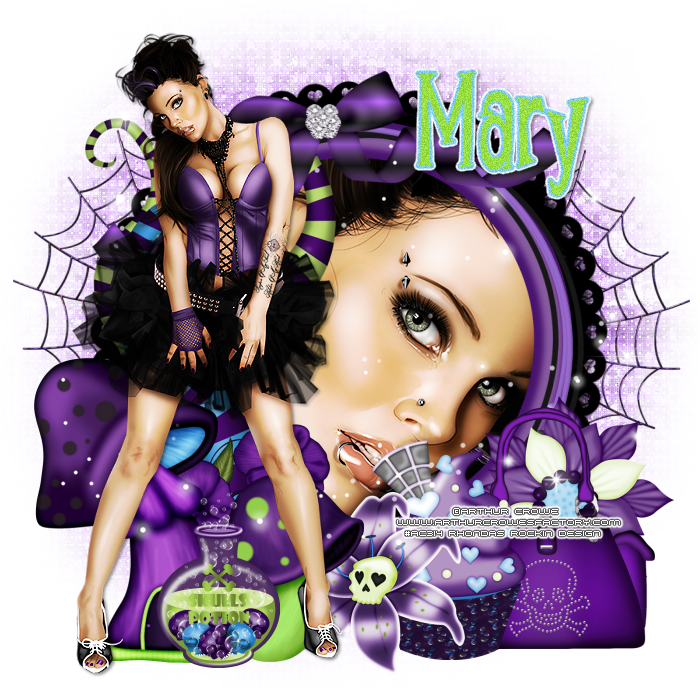
Supplies Needed:
Tube of choice: Im using the wonderful art work of Arthur Crowe
You must obtain a license to use his art at his store HERE
FTU Scrap Kit by Mary from Sweet as Honey Creationz called "Wicked Purple" HERE
Mask #33 by Chrissy Chaos HERE
Don't forget to leave a thank you when downloading
Xero Radiance
Ok Lets get Started:
Open a blank canvas 700x700
Open frame 5 resize 85% and place in center of canvas
Open frame 2 resize 65% and place on top of other frame
Open frame 3 resize 72% and place on top of frame 2
Open close up of tube you are using and place in center of frames
apply Xero Radiance with settings of choice
apply Xero Radiance again
I used the following:
Flower 2
Handbag
Cupcake
Mushroom 1&2
Potion
Spiderweb
SkullLilly
Sparkles 1
WeirdSwirls
Open paper 9 & apply mask
apply weave effect to mask
Add the Copyright and your License Number for the tube
Resize to your liking and save as PNG
This tutorial was created on July 4,2013 by Rhonda
Any resemblance to another Tag or Tutorial is purely coincidental
Tuesday, July 2, 2013

Supplies Needed:
Tube of choice: Im using the wonderful art work of Danny Lee
You must obtain a license to use his art at SATC HERE
PTU Scrap Kit from Pimp'd Designz called "Cat-woman"
You an purchase this awesome kit at Pimp My Tags With Scraps HERE
Mask #8 by Gems Taggin Scraps HERE
Open blank canvas 700x700
Open frame 3 and place in center
Click inside frame with magic wand
Selections modify expand by 4
Open paper 3 & paste as new layer
Selections invert delete
Move paper under frame
Open skyline and paste inside frame
I resized mine and duplicated several times
I used:
Flower 1&2
Heart 1&2
Light
Ribbon 2
Whip
Open paper 10 & apply mask
Add the Copyright and your License Number for the tube
Resize to your liking and save as PNG
This tutorial was created on July 2,2013 by Rhonda
Any resemblance to another Tag or Tutorial is purely coincidental
Monday, July 1, 2013
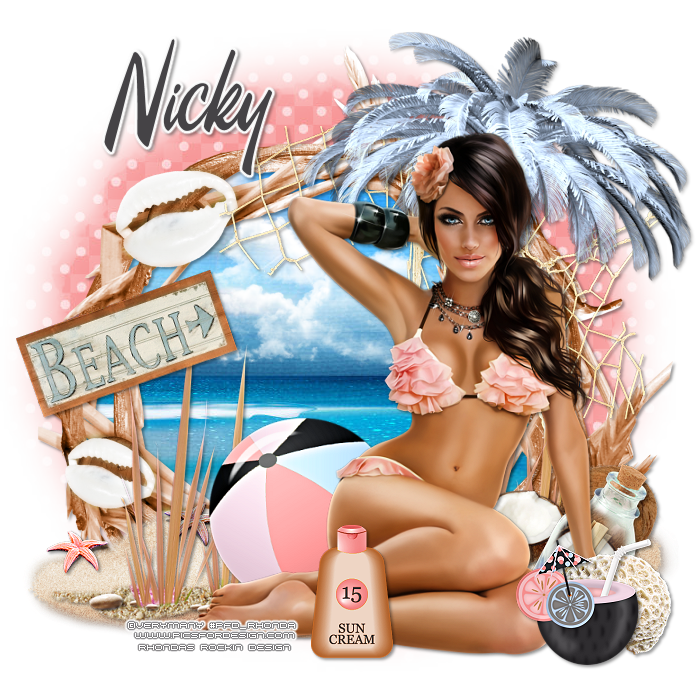
Supplies Needed:
Tube of choice: Im using the wonderful art work of VeryMany
You must obtain a license to use this art at PFD HERE
PTU Scrapkit by Nicky from Inzpired Creationz called "Coral"
You an purchase this awesome kit from Pimp My Tags W/Scraps HERE
This is a very quick and easy tutorial
Open blank 700x700 canvas
Open Frame 1 & paste as a new layer
Grab the freehand tool and draw around frame
Open paper 11 from kit and paste as new layer
Selections invert delete
Move paper under frame
Place your tube where you want it and build around it
I used:
Beach Ball
Bottle
Clouds 2
Cocktail 2
Coconuts
Coral 1
Grass 1
Netting
Palm Tree 2
Sand 2&3
Sign 3
Starfish
Sun Cream
Open paper 5 & apply mask
Add the Copyright and your License Number for the tube
Resize to your liking and save as PNG
This tutorial was created on July 1,2013 by Rhonda
Any resemblance to another Tag or Tutorial is purely coincidental

Supplies Needed:
Tube of choice: Im using the wonderful art work of Keith Garvey
Which you must obtain a license to use at his store HERE
This tube was bought at MPT which has now closed
FTU kit by Tasha's Playground HERE
You will be directed to PFD for the download
Monti's Blind Mask 1 HERE
You will need to scroll down to find mask
Please leave some love when you download freebies
Ok Lets get Started:
Open frame 3 and place as new layer
Grad the magc wand & click inside frame
Selections modify expand by 7
Open paper 8 and place as new layer
Selections invert delete
Move paper under frame
Place your main tube inside center of frame
Duplicate tube & move this layer to the top
Erase parts of tube hanging outide frame at bottom
Open bow 3 - resize 64% - place at top right of frame
Duplicate bow and mirror
Open flair 2 - resize 43% - place inside bow at top right
Open flair 1 - resize 36% - place inside bow at top left
Open fireworks 3 & place to left side of frame
Open fireworks 2 & place at right side of frame
Open blue flower resize 70% - place at bottom right of frame
Open flower 2 resize 73% - place beside blue flower
Open lace flower resize 79% - place behind the other 2 flowers in center
Open torch & place behind lace flower to the left of frame
Open star 1 resize 70% - place to bottom right of frame
Open star 2 resize 62% - place beside red star
Open hat resize 60% - place beside blue star
Open starpop resize 60% - place behind the stars to the right of frame
Open wordart and place as new layer on top
Selection modify expand 2
Add new layer behind wordart and flood fill with red
Add noise 65%
Open paper 5 & apply mask
Effects Texture Weave with these settings
Gap 2
Width 6
Opacity 5
Color white
Add the Copyright and your License Number for the tube
Resize to your liking and save as PNG
This tutorial was created on June 22,2013 by Rhonda
Any resemblance to another Tag or Tutorial is purely coincidental

Supplies Needed:
Tube of choice: Im using the wonderful art work of Elias Chatzoudis
You must obtain a license to use at his store HERE
PTU Scrap Kit from Digital Indulgence called "Absolutely Toxic"
You an purchase this awesome kit at Pimp My Tags With Scraps HERE
Mask #56 by Rosesblack HERE
Xero Radiance
Open blank canvas 700x700
Open frame 1 and place in center
Click inside frame with magic wand
Expand by 5
Open paper 25 and apply as new layer
Selections invert delete
Move paper under frame
apply Xero radiance with settings of choice
I used:
Brad 2
Doodle 2
Oval Tag
Paint 4
Poison
Rectangle Tag
Ribbon 6
Skull 4
Word Art
Open paper 1 & apply mask
Add the Copyright and your License Number for the tube
Resize to your liking and save as PNG
This tutorial was created on July 1,2013 by Rhonda
Any resemblance to another Tag or Tutorial is purely coincidental
Subscribe to:
Posts
(Atom)
Grab My Blinkie

I CT For



Blogs I Visit
























