Saturday, January 11, 2014

This tutorial is written for those with knowledge of PSP
Supplies Needed:
Tube of choice: Im using the wonderful art work of Pinup Toons
You must obtain a license to use at CDO HERE
PTU Scrap Kit from Designs by Sarah called "A Love So Sweet"
You an purchase this awesome kit at Pimp My Tags With Scraps HERE
Template #358 by Missy HERE
Mask of choice
Eyecandy Gradient Glow
Open template - Shift D to duplicate then close out original
Resize all layers 85%
Canvas size 700x700
delete copyright & rectangles
add new layer & flood fill with gradient of choice
select none delete the original
add noise with settings of choice
paste a paper of choice from the kit - I used paper9
selection invert delete
select none delete the original
paste a paper of choice from the kit - I used paper1
selection invert delete
select none delete the original
paste a paper of choice from the kit - I used paper3
selection invert delete
select none delete the original
add new layer & flood fill with gradient of choice
select none delete the original
add noise with settings of choice
paste a paper of choice from the kit - I used paper7
selection invert delete
select none delete the original
apply Eyecandy Gradient Glow
paste a paper of choice from the kit - I used paper6
selection invert delete
select none delete the original
apply Eyecandy Gradient Glow
paste a paper of choice from the kit - I used paper8
selection invert delete
select none delete the original
I used the following:
Sweet Cookie 1&2
Cupcake 1,2&3
Flower 1&2
Frame 3
Lolli
Marshmellows 1&2
Print 2
Ribbon 3
Sparkles
Sweet Tag 1&2
Open paper 10 & apply mask of choice
Add the Copyright and your License Number for the tube
Resize to your liking and save as PNG
This tutorial was created on January 11,2014 by Rhonda
Any resemblance to another Tag or Tutorial is purely coincidental

Friday, January 10, 2014
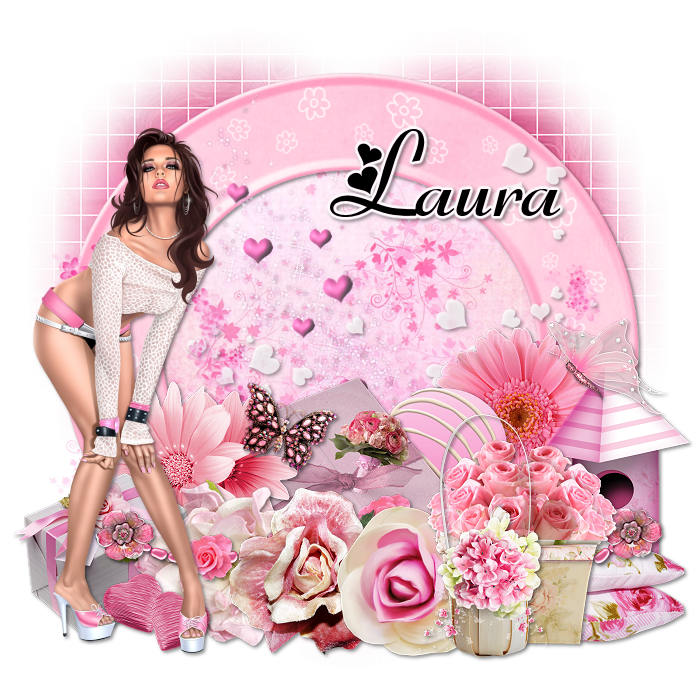
Supplies Needed:
Tube of choice: Im using the wonderful art work of Keith Garvey
This tube was purchased at PTE which has closed
You must obtain a license to use his art at his store HERE
PTU Scrap Kit by Laura from Tiny Turtle Design called "Loves Delight"
You an purchase this awesome kit at her store HERE
Mask of choice
Xero Radiance
Open blank canvas 700x700
Open element 72 - resize and place in center of canvas
Click inside frame with magic wand and expand by 8
Open paper 5 & paste as new layer
Selections invert delete
Move paper under frame
Place your main tube
Add Xero Radiance with settings of choice
I used:
Element 1
Element 3
Element 7
Element 10
Element 16
Element 25
Element 26
Element 28
Element 33
Element 38
Element 41
Element 43
Element 44
Element 55
Element 73
Element 75
Element 79
Element 101
Element 106
Element 108
Element 111
Element 121
Element 126
Open paper 10 & apply mask
Add the Copyright and your License Number for the tube
Resize to your liking and save as PNG
This tutorial was created on January 10,2014 by Rhonda
Any resemblance to another Tag or Tutorial is purely coincidental
Friday, January 3, 2014

Supplies Needed:
Tube of choice: Im using the wonderful art work of VeryMany
Which you must obtain a license to use at PFD HERE
PTU Scrap Kit by Jen from Sweet Temptations called "January 1st"
You an purchase this awesome kit HERE
Template #240 by Denz Designz HERE
Don't forget to leave a thank you when downloading
Open template - Shift D to duplicate then close out original
Resize all layers 116%
Canvas size 700x700
delete copyright,test & dotted outlines
paste a paper of choice from the kit - I used paper3
selection invert delete
select none delete the original
paste a paper of choice from the kit - I used paper6
selection invert delete
select none delete the original
paste a paper of choice from the kit - I used paper5
selection invert delete
select none delete the original
paste a paper of choice from the kit - I used paper4
selection invert delete
select none delete the original
paste a paper of choice from the kit - I used paper10
selection invert delete
select none delete the original
paste a paper of choice from the kit - I used paper8
selection invert delete
select none delete the original
paste a paper of choice from the kit - I used paper2
selection invert delete
select none delete the original
paste a paper of choice from the kit - I used paper1
selection invert delete
select none delete the original
I used the following:
Balloon 1
Centerpiece
Champagne Decor
Decor
Fireworks 1,2&3
Mask
Rose
Add the Copyright and your License Number for the tube
Resize to your liking and save as PNG
This tutorial was created on January 3,2014 by Rhonda
Any resemblance to another Tag or Tutorial is purely coincidental
Thursday, January 2, 2014

Supplies Needed:
Tube of choice: Im using the wonderful art work of Barbara Jensen
You must obtain a license to use her art HERE
PTU Scrap Kit by Crystal's Creations called "New Years Cheers"
You an purchase this awesome kit at Pimp My Tags With Scraps HERE
Mask #147 by Vix HERE
Leave a thank you when downloading freebies
Xero Radiance
Eyecandy HSB Noise
Open blank canvas 700x700
Open element 16 & paste as new layer
Grab the magic wand & click inside frame
Make sure you hold down the shift button to get everything in frame
Selections modify expand by 5
Open paper 10 & paste as new layer
Selections invert delete
Move paper under frame
Apply Eyecandy HSB noise with default settings
Xero Radiance with settings of choice
I used the following:
Element 6
Element 7
Element 10
Element 13
Element 14
Element 21
Element 29
Element 33
Element 35
Element 41
Element 43
Open paper 5 & apply mask of choice
Add the Copyright and your License Number for the tube
Resize to your liking and save as PNG
This tutorial was created on January 2,2014 by Rhonda
Any resemblance to another Tag or Tutorial is purely coincidental

Supplies Needed:
Tube of choice: Im using the wonderful art work of Pinup Toons
You can purchase this tube at CDO HERE
Scrap Kit by Mizteeque found at our blog HERE
Exclusive Template March 9 by Dee HERE
Please leave a thank you when downloading
Xero Radiance
Eyecandy Gradient Glow
Open template - Shift D to duplicate then close out original
Canvas size 700x700
Delete copyright,wordart,stars,strips & dotted lines
paste a paper of choice from the kit - I used paper8
selection invert delete
select none delete the original
paste a paper of choice from the kit - I used paper3
selection invert delete
select none delete the original
paste a paper of choice from the kit - I used paper7
selection invert delete
select none delete the original
paste a paper of choice from the kit - I used paper2
selection invert delete
select none delete the original
paste close up of tube in circle
selection invert delete
select none delete the original
apply Xero Radiance with settings of choice
paste a paper of choice from the kit - I used paper9
selection invert delete
select none delete the original
apply Xero Radiance with settings of coice
I used the following:
T2
T4
T6
T7
T9
T15
T16
T23
T28
T31
T34
T35
T39
Add the Copyright and your License Number for the tube
Resize to your liking and save as PNG
This tutorial was created on January 2,2014 by Rhonda
Any resemblance to another Tag or Tutorial is purely coincidental
Tuesday, December 31, 2013

Supplies Needed:
Tube of choice: Im using the wonderful art work of Alex Prihdko
You must obtain a license to use his art at PFD HERE
PTU ScrapKit by CandyCata called "Happy New Year"
You an purchase this awesome kit at Pimp My Tags With Scraps HERE
New Years Template #2 by Brutal Designs HERE
Mask #156 by Vaybs HERE
Xero Radiance
Eyecandy Gradient Glow
Open template - Shift D to duplicate then close out original
Resize template 85% all layers
Canvas size 700x700
delete copyright,layers 6,8,copy of 8 and 11
paste a paper of choice from the kit - I used paper19
selection invert delete
select none delete the original
paste a paper of choice from the kit - I used paper1
selection invert delete
select none delete the original
paste a paper of choice from the kit - I used paper11
selection invert delete
select none delete the original
paste a paper of choice from the kit - I used paper14
selection invert delete
select none delete the original
paste a paper of choice from the kit - I used paper17
selection invert delete
select none delete the original
paste a paper of choice from the kit - I used paper12
selection invert delete
select none delete the original
paste a paper of choice from the kit - I used paper13
selection invert delete
select none delete the original
paste a paper of choice from the kit - I used paper15
selection invert delete
select none delete the original
paste a paper of choice from the kit - I used paper9
selection invert delete
select none delete the original
apply Eyecandy Gradient Glow
place where desired
Xero Radiance with settings of choice
I used the following:
Balloon 3 HNY
Cake
Champagne Bottle Black Open
Champagne Glass Green
Clock
Firework 6
Frame 11
New Years Decoration 1&2
Sparkles 2
Open paper 6 & apply mask
Add the Copyright and your License Number for the tube
Resize to your liking and save as PNG
This tutorial was created on December 31,2013 by Rhonda
Any resemblance to another Tag or Tutorial is purely coincidental
Thursday, December 26, 2013

Supplies Needed:
Tube of choice: Im using the wonderful art work of VeryMany
You must obtain a license to use there art HERE
PTU Scrap Kit by Laura from Tiny Turtle Design called "2014"
You an purchase this awesome kit at her store HERE
Xero Radiance
Open blank canvas 700x700
Open element 158 and place in center of canvas
Grab the magic wand and click inside frame
Selections modify expand by 5
Open Paper 14 & paste as new layer
Selections invert delete
Move paper under frame
Place tube in center of frame
Apply Xero Radiance with settings of choice
I used:
Element 3
Element 8
Element 10
Element 17
Element 18
Element 32
Element 33
Element 35
Element 57
Element 58
Element 59
Add the Copyright and your License Number for the tube
Resize to your liking and save as PNG
This tutorial was created on December 26,2013 by Rhonda
Any resemblance to another Tag or Tutorial is purely coincidental
Wednesday, December 25, 2013

Supplies Needed:
Tube of choice: Im using the wonderful art work of Scott Blair
This tube was purchased when he was at MPT which has closed
I'm not usre where he is selling his art but his homepage is HERE
FTU Scrap Kit by Jen from Sweet Temptations called "Wishing for a White Christmas"
You can download this awesome kit HERE
Template #2 by Flaminsal HERE
Don't forget to leave a thank you when downloading
Xero Radiance
Eyecandy Gradient Glow
Open template - Shift D to duplicate then close out original
delete copyright,left & right red circles & dotted circles
paste a paper of choice from the kit - I used paper9
selection invert delete
select none delete the original
paste a paper of choice from the kit - I used paper3
selection invert delete
select none delete the original
paste a paper of choice from the kit - I used paper10
selection invert delete
select none delete the original
paste a paper of choice from the kit - I used paper6
selection invert delete
select none delete the original
paste a paper of choice from the kit - I used paper2
selection invert delete
select none delete the original
add new layer & flood fill with white
apply noise with settings of choice
select none delete the original
apply Eyecandy Gradient Glow
Xero Radiance with settings of choice
I used the following:
Bag
Bag 3
Gift 1-4
Ornament 1&3
Ornaments 2
Snowman
Tree 2
Wreath
Add the Copyright and your License Number for the tube
Resize to your liking and save as PNG
This tutorial was created on December 25, 2013 by Rhonda
Any resemblance to another Tag or Tutorial is purely coincidental

Supplies Needed:
Tube of choice: Im using the wonderful art work of Zebrush
Which you must obtain a license to use at Pic for Design HERE
PTU Scrap Kit by Jen from Sweet Temptations called "Tonights the Night"
You an purchase this awesome kit HERE
Template by Janice from Jus Graphicx HERE
It's the bottom template
Don't forget to leave a thank you when downloading
Plugins Used:
Xero Radiance
Open template - Shift D to duplicate then close out original
Canvas size 725x700
delete copyright
paste a paper of choice from the kit - I used paper5
selection invert delete
select none delete the original
paste a paper of choice from the kit - I used paper6
selection invert delete
select none delete the original
paste a paper of choice from the kit - I used paper8
selection invert delete
select none delete the original
paste a paper of choice from the kit - I used paper1
selection invert delete
select none delete the original
paste a paper of choice from the kit - I used paper7
selection invert delete
select none delete the original
paste a paper of choice from the kit - I used paper4
selection invert delete
select none delete the original
paste a paper of choice from the kit - I used paper10
selection invert delete
select none delete the original
paste a paper of choice from the kit - I used paper9
selection invert delete
select none delete the original
Xero Radiance with settings of choice
I used the following:
Balloon 1&2
Bucket
Corsage
Cupcake 1&2
Decor1
Drink
Fireworks 1&2
Wand
Add the Copyright and your License Number for the tube
Resize to your liking and save as PNG
This tutorial was created on January 4, 2013 by Rhonda
Any resemblance to another Tag or Tutorial is purely coincidental
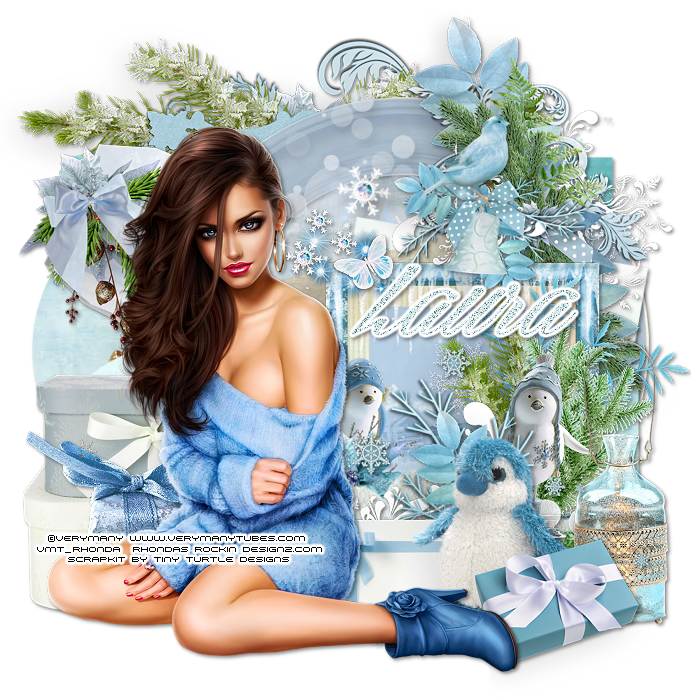
Supplies Needed:
Tube of choice: Im using the wonderful art work of VeryMany
You can purchase their tubes HERE
PTU Scrap Kit by Laura from Tiny Turtle Design called "Winter Ice"
You an purchase this awesome kit at her store HERE
Template #2 by TwytzedT's Playroom HERE
Xero Radiance
Open template - Shift D to duplicate then close out original
Resize all layers 90%
Canvas size 700x700
Delete copyright,stars & dotted lines
paste a paper of choice from the kit - I used paper11
selection invert delete
select none delete the original
paste a paper of choice from the kit - I used paper20
selection invert delete
select none delete the original
paste a paper of choice from the kit - I used paper2
selection invert delete
select none delete the original
paste a paper of choice from the kit - I used paper37
selection invert delete
select none delete the original
paste a paper of choice from the kit - I used paper12
selection invert delete
select none delete the original
paste a paper of choice from the kit - I used paper16
selection invert delete
select none delete the original
paste a paper of choice from the kit - I used paper24
selection invert delete
select none delete the original
paste a paper of choice from the kit - I used paper38
selection invert delete
select none delete the original
paste a paper of choice from the kit - I used paper6
selection invert delete
select none delete the original
Add Xero Radiance with settings of choice
I used the following:
Element 17
Element 20
Element 21
Element 25
Element 33
Element 47
Element 49
Element 51
Element 52
Element 109
Element 110
Element 115
Merge your layers
Place your name where you like it
Add the Copyright and your License Number for the tube
Resize to your liking and save as PNG
This tutorial was created on December 25,2013 by Rhonda
Any resemblance to another Tag or Tutorial is purely coincidental
Subscribe to:
Posts
(Atom)
Grab My Blinkie

I CT For



Blogs I Visit
























