Friday, July 3, 2015
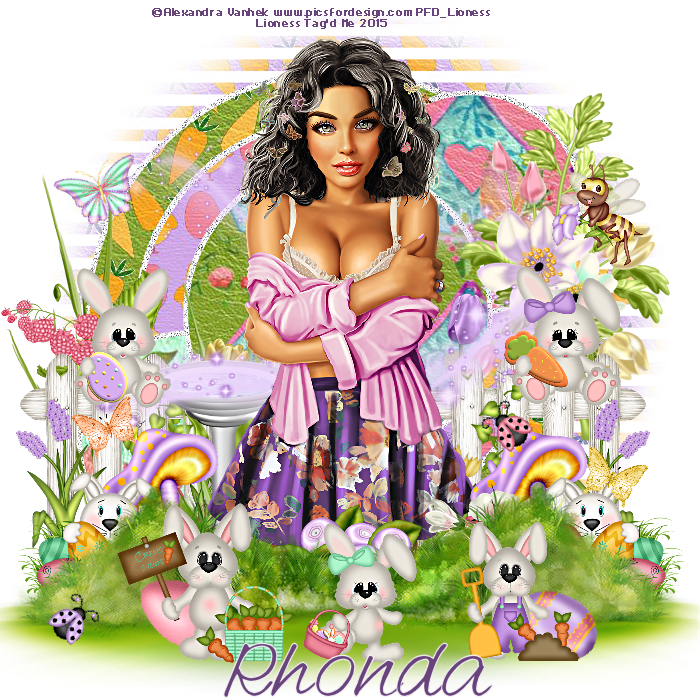


This tutorial is written for those with knowledge of PSP
Supplies Needed:
Tube of choice: I'm using the wonderful art work of Arthur Crowe
You can purchase these tubes at ACF HERE
Matching PTU Scrap Kit by Rissa's Designs called Blue Eyes
You can purchase this also from ACF HERE
Template #277 by Millie HERE
Mask of choice
Don't forget to leave a thank you when downloading
Ok Lets get Started:
Open template - Shift D to duplicate then close out original
Canvas size 700x700
Delete copyright & stars
Click on raster 1 square selections,select all, float,defloat
paste a paper of choice from the kit - I used paper3
selection invert delete
select none delete the original
Click on raster 2 selections,select all, float,defloat
paste a paper of choice from the kit - I used paper12
selection invert delete
select none delete the original
Click on raster 3 selections,select all, float,defloat
paste a paper of choice from the kit - I used paper6
selection invert delete
select none delete the original
Click on raster 4 selections,select all, float,defloat
paste a paper of choice from the kit - I used paper7
selection invert delete
select none delete the original
Click on raster 5 selections,select all, float,defloat
paste a paper of choice from the kit - I used paper10
selection invert delete
select none delete the original
Click on raster 6 selections,select all, float,defloat
paste a paper of choice from the kit - I used paper4
selection invert delete
select none delete the original
Click on raster 7 selections,select all, float,defloat
paste a paper of choice from the kit - I used paper11
selection invert delete
select none delete the original
Place your main tube
apply Xero Radiance if desired
Now add any other elements of choice
I used the following:
Element 3
Element 4
Element 5
Element 6
Element 10
Element 20
Element 21
Element 24
Element 27
Element 28
Element 30
Merge your layers
Open paper 9 and apply mask of choice
Place your name where you like it
Add the Copyright and your License Number for the tube
Resize to your liking and save as PNG
This tutorial was created on July 3,2015 by Rhonda
Any resemblance to another Tag or Tutorial is purely coincidental

Thursday, July 2, 2015
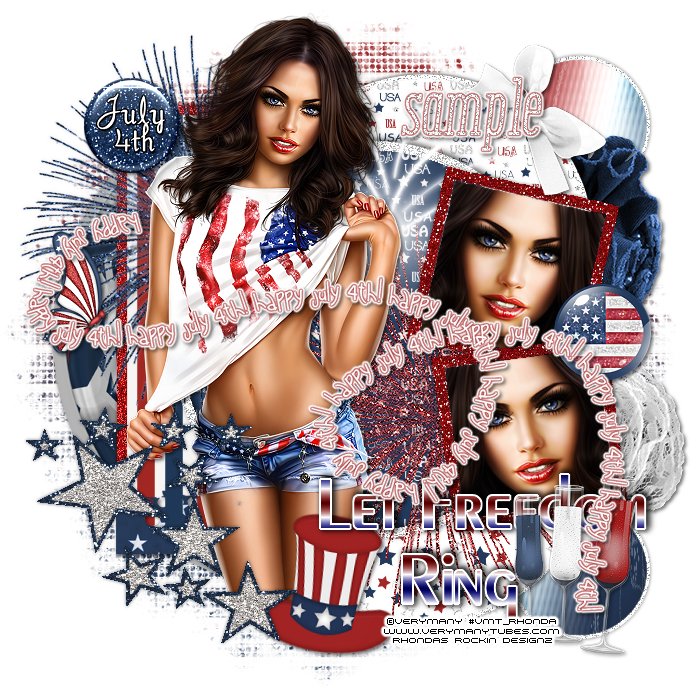
This tutorial is written for those with knowledge of PSP
Supplies Needed:
Tube of choice: I'm using the wonderful art work of VeryMany
You can purchase these tubes HERE
FTU Scrap Kit by Tasha HERE
Template by LindaNM Rawkin Designs HERE
Mask of choice
Don't forget to leave a thank you when downloading
Ok Lets get Started:
Open template - Shift D to duplicate then close out original
Canvas size 700x700
Delete copyright
Click on raster 7 - using magic wand click inside circles
add new layer and paste paper 10 into selections
selection none
Using magic wand again click on borders and add noise
Click on raster 4 - using magic wand click inside rectangle
add new layer and paste solid color into selection
selection none
Using magic wand again click on borders
add new layer and flood fill again with solid color
add noise
select none
Click on all layers with small rectangles
add new layer and paste solid color into selection
select none
Click on raster 5 - using magic wand click inside circle
add new layer and paste paper 8 into selections
select none
Using magic wand again click on borders and add noise
Click on copy of raster 5 - using magic wand click inside circle
add new layer and paste paper 6 into selections
select none
Using magic wand again click on borders and add noise
Click on raster 2 - using magic wand click inside circle
add new layer and paste paper 9 into selections
select none
Using magic wand again click on borders and add noise
Click on raster 3 & copy of 3 - using magic wand click inside square
add closeup of tube
selection none
Using magic wand again click on borders
add new layer and apply paper 13
select none
Click on raster 6 - using magic wand click inside stars
add new layer and paste paper 12 into selections
select none
Using magic wand again click on borders
add new layer and paste paper 11 into selections
select none
I merged the wordart and used as is
Place your main tube
apply Xero radiance with settings of choice
Now add any other elements of choice
I used the following:
Border
Bow 1
Butterfly 2
Champagne
Fireworks 1,2&3
Flair 1&2
Wordart 1
Merge your layers
Open paper of choice and apply mask
Place your name where you like it
Add the Copyright and your License Number for the tube
Resize to your liking and save as PNG
This tutorial was created on July,2 2015 by Rhonda
Any resemblance to another Tag or Tutorial is purely coincidental

This tutorial is written for those with knowledge of PSP
Supplies Needed:
Tube of choice: I'm using the wonderful art work of Nocturne
Which you must obtain a license to use at PFD HERE
FTU Scrap Kit by Purple Dream Scraps HERE
Cluster frame to match kit by Moonshine Dezinez HERE
Mask #321 by Weescotslass HERE
Don't forget to leave a thanks for freebies
Ok Lets get Started:
Open cluster - shift D to duplicate and close original
Resize cluster all layers 86%
Increase canvas size to 700x700
Place your tube to
apply Xero Radiance with settings of choice
Use my tag as example of where to place elements
Now add any elements of choice
I used the following:
Bubbles
Coconut
Drink
Frame
Palm tree
Parrot
Pineapple
Sand
Sun
Wave
Merge your layers
Open paper 6 & apply mask
Place your name where you like it
Add the Copyright and your License Number for the tube
Resize to your liking and save as PNG
This tutorial was created on July 2,2015 by Rhonda
Any resemblance to another Tag or Tutorial is purely coincidental

This tutorial is written for those with knowledge of PSP
Supplies Needed:
Tube of choice: I'm using the wonderful art work of VeryMany
You can purchase these tubes HERE
FTU kit by Kittz Kreations HERE
Please leave some love when you download freebies
Ok Lets get Started:
Open new canvas 700x700
Open element 15 and place as new layer
Grad the magc wand & click inside frame
Selections modify expand by 10
Open paper 2 and place as new layer
Selections invert delete
Move paper under frame
Place your main tube
Apply Xero Radiance with settings of choice
Now add any elements of choice
I used the following:
Element 4
Element 5
Element 10
Element 22
Element 30
Element 32
Element 33
Element 37
Element 39
Element 40
Element 49
Element 52
Element 60
Merge your layers
Place your name where you like it
Add the Copyright and your License Number for the tube
Resize to your liking and save as PNG
This tutorial was created on July 2,2015 by Rhonda
Any resemblance to another Tag or Tutorial is purely coincidental
Wednesday, July 1, 2015

This tutorial is written for those with knowledge of PSP
Supplies Needed:
Tube of choice: I'm using the wonderful art work of Carpe Diem
You must obtain a license to use this art at S&Co HERE
PTU Scrap Kit from Mariel Designs also available at S&CO HERE
These are parts of the Christmas in July Collab available this month
Free with any purchase of $10 from the store!!!!!!!!!!!!!!!
Mask of choice
Ok Lets get Started:
This is a very quick and easy tutorial
Open frame & place in center
Grab the magic wand & click inside frame
Selections modify expand by 10
Add new layer under frame
Selections select all
Open paper 7 & paste into selection
Select none
Place your main tube
Now time to add our elements
I used the following:
Element 4
Element 5
Element 8
Element 13
Element 17
Element 27
Element 31
Element 32
Element 36
Element 45
Element 55
Element 56
Element 57
Element 62
Merge your layers
Open paper of choice & apply mask
Place your name where you like it
Add the Copyright and your License Number for the tube
Resize to your liking and save as PNG
This tutorial was created on July 1,2015 by Rhonda
Any resemblance to another Tag or Tutorial is purely coincidental

This tutorial is written for those with knowledge of PSP
Supplies Needed:
Tube of choice: I'm using the wonderful art work of Spazzd Art
Which you must obtain a license to use HERE
FTU Scrap Kit by Bibi found on her FB page HERE
Template HERE
Mask of choice
Don't forget to leave a thank you when downloading
Ok Lets get Started:
Open template - Shift D to duplicate then close out original
Canvas size 700x700
Deleted copyright,stars & horizontal stripes
Click on horizontal rectangle back selections,select all, float,defloat
paste a paper of choice from the kit - I used paper8
selection invert delete
select none delete the original
Click on horizontal frames selections,select all, float,defloat
paste a paper of choice from the kit - I used paper9
selection invert delete
select none delete the original
Click on circle selections,select all, float,defloat
paste a paper of choice from the kit - I used paper10
selection invert delete
select none delete the original
Click on circle frame selections,select all, float,defloat
paste a paper of choice from the kit - I used paper11
selection invert delete
select none delete the original
Click on verticle rectangle selections,select all, float,defloat
paste a paper of choice from the kit - I used paper5
selection invert delete
select none delete the original
Click on verticle frame selections,select all, float,defloat
paste a paper of choice from the kit - I used paper1
selection invert delete
select none delete the original
Click on large stars selections,select all, float,defloat
paste a paper of choice from the kit - I used paper4
selection invert delete
select none delete the original
Click on large star frames selections,select all, float,defloat
paste a paper of choice from the kit - I used paper3
selection invert delete
select none delete the original
Decorate wordart however you choose
Place your main tube in center
Xero Radiance with settings of choice
Now time to add our elements
I used the following:
Element 1
Element 22
Element 26
Element 29
Element 40
Element 41
Element 42
Element 87
Element 97
Element 98
Element 105
Element 107
Element 109
Merge your layers
Open paper of choice & apply mask
Place your name where you like it
Add the Copyright and your License Number for the tube
Resize to your liking and save as PNG
This tutorial was created on July 1,2015 by Rhonda
Any resemblance to another Tag or Tutorial is purely coincidental
Tuesday, June 30, 2015
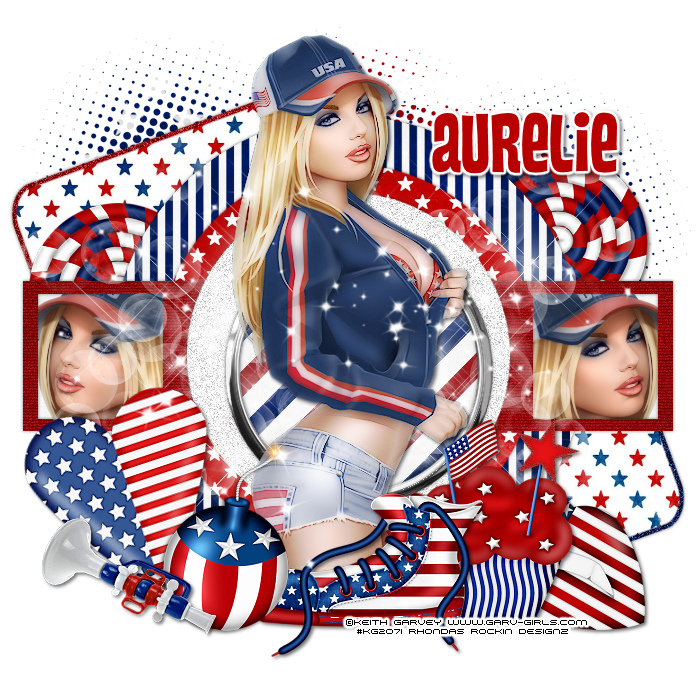
This tutorial is written for those with knowledge of PSP
Supplies Needed:
Tube of choice: I'm using the wonderful art work of Keith Garvey
Which you must obtain a license to use HERE
FTU Scrap Kit by Aurelie from Purple Dreams Scraps HERE
Template #90 by Scrap It Studio HERE
Ok Lets get Started:
Open template - Shift D to duplicate then close out original
Delete copyright
Click on raster 1&2 selections,select all, float,defloat
paste a paper of choice from the kit - I used paper6
selection invert delete
select none delete the original
Add border if desired
Click on raster 3 selections,select all, float,defloat
paste a paper of choice from the kit - I used paper10
selection invert delete
select none delete the original
Click on raster 4 selections,select all, float,defloat
paste a paper of choice from the kit - I used paper8
selection invert delete
select none delete the original
Click on raster 5 selections,select all, float,defloat
paste a paper of choice from the kit - I used paper5
selection invert delete
select none delete the original
Click on raster 6&7 selections,select all, float,defloat
paste a paper of choice from the kit - I used paper3
add close-up of tube
selection invert delete
select none delete the original
apply Xero Radiance and Porcelin to tube
Click on raster 8 selections,select all, float,defloat
paste a paper of choice from the kit - I used paper2
selection invert delete
select none delete the original
apply PhotoEffex with settings of choice
Click on raster 9 selections,select all, float,defloat
paste a paper of choice from the kit - I used paper3
selection invert delete
select none delete the original
add noise
Place your main tube
Xero Radiance with settings of choice
Now time to add our elements
I used the following:
Element 2
Element 15
Element 17
Element 25
Element 26
Element 28
Element 31
Element 35
Element 40
Merge your layers
Place your name where you like it
Add the Copyright and your License Number for the tube
Resize to your liking and save as PNG
This tutorial was created on June 30,2015 by Rhonda
Any resemblance to another Tag or Tutorial is purely coincidental

This tutorial is written for those with knowledge of PSP
Supplies Needed:
Tube of choice: I'm using the wonderful art work of Toriya
You must obtain a license to use his art at S&Co HERE
Matching PTU Scrapkit by Bibis Collection HERE
Template #3 by TwyztedT's Playroom HERE
Mask of choice
Ok Lets get Started:
Open template - Shift D to duplicate then close out original
Resize template all layers 85%
Canvas size 700x700
Delete copyright, word art and raster 6&7
Click on raster 5 selections,select all, float,defloat
paste a paper of choice from the kit - I used paper9
selection invert delete
select none delete the original
Click on raster 4 selections,select all, float,defloat
paste a paper of choice from the kit - I used paper10
selection invert delete
select none delete the original
Click on raster 3 selections,select all, float,defloat
paste a paper of choice from the kit - I used paper13
selection invert delete
select none delete the original
Click on raster 2 selections,select all, float,defloat
paste a paper of choice from the kit - I used paper4
selection invert delete
select none delete the original
Place your main tube
Now time to add our elements
I used the following:
Element 1
Element 2
Element 3
Element 9
Element 21
Element 28
Element 35
Element 39
Element 48
Element 87
Element 90
Merge your layers
Open paper of choice & apply mask
Place your name where you like it
Add the Copyright and your License Number for the tube
Resize to your liking and save as PNG
This tutorial was created on June 30,2015 by Rhonda
Any resemblance to another Tag or Tutorial is purely coincidental
Monday, June 29, 2015
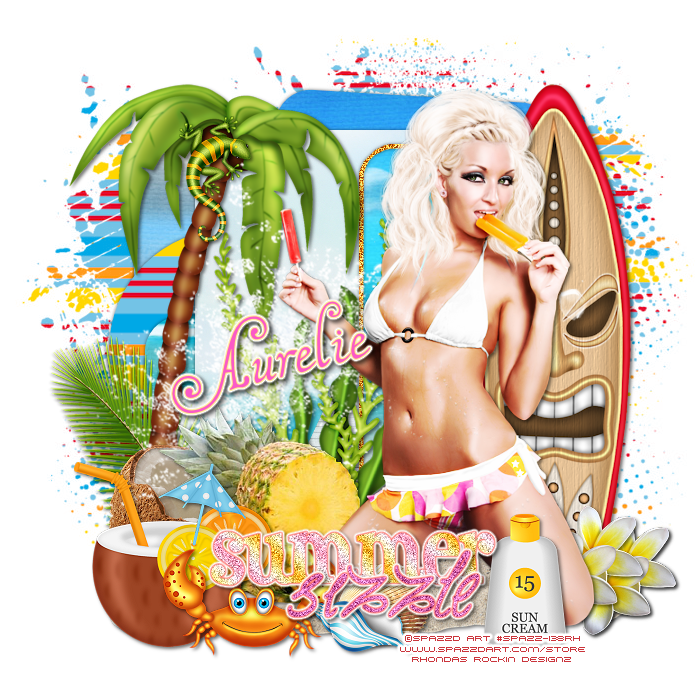
This tutorial is written for those with knowledge of PSP
Supplies Needed:
Tube of choice: I'm using the wonderful art work of Spazzd Art
Which you must obtain a license to use HERE
FTU Scrap Kit by Aurelie from Purple Dreams Scraps called "Sizzlin Summer"
You can download this awesome kit from our blog HERE
Mask of choice
Ok Lets get Started:
Open template - Shift D to duplicate then close out original
Increase canvas size 700x680
Delete copyright, layers 1&2
Click on raster 3 selections,select all, float,defloat
paste a paper of choice from the kit - I used paper3
selection invert delete
select none delete the original
Click on raster 4 selections,select all, float,defloat
paste a paper of choice from the kit - I used paper1
selection invert delete
select none delete the original
Click on raster 5 selections,select all, float,defloat
paste a paper of choice from the kit - I used paper5
selection invert delete
select none delete the original
Click on raster 6 selections,select all, float,defloat
paste a paper of choice from the kit - I used paper1
selection invert delete
select none delete the original
Click on raster 7 selections,select all, float,defloat
paste a paper of choice from the kit - I used paper2
selection invert delete
select none delete the original
Click on raster 8 selections,select all, float,defloat
paste a paper of choice from the kit - I used paper3
selection invert delete
select none delete the original
Click on raster 9 selections,select all, float,defloat
add new layer and flood fill with color of choice
select none delete the original
add noise
I used gradient with the word art
Place your main tube
Xero Radiance with settings of choice
Now time to add our elements
I used the following:
Element 2
Element 3
Element 5
Element 6
Element 7
Element 9
Element 12
Element 18
Element 25
Element 29
Element 30
Element 32
Element 33
Element 36
Element 37
Merge your layers
Open paper of choice and apply mask
Place your name where you like it
Add the Copyright and your License Number for the tube
Resize to your liking and save as PNG
This tutorial was created on July 29,2015 by Rhonda
Any resemblance to another Tag or Tutorial is purely coincidental
Subscribe to:
Posts
(Atom)
Grab My Blinkie

I CT For



Blogs I Visit
























