Sunday, July 12, 2015
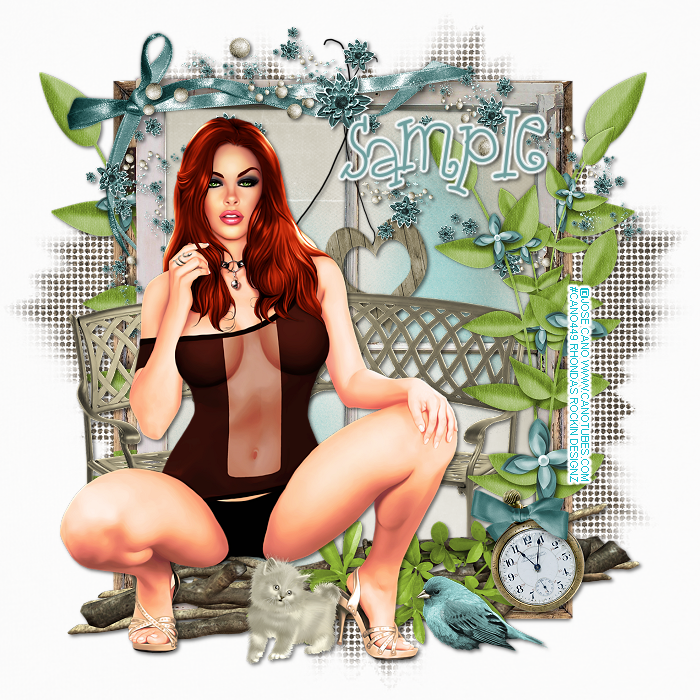
This tutorial is written for those with knowledge of PSP
Supplies Needed:
Tube of choice: I'm using the wonderful art work of Jose Cano
You can purchase these tubes at his store HERE
FTU Scrapkit by Designs by LK HERE
Don't forget to leave a thank you when downloading
Ok Lets get started:
Open blank canvas size 700x700
Open element 10 - resize 34%
Paste as new layer in center
Grab the selection tool and draw around frame
Add new layer under frame
Open paper 2 & paste into selections - select none
Open element 2 - resize 24% and place to top center
Open element 18 - resize 26% and place to far right of frame
Open element 15 - resize 26% amd place to middle of frame
Duplicate and resize again 68%. Place behind first set of leaves
Open element 9 - resize 24%% & place to bottom of frame
Open element 11 - resize 10% & place to bottom right near clock
Open your tube and place to left of tag
Open element 5 - resize 6% & place near tube you are using
Merge your layers
Open element 8 - resize 30% - place behind tag to far left
You want the leaves to be showing
Duplicate and mirror
Merge your layers again
Apply mask if so desired
Place your name where you like it
Add the Copyright and your License Number for the tube
Resize to your liking and save as PNG
This tutorial was created on July 3,2015 by Rhonda
Any resemblance to another Tag or Tutorial is purely coincidental

Saturday, July 11, 2015
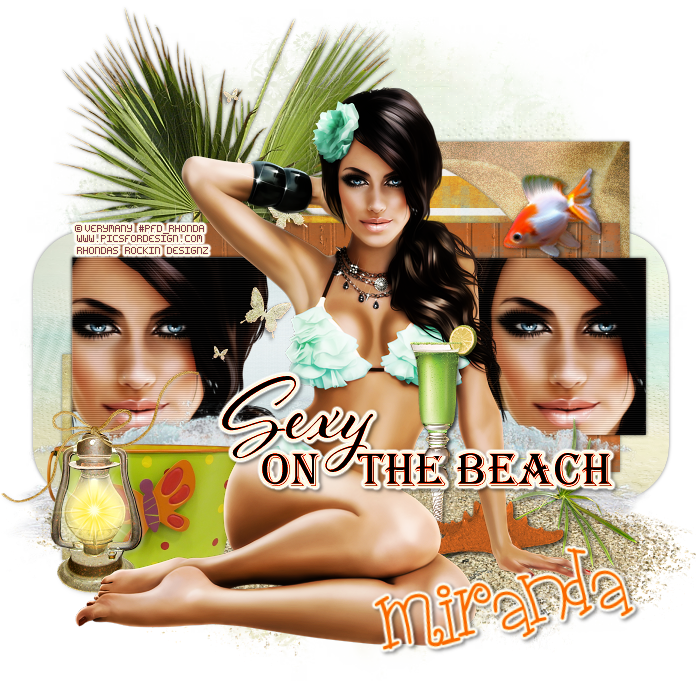
This tutorial is written for those with knowledge of PSP
Supplies Needed:
Tube of choice: I'm using the wonderful art work of VeryMany
This tube was purchased at PFD HERE
You can purchase these tubes at their store HERE
FTU Scrapkit by Gothic Inspirations HERE
Template #314 by Miranda at Sparkle Dsigz HERE
Mask of choice
Don't forget to leave a thank you when downloading
Ok Lets get Started:
Open template - Shift D to duplicate then close out original
Canvas size 700x700
Delete copyright and dotted lines
Click on layer 1 selections,select all, float,defloat
paste a paper of choice from the kit - I used paper5
selection invert delete
select none delete the original
Click on layer 2&3 selections,select all, float,defloat
paste a paper of choice from the kit - I used paper2
selection invert delete
select none delete the original
Click on layers 4 selections,select all, float,defloat
paste a paper of choice from the kit - I used paper3
selection invert delete
select none delete the original
Click on layer 5 selections,select all, float,defloat
paste a paper of choice from the kit - I used paper1
selection invert delete
select none delete the original
Click on layers 6 selections,select all, float,defloat
paste a paper of choice from the kit - I used paper4
selection invert delete
select none delete the original
Apply closeup of tube on bothe sides
Recolor word art or leave as is
Place your main tube
apply Xero radiance with settings of choice
Now add any other elements of choice
I used the following:
Butterflys
Drink
Fish
Greenery
Lamp
Ocean
Pail
Palm
Sand
SeaLife
Merge your layers
Add paper of choice & apply mask
Place your name where you like it
Add the Copyright and your License Number for the tube
Resize to your liking and save as PNG
This tutorial was created on Jul 10,2015 by Rhonda
Any resemblance to another Tag or Tutorial is purely coincidental
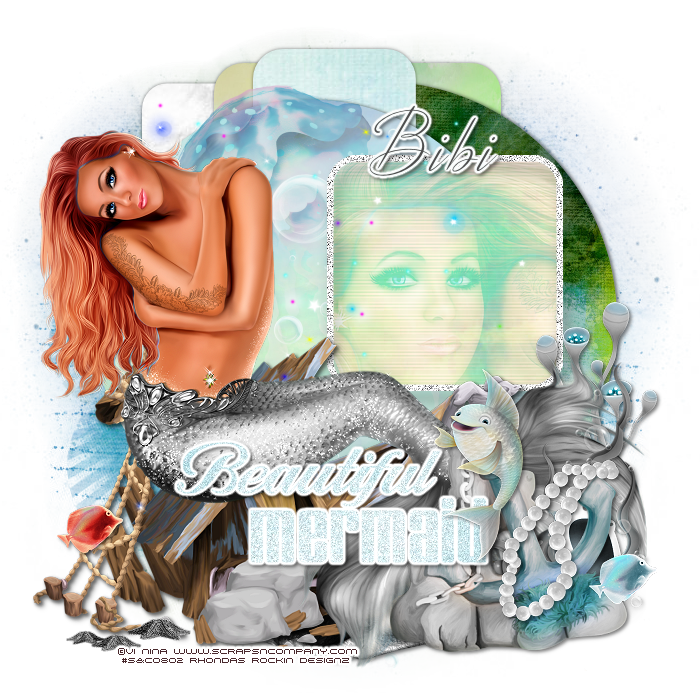
This tutorial is written for those with knowledge of PSP
Supplies Needed:
Tube of choice: I'm using the wonderful art work of Vi Nina
You must obtain a license to use this art at S&Co HERE
PTU Scrapkit from Bibi that matches the tube HERE
Template #774 by Millie HERE
Mask of choice
Ok Lets get Started:
Open template - Shift D to duplicate then close out original
Canvas size 700x700
delete copyright
Click on layer 1 selections,select all, float,defloat
paste a paper of choice from the kit - I used paper3
selection invert delete
select none delete the original
Click on layer 2 selections,select all, float,defloat
paste a paper of choice from the kit - I used paper6
selection invert delete
select none delete the original
Click on layers 3 selections,select all, float,defloat
paste a paper of choice from the kit - I used paper7
selection invert delete
select none delete the original
Click on layers 4 selections,select all, float,defloat
paste a paper of choice from the kit - I used paper5
selection invert delete
select none delete the original
Click on layers 5 selections,select all, float,defloat
paste a paper of choice from the kit - I used paper6
selection invert delete
select none delete the original
Click on layer 6 selections,select all, float,defloat
paste a paper of choice from the kit - I used paper4
selection invert delete
select none delete the original
Add close up of tube in square
Change blend mode to overlay
Click on layer 8 & add noise with setings of choice
Decorate word art as you choose
Place your main tube
Now time to add our elements
I used the following:
Element 1
Element 5
Element 19
Element 26
Element 56
Element 67
Element 70
Element 80
Element 89
Element 97
Element 99
Element 118
Element 135
Merge your layers
Open paper of choice & apply mask
Place your name where you like it
Add the Copyright and your License Number for the tube
Resize to your liking and save as PNG
This tutorial was created on July 11,2015 by Rhonda
Any resemblance to another Tag or Tutorial is purely coincidental
Friday, July 10, 2015

This tutorial is written for those with knowledge of PSP
Supplies Needed:
Tube of choice: I'm using the wonderful art work of Lagunna
You can purchase these tubes at PFD HERE
PTU Scrapkit by Scrappin With Lil Old Me called "Dreams"
You can purchase this awesome kit at Tiny Turtle Store HERE
Template by Sparkle Designz HERE
Mask of choice
Don't forget to leave a thank you when downloading
Ok Lets get Started:
Open template - Shift D to duplicate then close out original
Canvas size 700x700
Delete copyright & dotted circles
Click on raster 1 selections,select all, float,defloat
paste a paper of choice from the kit - I used paper7
selection invert delete
select none delete the original
Click on raster 11 selections,select all, float,defloat
paste a paper of choice from the kit - I used paper23
selection invert delete
select none delete the original
Click on raster 2&3 selections,select all, float,defloat
paste a paper of choice from the kit - I used paper16
selection invert delete
select none delete the original
Click on raster 4 selections,select all, float,defloat
paste a paper of choice from the kit - I used paper22
selection invert delete
select none delete the original
Click on raster 5 selections,select all, float,defloat
paste a paper of choice from the kit - I used paper14
selection invert delete
select none delete the original
Click on raster 6&7 circle selections,select all, float,defloat
paste a paper of choice from the kit - I used paper24
selection invert delete
select none delete the original
Place your main tube
apply Xero Radiance
Now time to add our elements
I used the following:
Element 14
Element 15
Element 22
Element 26
Element 60
Element 68
Element 69
Element 70
Element 74
Element 75
Element 127
Element 155
Element 160
Merge your layers
Open paper 6 & apply mask
Place your name where you like it
Add the Copyright and your License Number for the tube
Resize to your liking and save as PNG
This tutorial was created on July 10,2015 by Rhonda
Any resemblance to another Tag or Tutorial is purely coincidental

This tutorial is written for those with knowledge of PSP
Supplies Needed:
Tube of choice: I'm using the wonderful art work of SoulDesigner
You must obtain a license to use his art at S&Co HERE
Matching PTU Scrapkit from Disturbed Scraps purchased at S&CO HERE
Ok Lets get Started:
Resize elements to your liking
This is a very quick and easy tutorial
Open blank canvas 700x700
Open element 87 & place in center of tag
Grab the magic wand & click inside frame
Selections modify expand by 10
Open paper 2 and paste as new layer
Move paper under frame
Place your main tube & build around it
Now time to add our elements
I used the following:
Element 9
Element 38
Element 56
Element 58
Element 60
Element 64
Element 65
Element 66
Element 68
Merge layers
Open paper 1 and apply mask
Place your name where you like it
Add the Copyright and your License Number for the tube
Resize to your liking and save as PNG
This tutorial was created on July 10,2015 by Rhonda
Any resemblance to another Tag or Tutorial is purely coincidental
Thursday, July 9, 2015

This tutorial is written for those with knowledge of PSP
Supplies Needed:
Tube of choice: I'm using the wonderful art work of Zlata_M
Which you must obtain a license to use at PFD HERE
FTU Scrap Kit by BLT DeZignZ which can be found on her FB Fan Club
Template #6 by Yvette HERE
Template is the one under year 2013
Mask of choice
Don't forget to leave a thank you when downloading
Ok Lets get Started:
Open template - Shift D to duplicate then close out original
Resize all layers 88%
Increase canvas size to 700x700
Delete copyright
Click on circle 1&2 selections,select all, float,defloat
paste a paper of choice from the kit - I used paper4
selection invert delete
select none delete the original
Click on grey rectangle selections,select all, float,defloat
paste a paper of choice from the kit - I used paper10
selection invert delete
select none delete the original
Click on rounded rectangle selections,select all, float,defloat
paste a paper of choice from the kit - I used paper17
selection invert delete
select none delete the original
Click on large circle selections,select all, float,defloat
paste a paper of choice from the kit - I used paper18
selection invert delete
select none delete the original
Place your main tube
Now time to add our elements
I used the following:
Bottle
Cake
Cup 1&2
Cupcake
Flair
Glass
Ribbon 1
Sparkles
Spill
Merge your layers
Open paper 5 and apply mask of choice
Place your name where you like it
Add the Copyright and your License Number for the tube
Resize to your liking and save as PNG
This tutorial was created on July 9,2015 by Rhonda
Any resemblance to another Tag or Tutorial is purely coincidental

Supplies Needed:
Tube of choice: I'm using the wonderful art work of KiwiFireStorm
You can purchase this art at TPP HERE
PTU Scrap Kit by Laura from Tiny Turtle Design called "Dreadful Wonderland"
You an purchase this awesome kit at her store HERE
Template #169 by HorsePlay's Pasture HERE
Mask of choice
Don't forget to leave a thank you when downloading
Ok Lets get Started:
Open template - Shift D to duplicate then close out original
Canvas 700x700
Delete copyright
Click on raster 1 selections,select all, float,defloat
paste a paper of choice from the kit - I used paper11
selection invert delete
select none delete the original
I added a border with noise
Click on raster 2 selections,select all, float,defloat
paste a paper of choice from the kit - I used paper50
selection invert delete
select none delete the original
Click on raster 3 selections,select all, float,defloat
paste a paper of choice from the kit - I used paper9
selection invert delete
select none delete the original
Click on raster 4 selections,select all, float,defloat
paste a paper of choice from the kit - I used paper55
selection invert delete
select none delete the original
Click on raster 5 selections,select all, float,defloat
paste a paper of choice from the kit - I used paper52
selection invert delete
select none delete the original
I added a border with noise
Click on raster 6-8 selections,select all, float,defloat
paste a paper of choice in each square
selection invert delete
select none delete the original
Place your main tube
Add Xero Radiance with settings of choice
Now time to add our elements
I used the following:
Element 10
Element 11
Element 46
Element 49
Element 51
Element 62
Element 67
Element 89
Element 93
Element 112
Element 125
Element 159
Element 164
Element 177
Element 192
Element 195
Element 225
Element 236
Element 246
Merge your layers
Open paper of choice and apply mask
Place your name where you like it
Add the Copyright and your License Number for the tube
Resize to your liking and save as PNG
This tutorial was created on July 9,2015 by Rhonda
Any resemblance to another Tag or Tutorial is purely coincidental

This tutorial is written for those with knowledge of PSP
Supplies Needed:
Tube of choice: I'm using the wonderful art work of Ellie_Milk
You can purchase his tubes at PFD HERE
PTU Scrapkit by Laura from Tiny Turtle Design called "Strawberry Spring"
You an purchase this awesome kit at her store HERE
Template #743 by Millie HERE
Wordart HERE
Mask of choice
Ok Lets get Started:
Open template - Shift D to duplicate then close out original
Canvas 700x700
Delete copyright,raster 6 & word art
Click on raster 1 selections,select all, float,defloat
paste a paper of choice from the kit - I used paper18
selection invert delete
select none delete the original
Click on raster 2 selections,select all, float,defloat
paste a paper of choice from the kit - I used paper37
selection invert delete
select none delete the original
Click on raster 7 selections,select all, float,defloat
paste a paper of choice from the kit - I used paper2
selection invert delete
select none delete the original
Click on raster 3 selections,select all, float,defloat
paste a paper of choice from the kit - I used paper8
selection invert delete
select none delete the original
Click on raster 4 selections,select all, float,defloat
paste a paper of choice from the kit - I used paper1
selection invert delete
select none delete the original
Click on raster 5 selections,select all, float,defloat
paste a paper of choice from the kit - I used paper43
selection invert delete
select none delete the original
Open word art and apply to tag
Place your main tube
Add Xero Radiance with settings of choice
Now time to add our elements
I used the following:
Element 34
Element 36
Element 42
Element 54
Element 55
Element 56
Element 57
Element 58
Element 67
Element 91
Element 97
Element 116
Element 153
Element 166
Element 172
Element 178
Element 182
Element 188
Merge your layers
Open paper of choice & apply mask
Place your name where you like it
Add the Copyright and your License Number for the tube
Resize to your liking and save as PNG
This tutorial was created on July 9,2015 by Rhonda
Any resemblance to another Tag or Tutorial is purely coincidental
Wednesday, July 8, 2015

This tutorial is written for those with knowledge of PSP
Supplies Needed:
Tube of choice: I'm using the wonderful art work of Andy Cooper
You must obtain a license to use this art at S&Co HERE
PTU Scrapkit from Mysterfeerie Creation HERE
Mask of choice
Ok Lets get Started:
Open template - Shift D to duplicate then close out original
Resize all layers 120%
Canvas size 700x700
delete copyright & wordart
Click on layer 11 selections,select all, float,defloat
paste a paper of choice from the kit - I used paper1
selection invert delete
select none delete the original
Click on layer 10 selections,select all, float,defloat
paste a paper of choice from the kit - I used element49
selection invert delete
select none delete the original
Click on layers 9 selections,select all, float,defloat
paste a paper of choice from the kit - I used dotted paper
selection invert delete
select none delete the original
Click on layers 8 selections,select all, float,defloat
paste a paper of choice from the kit - I used solid paper
selection invert delete
select none delete the original
Click on layers 7 selections,select all, float,defloat
paste a paper of choice from the kit - I used stripes paper
selection invert delete
select none delete the original
Click on layer 9 selections,select all, float,defloat
paste a paper of choice from the kit - I used green paper
selection invert delete
select none delete the original
Click on layer 3&5 selections,select all, float,defloat
paste a paper of choice from the kit - I used paper1
selection invert delete
select none delete the original
Click on layer 2&4 selections,select all, float,defloat
paste a paper of choice from the kit - I used solid paper
selection invert delete
select none delete the original
Click on layer 1 selections,select all, float,defloat
paste a paper of choice from the kit - I used birdcage paper
selection invert delete
select none delete the original
Place your main tube
Now time to add our elements
I used the following:
Element 25
Element 01
Element 02
Element tale of time
Element 20
Element 21
Element cu16
Element cu17
Element 10
Element 9
Element 6
Element 8
Element 15
Element 12
Element 21
Merge your layers
Open paper of choice & apply mask
Place your name where you like it
Add the Copyright and your License Number for the tube
Resize to your liking and save as PNG
This tutorial was created on July 9,2015 by Rhonda
Any resemblance to another Tag or Tutorial is purely coincidental
Tuesday, July 7, 2015

This tutorial is written for those with knowledge of PSP
Supplies Needed:
Tube of choice: I'm using the wonderful art work of GraphFreaks
You must obtain a license to use this art at S&Co HERE
PTU Scrap Kit from Chili Designz called "Empire of Elizabeth"
Kit can be purchased at S&CO HERE
Mask of choice
Ok Lets get Started:
Resize elements to your liking
This is a very quick and easy tutorial
Open blank canvas 700x700
Open frame 6 & place in center of tag
Grab the magic wand & click inside frame
Selections modify expand by 10
Open paper 15 and paste as new layer
Move paper under frame
Place your main tube & build around it
Now time to add our elements
I used the following:
Bow 2
All Flowers
Harp
Jewel 3
Ribbon
Sparkle 3
Vase
Watch
Merge layers
Open paper 7 and apply mask
Place your name where you like it
Add the Copyright and your License Number for the tube
Resize to your liking and save as PNG
This tutorial was created on July 6,2015 by Rhonda
Any resemblance to another Tag or Tutorial is purely coincidental
Subscribe to:
Posts
(Atom)
Grab My Blinkie

I CT For



Blogs I Visit
























