Showing posts with label Icy Blue Mystic Designs. Show all posts
Showing posts with label Icy Blue Mystic Designs. Show all posts
Friday, July 31, 2015
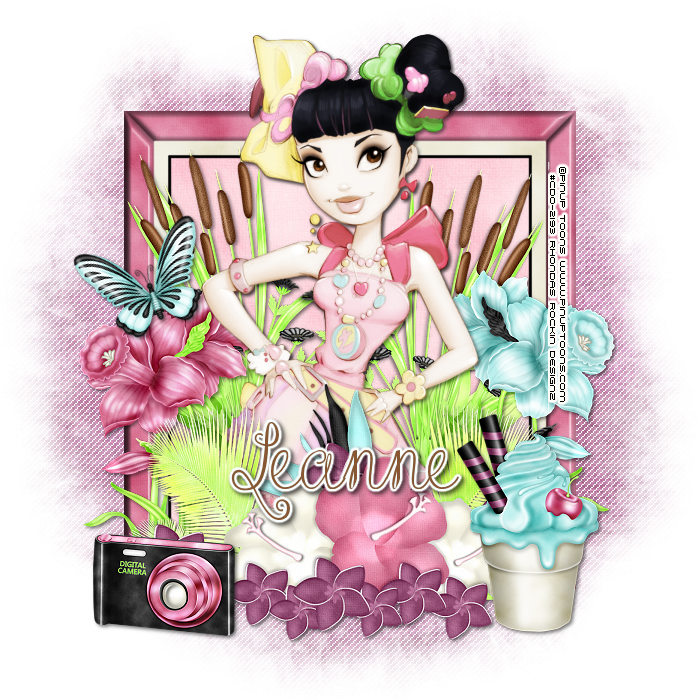
This tutorial is written for those with knowledge of PSP
Supplies Needed:
Tube of choice: I'm using the wonderful art work of Pinup Toons
You can find Pinup tubes at CDO HERE
FTU Scrap Kit by Icy Blue Mystic Designs HERE
Use mask of choice
Don't forget to leave a thank you when downloading
Ok lets get started:
Resize elements to your liking
This is a very quick and easy tutorial
Open blank canvas 700x700
Open frame 2 and place in center
Click inside of frame with magic wand
Selections modify expand by 10
Open new layer under frame
Open paper 4 and paste into selections
Select none
Place tube and build around it
Now time to add our elements
I used the following:
Butterfly
Camera
Cattail and Flower 2
Daffadil 1&2
Ice Cream Cup
Tropical Flower
Merge layers
Open paper of choice and apply mask
Place your name where you like it
Add the Copyright and your License Number for the tube
Resize to your liking and save as PNG
This tutorial was created on July 31,2015 by Rhonda
Any resemblance to another Tag or Tutorial is purely coincidental
Sunday, July 19, 2015
This tutorial is written for those with knowledge of PSP
Supplies Needed:
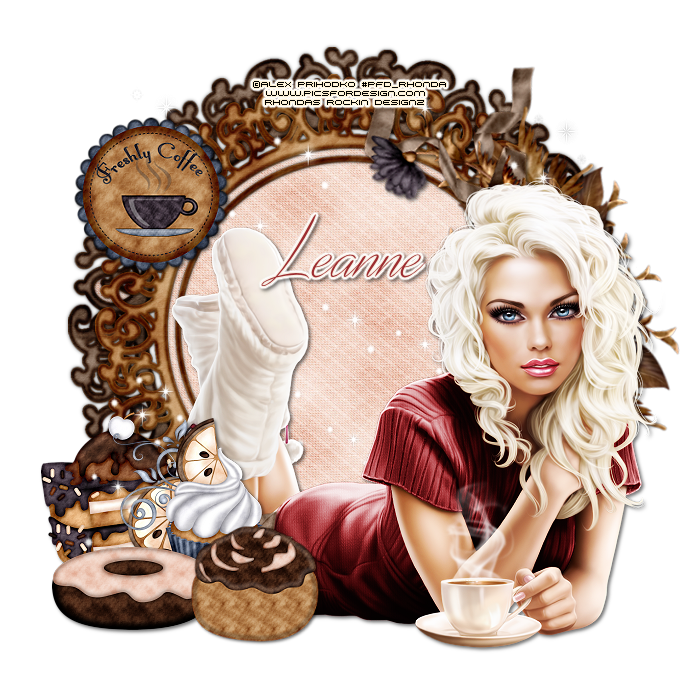
Tube of choice: I'm using the wonderful art work of Alex Prihodko
You must obtain a license to use at PFD HERE
PTU Scrap Kit from Icy Blue Mystic Designs called Caffeine Delight
You can purchase this kit at one of her stores HERE
Mask of choice
Ok lets get started:
Resize elements to your liking
This is a very quick and easy tutorial
Open blank canvas 700x700
Open frame 5 and place in center
Open frame 6 and place on top
Click inside of frame with magic wand
Selections modify expand by 10
Open new layer under frame
Open paper 3 and paste into selections
Select none
Place tube and build around it
Now time to add our elements
I used the following:
Cake
Cinnamon Roll
Citrus Cupcake
Donut 2
Flower Cluster 1
Sparkle 2
Word Tag 2
Merge layers
Open paper of choice and apply mask
Place your name where you like it
Add the Copyright and your License Number for the tube
Resize to your liking and save as PNG
This tutorial was created on July 19,2015 by Rhonda
Any resemblance to another Tag or Tutorial is purely coincidental
Saturday, July 4, 2015

This tutorial is written for those with knowledge of PSP
Supplies Needed:
Tube of choice: I'm using the wonderful art work of Keith Garvey
You can purchase his tubes HERE
PTU Scrap Kit by Icy Blue Mystic Designs "Sweet Liberty"
You can purchase this kit at one of her stores HERE
Template #766 from Millie HERE
Use mask of choice if desired
Ok Lets get Started:
Open template - Shift D to duplicate then close out original
Canvas size 700x700
delete copyright
Click on raster 1 selections,select all, float,defloat
paste a paper of choice from the kit - I used paper8
selection invert delete
select none delete the original
Layers 2,3&4 add noise with settings of choice
Click on raster 5 selections,select all, float,defloat
paste a paper of choice from the kit - I used paper5
selection invert delete
select none delete the original
Click on raster 6 selections,select all, float,defloat
paste a paper of choice from the kit - I used paper7
selection invert delete
select none delete the original
Click on raster 7 selections,select all, float,defloat
paste closeup of tube
selection invert delete
select none delete the original
add PhotoEffex Scanlines
Leave other layers as they are
Place your tube
Now time to add our elements
I used the following:
Cat
Double Flags
Firecrackers
Fireworks 1&2
Flag Lips
Patriotic Button Ribbon 1
Patriotic Hat 2
Patriotic Teddy
Patriotic Tie
StarsNStripes Bomb 1
Merge layers
Apply mask if desired
Place your name where you like it
Add the Copyright and your License Number for the tube
Resize to your liking and save as PNG
This tutorial was created on July 4,2015 by Rhonda
Any resemblance to another Tag or Tutorial is purely coincidental
Friday, June 26, 2015
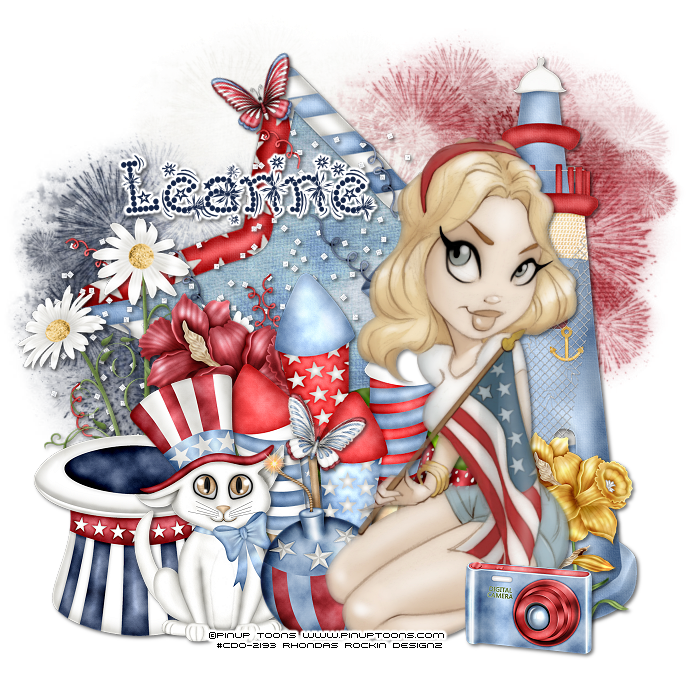
This tutorial is written for those with knowledge of PSP
Supplies Needed:
Tube of choice: I'm using the wonderful art work of Pinup Toons
You can purchase these at CDO HERE
PTU Scrap Kit by Icy Blue Mystic Designs "Celebrate"
You can purchase this kit at one of her stores HERE
Patriotic Mask by Dee HERE
Ok Lets get Started:
Resize elements to your liking
This is a very quick and easy tutorial
Open blank canvas 700x700
Open frame 3 and place in center
Using magic wand click inside frame
Selections modify expand by 10
Open paper 6 and paste as new layer
Selections invert delete
Move paper under frame
Open tube and place where desired
Now time to add our elements
I used the following:
Butterfly 1&2
Daffodil 1&3
Daisy Swirl 1
Digital Camera
Firecrackers
Liberty Cat
Light House
Party Blower
Patriotic Hat 2
Stars & Stripes Bomb
Merge layers
Open papers 5,8 & 10 and apply mask
Place your name where you like it
Add the Copyright and your License Number for the tube
Resize to your liking and save as PNG
This tutorial was created on June 26,2015 by Rhonda
Any resemblance to another Tag or Tutorial is purely coincidental
Friday, June 19, 2015
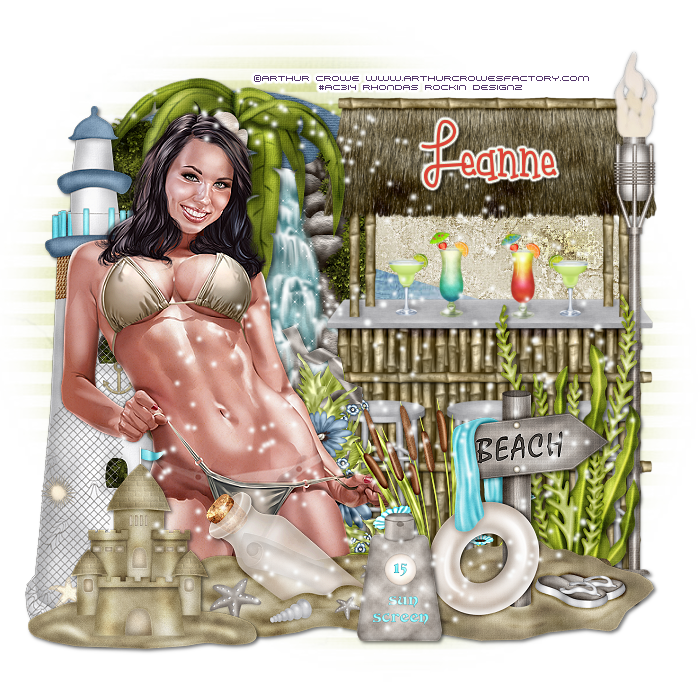
This tutorial is written for those with knowledge of PSP
Supplies Needed:
Tube of choice: I'm using the wonderful art work of Arthur Crowe
You must obtain a license to use his work HERE
PTU Scrap Kit from Icy Blue Mystic Designs called Tiki Beach
You can purchase this kit at one of her stores HERE
Mask of choice
Ok lets get started:
Resize elements to your liking
This is a very quick and easy tutorial
Open blank canvas 700x700
Using my tag as an example I used the following elements:
Alga2
Beach Sign
Cat Tail 1
Light House
Message In A Bottle
Palm Tree 2
Sand Castle
Sparkles 2
Tiki Torch
Waterfall
Place tube where desired
I used 2 papers from kit and created 2 circles to use as background
Merge layers
Apply mask if desired
Place your name where you like it
Add the Copyright and your License Number for the tube
Resize to your liking and save as PNG
This tutorial was created on June 19,2015 by Rhonda
Any resemblance to another Tag or Tutorial is purely coincidental
Friday, May 15, 2015

This tutorial is written for those with knowledge of PSP
Supplies Needed:
Tube of choice: I'm using the wonderful art work of Lightartist_XXX
You must obtain a license to use at PFD HERE
PTU Scrap Kit from Icy Blue Mystic Designs called Friends Across The Miles
You can purchase this kit at one of her stores HERE
Mask of choice
Ok lets get started:
Resize elements to your liking
This is a very quick and easy tutorial
Open blank canvas 700x700
Open frame 4 and place in center
Click inside of frame with magic wand
Selections modify expand by 10
Open new layer under frame
Open paper 5 and paste into selections
Select none
Place tube and build around it
Now time to add our elements
I used the following:
Bee
Bouquet of Flowers 2&4
Butterfly 1&2
Cherry Blossom 1
Corner Flowers 1&3
Daisies 1&2
Home Tweet Home
LilElf
Vine 2
Merge layers
Open paper 10 and apply mask
Place your name where you like it
Add the Copyright and your License Number for the tube
Resize to your liking and save as PNG
This tutorial was created on May 13,2015 by Rhonda
Any resemblance to another Tag or Tutorial is purely coincidental
Friday, April 24, 2015
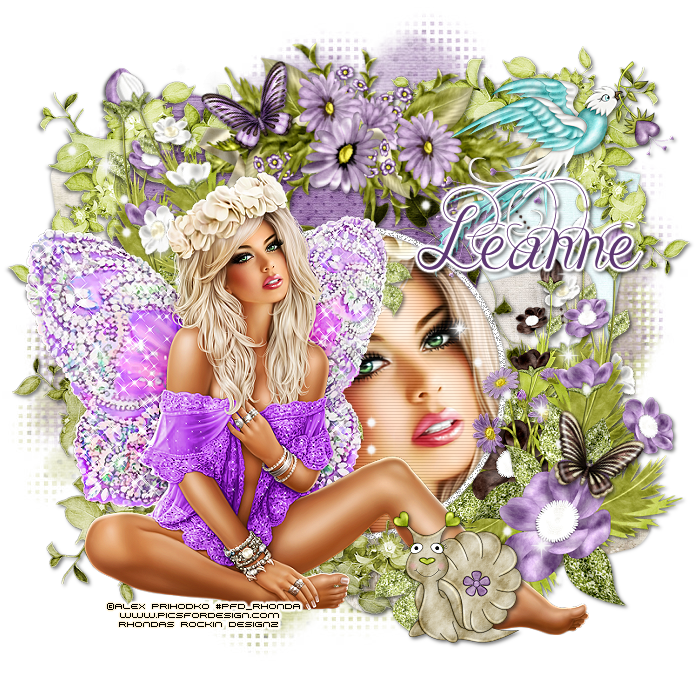
This tutorial is written for those with knowledge of PSP
Supplies Needed:
Tube of choice: I'm using the wonderful art work of Alex Prihdoko
You can find these tubes at PFD HERE
PTU Scrap Kit by Icy Blue Mystic Designs "Fairy Frolic"
You can purchase this kit at one of her stores HERE
Template #148 by Tamie HERE
1st template in set
Mask of choice
Ok lets get started:
Open template - Shift D to duplicate then close out original
Resize all layers 85%
Increase canvas to 700x700
Delete copyright, wordart,layers 4&7
Click on raster 10 selections,select all, float,defloat
paste a paper of choice from the kit - I used paper8
selection invert delete
select none delete the original
Click on raster 6 selections,select all, float,defloat
paste a paper of choice from the kit - I used paper9
selection invert delete
select none delete the original
Click on raster 3 selections,select all, float,defloat
paste a paper of choice from the kit - I used paper7
selection invert delete
select none delete the original
Click on raster 18 selections,select all, float,defloat
paste a paper of choice from the kit - I used paper10
selection invert delete
select none delete the original
Click on raster 8 selections,select all, float,defloat
paste a paper of choice from the kit - I used paper1
selection invert delete
select none delete the original
Click on raster 2 selections,select all, float,defloat
paste a paper of choice from the kit - I used paper3
selection invert delete
select none delete the original
Click on raster 1 selections,select all, float,defloat
add close-up of tube
selection invert delete
select none delete the original
Click on raster 5 and add noise
Place your tube
Now time to add our elements
I used the following:
Butterfly 1&2
Cluster Flower 2&5
Cluster Leaf 1&2
Cluster Corner 1,2&4
Daisies 3
Fantasy Bird 1
Leaf 2
Merge layers
Open paper of choice and apply mask
Place your name where you like it
Add the Copyright and your License Number for the tube
Resize to your liking and save as PNG
This tutorial was created on April 25,2015 by Rhonda
Monday, April 13, 2015

This tutorial is written for those with knowledge of PSP
Supplies Needed:
Tube of choice: Im using the wonderful art work of KiwiFireStorm
You can find these tubes HERE
PTU Scrap Kit by Icy Blue Mystic Designs "The Birds and the Bees"
You can purchase this kit at one of her stores HERE
Template #103 from HERE
Use mask of choice
Ok Lets get Started:
Open template - Shift D to duplicate then close out original
Canvas size 700x700
delete copyright & stars layer
Click on blk circle selections,select all, float,defloat
paste a paper of choice from the kit - I used paper7
selection invert delete
select none delete the original
Click on blue strip selections,select all, float,defloat
paste a paper of choice from the kit - I used paper12
selection invert delete
select none delete the original
Click on pink strip selections,select all, float,defloat
paste a paper of choice from the kit - I used paper15
selection invert delete
select none delete the original
Click on black strip selections,select all, float,defloat
paste a paper of choice from the kit - I used paper4
selection invert delete
select none delete the original
Place your tube
Now time to add our elements
I used the following:
Bee
Birdhouse
Butterfly 1,2&3
Daisies 1&3
Floral Beehive 2
Flower and Grass
Grass
Honey Barrel
Honey Jar 2
Hummingbird
Honey for Hugz
Ladybug
Merge layers
Open paper of choice and apply mask
Place your name where you like it
Add the Copyright and your License Number for the tube
Resize to your liking and save as PNG
This tutorial was created on April 13,2015 by Rhonda
Any resemblance to another Tag or Tutorial is purely coincidental

Friday, April 3, 2015

This tutorial is written for those with knowledge of PSP
Supplies Needed:
Tube of choice: Im using the wonderful art work of Jose Cano
You can find his tubes HERE
PTU Scrap Kit by Icy Blue Mystic Designs "Easter Memories"
You can purchase this kit at one of her stores HERE
Template #16 from Seraph Creations HERE
Use mask of choice
Ok... Lets get started:
Open template - Shift D to duplicate then close out original
Resize template 71% all layers
Canvas size 700x700
delete copyright
Click on rectangle 1 selections,select all, float,defloat
paste a paper of choice from the kit - I used paper9
selection invert delete
select none delete the original
Click on rectangle 2 selections,select all, float,defloat
paste a paper of choice from the kit - I used paper4
selection invert delete
select none delete the original
Click on square background,selections,select all, float,defloat
paste a paper of choice from the kit - I used paper6
selection invert delete
select none delete the original
Click on square border selections,select all, float,defloat
paste a paper of choice from the kit - I used paper8
selection invert delete
select none delete the original
add noise
Click on circle background 1 selections,select all, float,defloat
paste a paper of choice from the kit - I used paper10
selection invert delete
select none delete the original
Click on circle frame 1 selections,select all, float,defloat
paste a paper of choice from the kit - I used paper8
selection invert delete
select none delete the original
add noise
Click on circle background 2 selections,select all, float,defloat
paste a paper of choice from the kit - I used paper2
selection invert delete
select none delete the original
Click on circle frame 2 selections,select all, float,defloat
paste a paper of choice from the kit - I used paper8
selection invert delete
select none delete the original
add noise
Click on circle background 3 selections,select all, float,defloat
paste a paper of choice from the kit - I used paper1
selection invert delete
select none delete the original
Click on circle frame 3 selections,select all, float,defloat
paste a paper of choice from the kit - I used paper8
selection invert delete
select none delete the original
add noise
Place your tube
Now time to add our elements
I used the following:
Bird
Branch
Butterfly 2
Candy Eggs
Candy Filled Eggs
Chick Ride
Cloud
Easter Basket 1
Easter Cross
EasterEgg House
EggsNTulips 1
Eggtatic
Flower 5&6
FlowerChic Pot
Grass 2
Scatter
Tree
TweetHome
Merge layers
Open paper of choice and apply mask
Place your name where you like it
Add the Copyright and your License Number for the tube
Resize to your liking and save as PNG
This tutorial was created on April 3,2015 by Rhonda
Any resemblance to another Tag or Tutorial is purely coincidental
Saturday, March 28, 2015
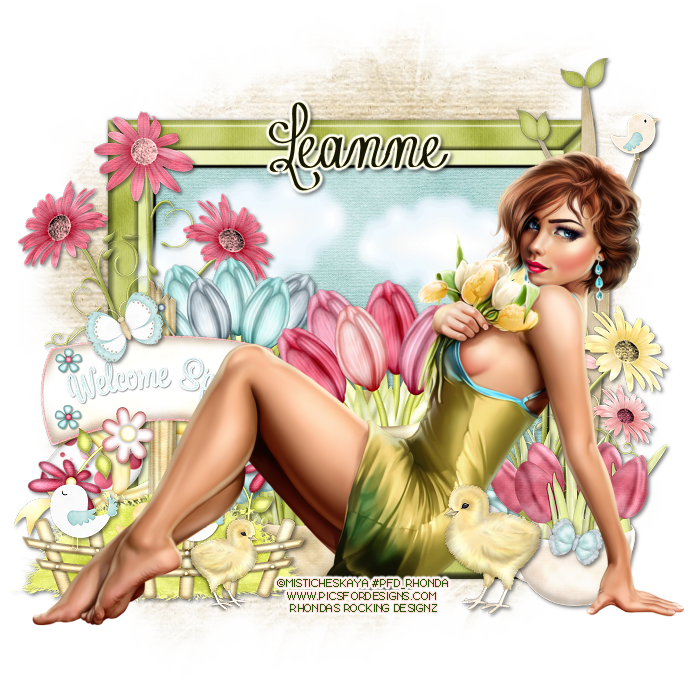
This tutorial is written for those with knowledge of PSP
Supplies Needed:
Tube of choice: I'm using the wonderful art work of Misticheskaya
You must obtain a license to use at PFD HERE
PTU Scrap Kit from Icy Blue Mystic Designs called My Spring Garden
You can purchase this kit at one of her stores HERE
Mask of choice
Ok Lets get Started:
Resize elements to your liking
This is a very quick and easy tutorial
Open blank canvas 700x700
Open frame 6
Click inside frame with magic wand
Selections modify expand by 8
Open paper 3 and paste as new layer
Selections invert delete
Move paper under frame
Place your main tube & build around it
Now time to add our elements
I used the following:
Bird 2&4
Butterfly 1,2&3
Chick
Cloud
Daisy Swirl 2&4
EggsNTulips 1&2
Spring Sign
Tree Branch
TulipCup 1&2
Merge layers
Open paper of choice and apply mask
Place your name where you like it
Add the Copyright and your License Number for the tube
Resize to your liking and save as PNG
This tutorial was created on March 28,2015 by Rhonda
Any resemblance to another Tag or Tutorial is purely coincidental
Friday, March 13, 2015

This tutorial is written for those with knowledge of PSP
Supplies Needed:
Tube of choice: I'm using the wonderful art work of VeryMany
You must obtain a license to use HERE
PTU Scrap Kit from Icy Blue Mystic Designs called Cutie Skullz
You can purchase this kit at one of her stores HERE
Mask of choice
Ok Lets get Started:
Resize elements to your liking
This is a very quick and easy tutorial
Open blank canvas 700x700
Open frame 3
Click inside with magic wand
Add new layer under frame and select all
Open paper 7 and paste into selections
Place your main tube & build around it
Now time to add our elements
I used the following:
Bow 4
Bubbles Wand and Bottle
Emo Heart
Emo Skulls Pocket
EyeNBone String
Heart Headphones
Heartspray 2
Ipod
Music Scatter
Poison Spray 2
Skull Lily 2
Merge layers
Open paper 10 and apply mask of choice
Place your name where you like it
Add the Copyright and your License Number for the tube
Resize to your liking and save as PNG
This tutorial was created on March 13,2015 by Rhonda
Any resemblance to another Tag or Tutorial is purely coincidental
Friday, March 6, 2015
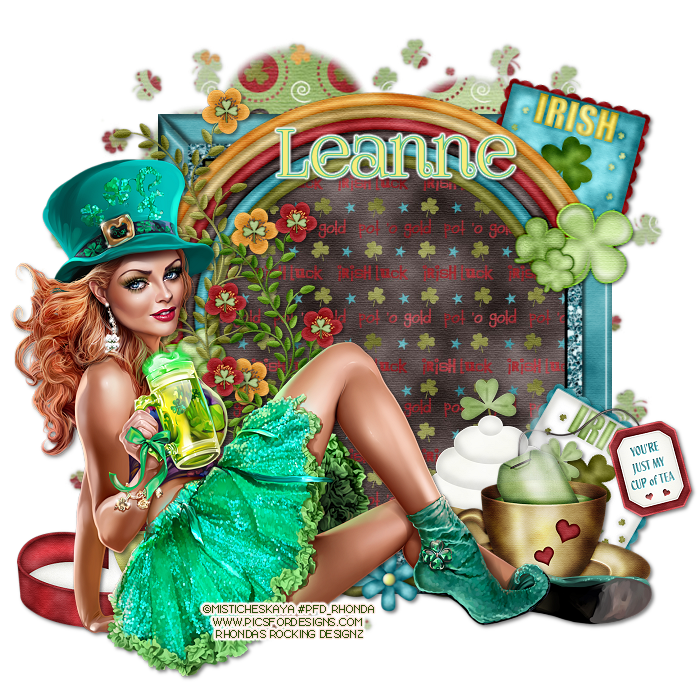
This tutorial is written for those with knowledge of PSP
Supplies Needed:
Tube of choice: I'm using the wonderful art work of Misticheskaya
You must obtain a license to use at PFD HERE
PTU Scrap Kit from Icy Blue Mystic Designs called Lucky in Love
You can purchase this kit from one of her stores HERE
Clover mask by Jackie Jewels HERE
Ok Lets get Started:
Resize elements to your liking
This is a very quick and easy tutorial
Open blank canvas 700x700
Open Frame 4, resize and place in center
Click inside frame with magic wand
Expand by 8
Open paper 5 and paste as new layer
Selections invert
Move paper under frame
Place your main tube where desired
Now time to add our elements
I used the following:
Cupcake
Flower Branch 3
Irish Stamp 1&2
Love Box
Lucky Rainbow
Tea Cup 1
Vines 1&3
Merge layers
Open paper 1 and apply mask
Place your name where you like it
Add the Copyright and your License Number for the tube
Resize to your liking and save as PNG
This tutorial was created on March 7,2015 by Rhonda
Any resemblance to another Tag or Tutorial is purely coincidental
Thursday, February 26, 2015
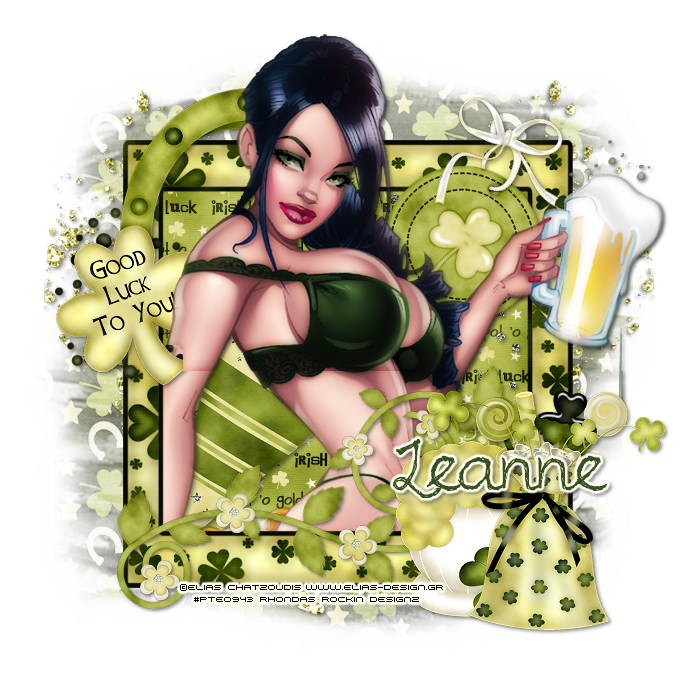
This tutorial is written for those with knowledge of PSP
Supplies Needed:
Tube of choice: I'm using the wonderful art work of Elias Chatzoudis
This tube was purchased at PTE which has closed
You can purchsed these tubes now at his store HERE
PTU Scrap Kit from Icy Blue Mystic Designs called Kiss Me I'm Irish
You can purchase this kit at one of her stores HERE
Clover mask by Maria HERE
Ok Lets get Started:
Resize elements to your liking
This is a very quick and easy tutorial
Open blank canvas 700x700
Open frame 2 and place in center
Using magic wand click inside frame
Selections modify expand by 8
Open paper 2 and paste as new layer
Selections invert delete
Move paper under frame
Open tube and place where desired
Now time to add our elements
I used the following:
Clover tag 1
Foamy Mug 2
Glitter Splatter 1
Goodies Bag
Lucky Shamrock
Party Blower
Swirl Flower 1
Merge layers
Open paper 7 and apply mask
Place your name where you like it
Add the Copyright and your License Number for the tube
Resize to your liking and save as PNG
This tutorial was created on Feburary 26,2015 by Rhonda
Any resemblance to another Tag or Tutorial is purely coincidental
Friday, February 13, 2015

This tutorial is written for those with knowledge of PSP
Supplies Needed:
Tube of choice: Im using the wonderful art work of Zlata_M
You can find these tubes at PFD HERE
PTU Scrap Kit by Icy Blue Mystic Designs "Key 2 My Heart"
You can purchase this kit at one of her stores HERE
Template #10 by Wendy HERE
Mask of choice
Ok Lets get Started:
Open template - Shift D to duplicate then close out original
Resize 700x700
delete copyright
Click on rectangle selections,select all, float,defloat
paste a paper of choice from the kit - I used paper2
selection invert delete
select none delete the original
Click on small rectangles selections,select all, float,defloat
paste a paper of choice from the kit - I used paper4
selection invert delete
select none delete the original
Click on rectangles frames selections,select all, float,defloat
paste a paper of choice from the kit - I used paper6
selection invert delete
select none delete the original
add noise with settings of choice
Click on circle selections,select all, float,defloat
paste a paper of choice from the kit - I used paper1
selection invert delete
select none delete the original
Click on circle frame selections,select all, float,defloat
paste a paper of choice from the kit - I used paper11
selection invert delete
select none delete the original
add noise with settings of choice
Place your tube
Now time to add our elements
I used the following:
Bear with Balloons
Frame 2
Heart Confetti 2
Hearts
Love Box 2
Love Letter
Love Lollipop 1,2&3
Pillow
Ribbon 1&2
Sparkle 1
TeaCup
Valentine Vase 1
Merge layers
Open paper of choice and apply mask
Place your name where you like it
Add the Copyright and your License Number for the tube
Resize to your liking and save as PNG
This tutorial was created on Feburary 13,2015 by Rhonda
Any resemblance to another Tag or Tutorial is purely coincidental

Monday, January 19, 2015
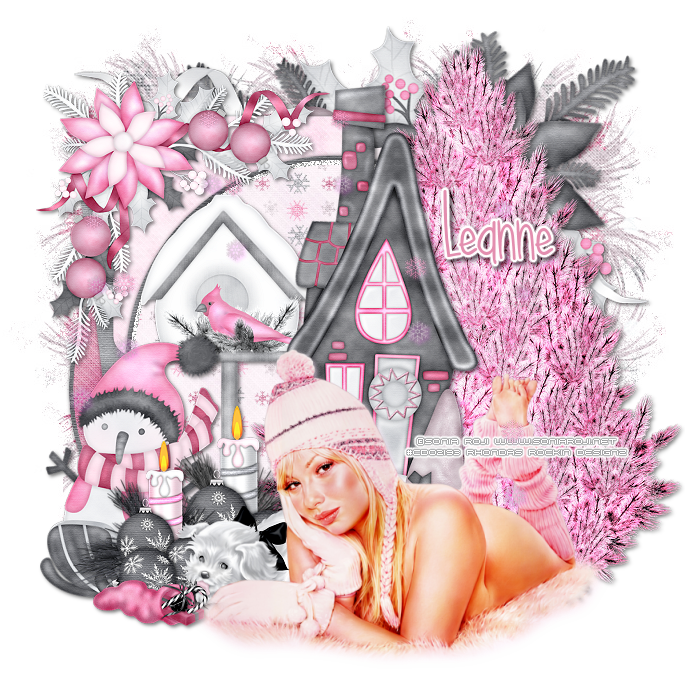
This tutorial is written for those with knowledge of PSP
Supplies Needed:
Tube of choice: Im using the wonderful art work of Sonia Roji
You can find Pinup tubes at CDO HERE
PTU Scrap Kit by Icy Blue Mystic Designs "Pink Winter"
You can purchase this kit at one of her stores HERE
Template #732 by Millie HERE
Winter Mask by Dee HERE
Ok Lets get Started:
Open template - Shift D to duplicate then close out original
Resize template to your liking
delete copyright,wordart,raster 4&6,hearts
Click on raster 1 selections,select all, float,defloat
paste a paper of choice from the kit - I used paper1
selection invert delete
select none delete the original
Click on raster 2 selections,select all, float,defloat
paste a paper of choice from the kit - I used paper11
selection invert delete
select none delete the original
Click on raster 3 selections,select all, float,defloat
paste a paper of choice from the kit - I used paper12
selection invert delete
select none delete the original
Click on raster 5 selections,select all, float,defloat
paste a paper of choice from the kit - I used paper5
selection invert delete
select none delete the original
Click on raster 9 selections,select all, float,defloat
paste a paper of choice from the kit - I used paper11
selection invert delete
select none delete the original
Click on raster 11 selections,select all, float,defloat
paste a paper of choice from the kit - I used paper6
selection invert delete
select none delete the original
Place your tube
Now time to add our elements
I used the following:
Candle 1
Candle 2
Holiday House
Holly Garland 1&2
Puppy with Candy Cane
Sledding Snowman
Snowfalling 2&3
Tree 2
Winter Birdhouse
Merge layers
Open paper of choice and apply mask
Place your name where you like it
Add the Copyright and your License Number for the tube
Resize to your liking and save as PNG
This tutorial was created on January 20,2015 by Rhonda
Any resemblance to another Tag or Tutorial is purely coincidental
Wednesday, December 31, 2014

Supplies Needed:
Tube of choice: I'm using the wonderful art work of VeryMany
You must obtain a license to use HERE
PTU Scrap Kit from Icy Blue Mystic Designs called Christmas Stocking
You can purchase this kit at one of her stores HERE
Mask of choice
This is a very quick and easy tutorial
Open blank canvas 700x700
Open frame 4 and place in center
Click inside frame with magic wand
Selections modify expand by 12
Open new layer under frame
Open paper 10 and paste into selections
Select none
I used the following:
Candle1
Christmas Gifts 1,2 &3
Christmas Tree 1
Cocktail Christmas 2
Puppy with candy cane
Santa and Sleigh
Merge layers
Open paper of choice and apply mask
Add the Copyright and your License Number for the tube
Resize to your liking and save as PNG
This tutorial was created on December 31,2014 by Rhonda
Any resemblance to another Tag or Tutorial is purely coincidental

Friday, December 12, 2014

This tutorial is written for those with knowledge of PSP
Supplies Needed:
Tube of choice: I'm using the wonderful art work of Pinup Toons
You can find Pinup tubes at CDO HERE
PTU Scrap Kit by Icy Blue Mystic Designs "Blue Winter"
You can purchase this kit at one of her stores HERE
Template #0029 from Manipulated by Magik HERE
Use mask of choice
Don't forget to leave a thank you when downloading
Open template - Shift D to duplicate then close out original
Resize template to your liking
delete copyright,wordart & lower right circle
paste a paper of choice from the kit - I used paper12
selection invert delete
select none delete the original
paste a paper of choice from the kit - I used paper3
selection invert delete
select none delete the original
paste a paper of choice from the kit - I used paper15
selection invert delete
select none delete the original
paste a paper of choice from the kit - I used paper13
selection invert delete
select none delete the original
paste a paper of choice from the kit - I used paper10
selection invert delete
select none delete the original
I used the following:
Candy Cane 1
Flower 3
Holiday Hat
Holly Garland2
Pole 1
Puppy with Candy
Rudolph
Santa Sleigh1
Tree 1
Open paper of choice and apply mask
Add the Copyright and your License Number for the tube
Resize to your liking and save as PNG
This tutorial was created on December 12,2014 by Rhonda
Any resemblance to another Tag or Tutorial is purely coincidental
Monday, November 24, 2014

This tutorial is written for those with knowledge of PSP
Supplies Needed:
Tube of choice: I'm using the wonderful art work of Keith Garvey
You must obtain a license to use HERE
FTU Scrap Kit from Icy Blue Mystic Designs HERE
Mask of choice
Resize elements to your liking
Open blank canvas 700x700
Open Frame 3, resize and place in center
Click inside frame with magic wand
Expand by 8
Open paper 1 and paste as new layer
Selections invert
Move paper under frame
I used the following:
Butterfly 1
Leaf Cluster 1
Leaf Cluster 2
PickAPumpkin
Turkey
Open paper of choice and apply mask
Add the Copyright and your License Number for the tube
Resize to your liking and save as PNG
This tutorial was created on November 24,2014 by Rhonda
Any resemblance to another Tag or Tutorial is purely coincidental
Thursday, November 20, 2014

This tutorial is written for those with knowledge of PSP
Supplies Needed:
Tube of choice: I'm using the wonderful art work of Misticheskaya
You must obtain a license to use at PFD HERE
PTU Scrap Kit from Icy Blue Mystic Designs called CocoaWhite
You can purchase this kit at one of her stores HERE
Mask #15 from Leah HERE
Resize elements to your liking
Open blank canvas 700x700
Open Gingerbread House and place in center
We will use this to build our tag
I used the following:
Berry Bush 4
CoCoa Mug
Flower 1&3
Frame 6
Lamp Light
Lights 2
Puppy with CandyCane
Santas Gift
Santas Sleigh
Snowman 1
Snowman on Ice
Three Happy Snowmen
Open paper of choice and apply mask
Add the Copyright and your License Number for the tube
Resize to your liking and save as PNG
This tutorial was created on November 20,2014 by Rhonda
Any resemblance to another Tag or Tutorial is purely coincidental
Wednesday, November 12, 2014

This tutorial is written for those with knowledge of PSP
Supplies Needed:
Tube of choice: I'm using the wonderful art work of VeryMany
You must obtain a license to use HERE
PTU Scrap Kit from Icy Blue Mystic Designs called Changing Seasons
You can purchase this kit at one of her stores HERE
Mask #92 by Millie HERE
Resize elements to your liking
Place your main tube & build around it
I used the following:
Apple 1&2
Butterfly 1,2&3
Create 1&2
Ladder 2
Leaves Frame 1,2,3&4
Owl
Squirrel
Sunflower2&3
Tree
Open paper of choice and apply mask
I used 2 different papers
Add the Copyright and your License Number for the tube
Resize to your liking and save as PNG
This tutorial was created on November 11,2014 by Rhonda
Any resemblance to another Tag or Tutorial is purely coincidental
Subscribe to:
Posts
(Atom)
Grab My Blinkie

I CT For



Blogs I Visit
























