Wednesday, October 30, 2013
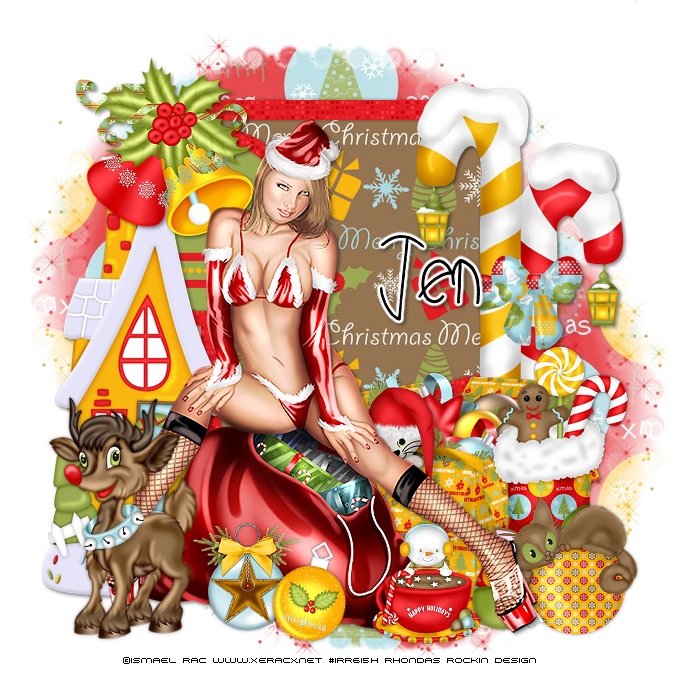
Tube of choice: Im using the wonderful art work of Ismael Rac
You can purchase his tubes HERE
PTU Scrap Kit by Jen from Sweets Temptations called "Christmas Ribbon"
You can purchase this kit on her blog HERE
Template #19 by Wendy HERE
Mask 56 from Rosesblack HERE
Don't forget to leave a thank you when downloading
Plugins Used:
Xero Radiance
Xero Fritillary
Open template - Shift D to duplicate then close out original
Canvas size 700x7000
I deleted copyright & dotted lines
paste a paper of choice from the kit - I used paper6
selection invert delete
select none delete the original
paste a paper of choice from the kit - I used paper5
selection invert delete
select none delete the original
add new layer and flood fill with color of choice
add Xero Fritillary with settings of choice
select none delete the original
Apply Xero radiance with settings of choice
Bells
Box
Candycane
Cat Ornament
Cup
House
Ornament 1&2
Reindeer
Stocking
Apply mask
Add the Copyright and your License Number for the tube
Resize to your liking and save as PNG
This tutorial was created on December 23,2012 by Rhonda

Labels:Christmas,Jens Sweet Temptations,PTU | 0
comments
Which you must obtain a license to use at his store HERE
This tube was purchased at MPT which has closed
FTU Scrap Kit by Vaybs called "To The North Pole"
You an download this awesome kit HERE
Chrsitmas Mask #11 by Vaybs HERE
Plugins Used:
Xero Radiance
Open a white blank canvas 700x700
Open element 25 from kit and place as a new layer
Grab the magik wand and click inside frame
Selections Modify expand by 10
Open paper 10 from kit and place as a new layer
Selections - invert - delete
Move layer under frame
Open element 35 - place to right of frame
Open tube and place to left of frame
Open element 41 and resize 42% - place behind tube with address showing
Open element 23 resize 45% - move beside the letter
Open element 6 and place to far right of tree
Open element 22 and resize 42% - place beside other present
Open element 40 resize 42% and place in front of tube
Open paper 6 from kit and place under tag
Open mask and apply
Add the Copyright and your License Number for the tube
Resize to your liking and save as PNG
This tutorial was created on December 9,2012 by Rhonda
Any resemblance to another Tag or Tutorial is purely coincidental

Labels:Christmas,FTU | 0
comments
Supplies Needed:
Tube of choice: Im using the wonderful art work Ismael Rac
You can purchase this tube at his store HERE
FTU kit by Mizteeque HERE
Template #6 by Tracy HERE
Look to the right and you will see the holiday temp downloads
Wordart by Mizteeque HERE
Don't forget to leave a thank you when downloading
Plugins Used:
Xero Radiance
Filters Unlimited Textures
Open template - Shift D to duplicate then close out original
Canvas size 700x660
Delete copyright layer and wordart
paste a paper of choice from the kit - I used paper4
selection invert delete
select none delete the original
paste a paper of choice from the kit - I used paper8
selection invert delete
select none delete the original
apply texture of choice
paste a paper of choice from the kit - I used paper10
selection invert delete
select none delete the original
Add closeup of tube to the shape
apply Xero Radiance with settings of choice
Add Xero Radiance again
I used the following:
Any 3 christmas balls of choice
Element 28
Element 33
Element 41
Element 51
Merge the layers
Place your name where you like it
Add the Copyright and your License Number for the tube
Resize to your liking and save as PNG
This tutorial was created on December 14, 2012 by Rhonda
Any resemblance to another Tag or Tutorial is purely coincidental

Labels:Christmas,FTU,Mizteeque | 1 comments
Supplies Needed:
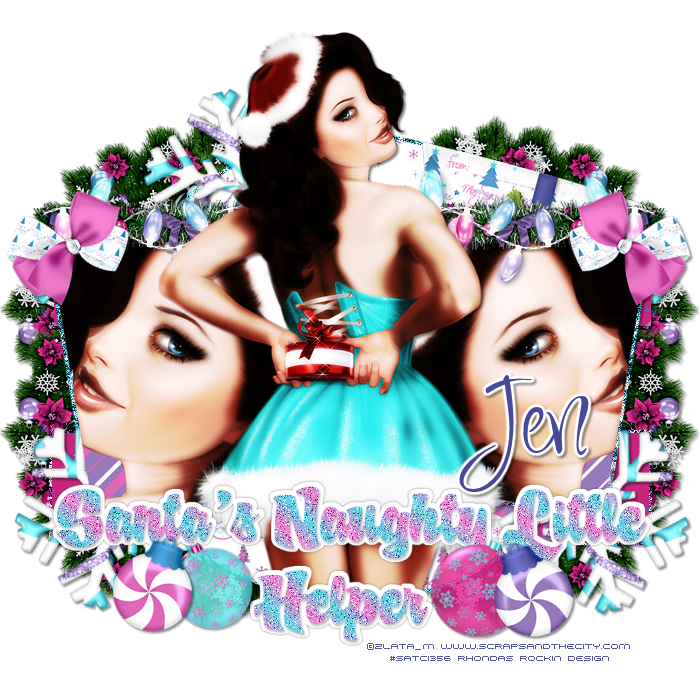
Tube of choice: I'm using the wonderful art work of Zlata_M
This tube was a prepaid which was gifted to me by a wonderful friend
You can purchase her tubes HERE
Limited FTU Scrap Kit by Jen from Sweets Temptations called "12 Days of Christmas 2012"
This kit will be available on her blog HERE
Don't forget to leave a thank you when downloading
Plugins Used:
Xero Radiance
Open template - Shift D to duplicate then close out original
Resize all layers 86%
Canvas size 700x7000
I deleted copyright & new layer
paste a paper of choice from the kit - I used paper6
selection invert delete
select none delete the original
I added a border of 3 with glitter 4 & noise
paste a paper of choice from the kit - I used paper33
selection invert delete
select none delete the original
I added a border of 3 with glitter 6 & noise
paste a paper of choice from the kit - I used glitter 6
selection invert delete
select none delete the original
add noise with settings of choice
paste a paper of choice from the kit - I used paper31
selection invert delete
select none delete the original
paste a paper of choice from the kit - I used paper1
selection invert delete
select none delete the original
Apply Xero Radiance with settings of choice
add a new layer and flood fill with gradient of choice
add noise with settings of choice
select none delete the original
add a new layer & flood fill with white
select none delete the original
Apply Xero radiance with settings of choice
I used the following:
Bow 1
Candy Ornament 1&5
Lights
Lollipop 2
Note
Ornament 5&6
Tinsel
Wreath
Add the Copyright and your License Number for the tube
Resize to your liking and save as PNG
This tutorial was created on December 10,2012 by Rhonda
Any resemblance to another Tag or Tutorial is purely coincidental

Supplies Needed:
Tube of choice: I'm using the wonderful art work of Suzanne Woolcott
Not sure if you can still purchase her tubes but her store is HERE
FTU Scrap Kit by MizTeeque called "Spearmint Christmas" HERE
Mask of choice
Don't forget to leave a thank you when downloading
Plugins Used:
Xero Radiance
Open element 28 - paste as a new layer
Resize 88% - rotate 90 degrees to the right
Grab the selection tool and draw a rectangle around the frame
Open paper 12 - Selections invert delete
Move paper under frame
Open element 5 - resize - place to right of frame
Open element 36 - resize small enough to place on tree - place as many as desired
Open element 23 - resize and place to top left of frame
Open element 43 - resize - place to bottom left of frame
Open element 41 - place beside heart
Open element 21 - resize and place to top left of frame
Open element 15 - resize - place to bottom left of frame on top of bells
Open element 29 - resize - place behind frame - duplicate
Move duplicate bow to the top - Using the eraser tool erase the parts you don't want showing
Place your main tube to right of frame
Apply Xero radiance with settings of choice
Merge your layers
Open paper and apply mask of choice
Add the Copyright and your License Number for the tube
Resize to your liking and save as PNG
This tutorial was created on December 1,2012 by Rhonda
Any resemblance to another Tag or Tutorial is purely coincidental

Labels:Christmas,FTU,Mizteeque | 0
comments
Supplies Needed:
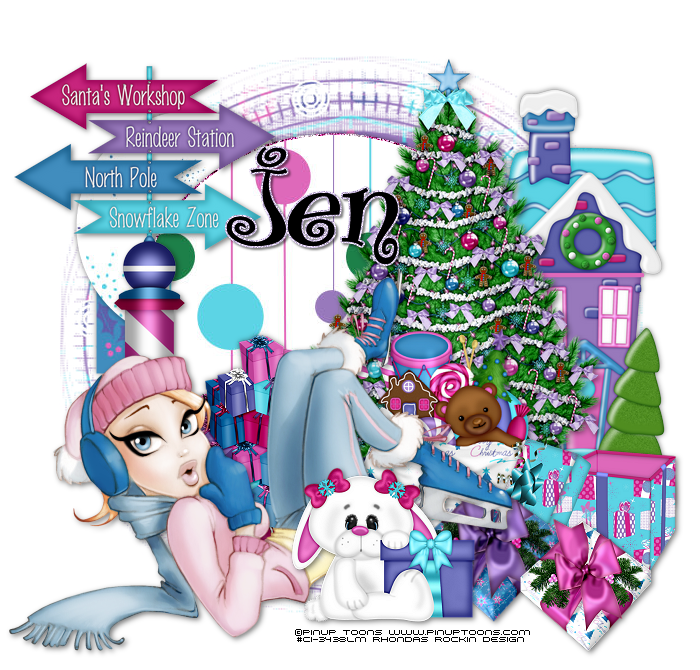
Tube of choice: I'm using the wonderful art work of Pinup Toons
Which you must obtain a license to use at CDO HERE
This tube was bought at CILM which has closed
Limited FTU Scrap Kit by Jen from Sweet Temptations called "12 Days of Christmas 2012"
You an download this awesome kit HERE
Template #9 from Carrie's Concoctions HERE
Don't forget to leave a thank you when downloading
Plugins Used:
Xero Radiance
Open template - Shift D to duplicate then close out original
Resize 84% all layers checked
Canvas size 700x675
delete copyright & layer SC1
paste a paper of choice from the kit - I used paper12
selection invert delete
select none delete the original
paste a paper of choice from the kit - I used paper14
selection invert delete
select none delete the original
paste a paper of choice from the kit - I used paper32
selection invert delete
select none delete the original
I also added a border around the circle
paste a paper of choice from the kit - I used paper14
selection invert delete
select none delete the original
Place your main tube
Xero Radiance with settings of choice
I used the following:
Bunny N Gift
Gift Stack
Gifts 3,4 & 6
House 1
Sign
Toy Bag
Tree
Add mask of choice
Add the Copyright and your License Number for the tube
Resize to your liking and save as PNG
This tutorial was created on December 7, 2012 by Rhonda
Any resemblance to another Tag or Tutorial is purely coincidental

Supplies Needed:
Tube of choice: I'm using the wonderful art work of Zlata_M
This tube was a gift I got from PFD
You can purchase her work HERE
FTU Scrap Kit by Jen from Sweets Temptations called "Crazy Christmas"
You an download this awesome kit HERE
Template #24 by Rosa HERE
Christmas mask 1 from Essex Girl HERE
Don't forget to leave a thank you when downloading
Plugins Used:
Xero Radiance
Open template - Shift D to duplicate then close out original
I deleted copyright,wordart,layers 6,7,8&9
paste a paper of choice from the kit - I used paper2
selection invert delete
select none delete the original
fill with a solid color of choice
selection invert delete
select none delete the original
add close-up of tube you are using
selection invert delete
select none delete the original
paste a paper of choice from the kit - I used paper1
selection invert delete
select none delete the original
apply Xero radiance with settings of choice
I used the following:
Bag 2
Bear 1
Candy 1
CandyCane 1
Gift
Hat Kitty
Ornaments 3&4
Sign
Tree
Open paper 5 and paste as new ;ayer
Open mask in psp and apply to tag
Add the Copyright and your License Number for the tube
Resize to your liking and save as PNG
This tutorial was created on December 3,2012 by Rhonda
Any resemblance to another Tag or Tutorial is purely coincidental

Labels:Christmas,FTU,Jens Sweet Temptations | 0
comments
Supplies Needed:
Tube of choice: I'm using the wonderful art work of Keith Garvey
This tube was purchased at PTE which has now closed
You can now find Garvey's work at his own store HERE
FTU Scrap Kit By Teresa from Topcats Tagz called "Christmas Joy"
You an find this awesome kit HERE
Please remember to say Thank You when downloading
Mask of choice
Plugins Used:
Xero Radiance
Open a blank image 700x700
Resize elements to your liking
Dropshadow of choice
Grab the magik wand & click inside wreath
Selection modify expand by 10
Open paper 2 & paste as a new layer - select none
Move paper under wreath
Effects Texture Blinds with settings of choice
Open element 24 and place inside wreath
Open element 1 and place to right of tag
You don't want the wreath to show behind the tree
Open elements 15&16 and place in front of tree
Open element 18 and place in front of presents
Open element 30 and place to left of tag
Place your main tube infron of wreath
Apply Xero Radiance with settings of choice
Open element 23 and place in front of tube
Merge your layers
Open mask and apply to tag
Add the Copyright and your License Number for the tube
Resize to your liking and save as PNG
This tutorial was created on November 23,2012 by Rhonda
Any resemblance to another Tag or Tutorial is purely coincidental

Labels:Christmas,FTU | 0
comments
Supplies Needed:
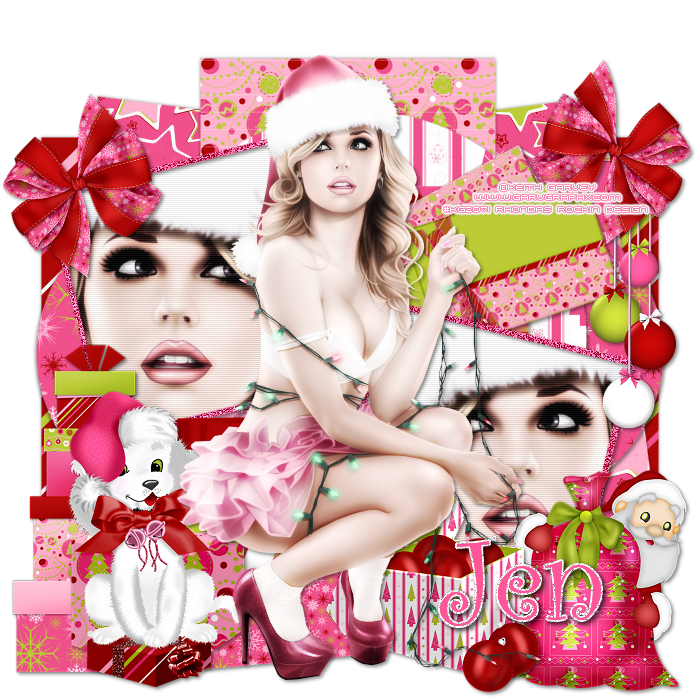
Tube of choice: I'm using the wonderful art work of Keith Garvey
You can purchase his work at his store HERE
PTU Scrap Kit by Jen from Sweets Temptations called "Spreading Christmas Cheer"
You an purchase this awesome kit HERE
Template #184 by Tami HERE
Don't forget to leave a thank you when downloading
Xero Radiance
Photo Effex Scanlines
Open template - Shift D to duplicate then close out original
Resize 88% all layers
Canvas size 700x700
paste a paper of choice from the kit - I used paper3
selection invert delete
select none delete the original
paste a paper of choice from the kit - I used paper9
selection invert delete
select none delete the original
I added notebook element
selection invert delete
select none delete the original
paste a paper of choice from the kit - I used paper6
selection invert delete
select none delete the original
paste a paper of choice from the kit - I used paper4
selection invert delete
select none delete the original
paste a paper of choice from the kit - I used paper1
selection invert delete
select none delete the original
add close-up of tube you are using
selection invert delete
select none delete the original
apply Xero Radiance with settings of choice
Xero radiance with settings of choice
I used the following:
Bag 2
Bow 1
Bulb Box
Card
Gifts
Ornaments
Pup
Santa
Add the Copyright and your License Number for the tube
Resize to your liking and save as PNG
This tutorial was created on December 1,2012 by Rhonda
Any resemblance to another Tag or Tutorial is purely coincidental

Labels:Christmas,Jens Sweet Temptations,PTU | 0
comments
Which you must obtain a license to use at Pic for Design HERE
PTU Scrap Kit by Jen from Sweet Temptations called "No Peekin"
You an purchase this awesome kit HERE
Template #106 by Rosey from Rosey's Place HERE
Mask of choice
Don't forget to leave a thank you when downloading
Plugins Used:
Xero Radiance
Open template - Shift D to duplicate then close out original
Canvas size 700x700
delete copyright,white&purple right circle
paste a paper of choice from the kit - I used paper10
selection invert delete
select none delete the original
paste a paper of choice from the kit - I used paper1
selection invert delete
select none delete the original
paste a paper of choice from the kit - I used paper2
selection invert delete
select none delete the original
paste a paper of choice from the kit - I used paper5
selection invert delete
select none delete the original
paste a paper of choice from the kit - I used paper2
selection invert delete
select none delete the original
paste a paper of choice from the kit - I used paper8
selection invert delete
select none delete the original
Xero Radiance with settings of choice
I used the following:
Bells
Candle1
Candycanes
Cardinal
Gifts
Gifts1
House
Train
Add mask of choice
Add the Copyright and your License Number for the tube
Resize to your liking and save as PNG
This tutorial was created on November 26, 2012 by Rhonda
Any resemblance to another Tag or Tutorial is purely coincidental

Labels:Christmas,Jens Sweet Temptations,PTU | 0
comments
Supplies Needed:
Tube of choice: I'm using the wonderful art work of Pinup Toons
You can purchase these tubes at CDO HERE
PTU Scrap Kit by Jen from Sweets Temptations called "All Spruced Up"
You an purchase this awesome kit HERE
Template #165 from Punky Butts HERE
Mask of choice
Don't forget to leave a thank you when downloading
Xero Radiance
Open template - Shift D to duplicate then close out original
Delete copyright, all stars layers, layers 9,10,11&12
paste a paper of choice from the kit - I used paper8
selection invert delete
select none delete the original
paste a paper of choice from the kit - I used paper5
selection invert delete
select none delete the original
paste a paper of choice from the kit - I used paper10
selection invert delete
select none delete the original
paste a paper of choice from the kit - I used paper6
selection invert delete
select none delete the original
paste a paper of choice from the kit - I used paper3
selection invert delete
select none delete the original
apply Xero radiance with settings of choice
I used the following:
Candycane 1
Gift
Letter to Santa
Lights
Ornament 3&5
Pup
Puppy N Box
Santa Box
Tree 1
Add mask of choice
Add the Copyright and your License Number for the tube
Resize to your liking and save as PNG
This tutorial was created on November 25,2012 by Rhonda
Any resemblance to another Tag or Tutorial is purely coincidental

Labels:Christmas,Jens Sweet Temptations,PTU | 0
comments
Supplies Needed:
Tube of choice: I'm using the wonderful art work of Zlata_M
You can purchase her tubes at PFD HERE
FTU Scrap Kit by Vesta called "Pink Ice Xmas" HERE
Mask of choice
Don't forget to leave a thank you when downloading
Plugins Used:
Xero Radiance
Open cluster frame 1 - paste as a new layer
Grab the freehand tool and draw around 1 frame at a time
Open closeup tube and place inside each frame
Selections invert delete
Apply Xero Radiance with settings of choice
Open element 2 - resize - place at top left of frame
Open element 29 - resize - place at bottom left of frame
Duplicate this element and move behind the frame
Grab the eraser tool and erase all parts showing on top of frame
You want the candle to show behind the frame
Open element 30 - resize and place to bottom right of frame
Open element 37 - resize - place in front of frame to left
Open element 31 - resize - place beside element 37 more to the right
Place your main tube to right of frame
Apply Xero radiance with settings of choice
Merge your layers
Open paper 10 and apply mask of choice
Merge group
Open sparkles 2 - apply on top of mask
Add the Copyright and your License Number for the tube
Resize to your liking and save as PNG
This tutorial was created on November 17,2012 by Rhonda
Any resemblance to another Tag or Tutorial is purely coincidental

Labels:Christmas,FTU | 0
comments
Supplies Needed:
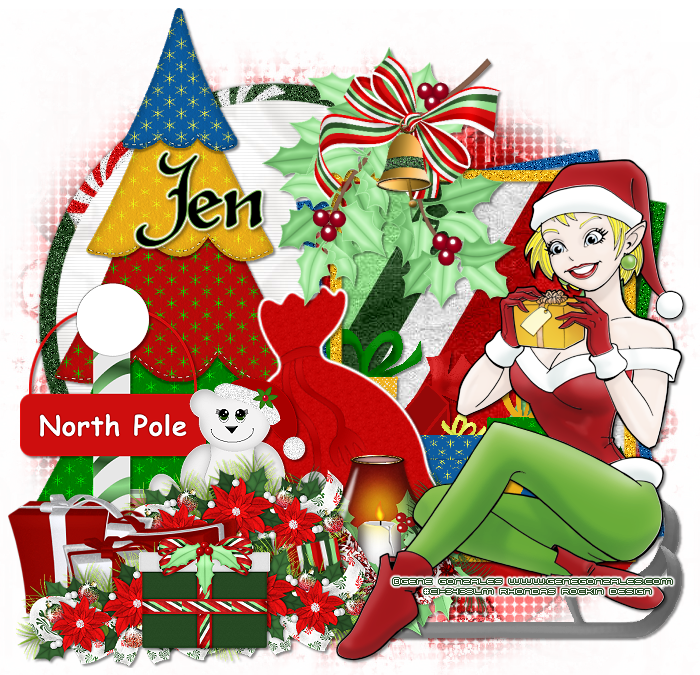
Tube of choice: I'm using the wonderful art work of Gene Gonzales
I'm not sure where or if he is selling at this time
This tube was bought at CILM which is now closed
PTU Scrap Kit by Jen from Sweet Temptations - It is her 12 Days of Christmas in 2009
You an purchase this awesome kit HERE
Template #1 by Cupcake Sprinkles from the Template Bundle Pack
You can get this HERE
Templates are located on the right hand side of page
Mask of choice
Don't forget to leave a thank you when downloading
Plugins Used:
Xero Radiance
Photo Effex Scanlines
Open template - Shift D to duplicate then close out original
Resize 130% all layers checked
Canvas size 700x675
delete copyright & staples
paste a paper of choice from the kit - I used paper34
selection invert delete
select none delete the original
add noise
paste a paper of choice from the kit - I used paper18
selection invert delete
select none delete the original
paste a paper of choice from the kit - I used paper30
selection invert delete
select none delete the original
paste a paper of choice from the kit - I used paper5
selection invert delete
select none delete the original
paste a paper of choice from the kit - I used paper36
selection invert delete
select none delete the original
Xero Radiance with settings of choice
I used the following:
Card 12
Card 2
Bear 12
Candle 5
Sack 1
Tree 11
Gift 5
Gift 6
Holly Bell 2
Sleigh 1
Add mask of choice
Add the Copyright and your License Number for the tube
Resize to your liking and save as PNG
This tutorial was created on November 18, 2012 by Rhonda
Any resemblance to another Tag or Tutorial is purely coincidental

Labels:Christmas,Jens Sweet Temptations,PTU | 0
comments
Supplies Needed:
Tube of choice: I'm using the wonderful art work of Ismael Rac
You can purchase his tubes at his store HERE
PTU Scrap Kit by Jen from Sweets Temptations called "Frosty"
You an purchase this awesome kit HERE
Template by Vix HERE
Don't forget to leave a thank you when downloading
Plugins Used:
Xero Radiance
Open template - Shift D to duplicate then close out original
Canvas size 700x675
I deleted copyright, frames, darker rectangle & diamonds
paste a paper of choice from the kit - I used paper8
selection invert delete
select none delete the original
Leave wordart as is
paste a paper of choice from the kit - I used paper2
selection invert delete
select none delete the original
Add frame one to rectangle
paste a paper of choice from the kit - I used paper6
selection invert delete
select none delete the original
Add frame 2
paste a paper of choice from the kit - I used paper5
selection invert delete
select none delete the original
Add frame 2 again
Apply Xero radiance with settings of choice
I used the following:
Flower 3
Skater Light
Snow
Snowflake 2
Snowman Light
Tree Light
Add the Copyright and your License Number for the tube
Resize to your liking and save as PNG
This tutorial was created on November 6,2012 by Rhonda
Any resemblance to another Tag or Tutorial is purely coincidental

Labels:Christmas,Jens Sweet Temptations,PTU | 0
comments
Supplies Needed:
Tube of choice: Im using the wonderful art work of Barbara Jensen
You can purchase her tubes at her store HERE
PTU Scrap Kit by Laura from Tiny Turtle Design called "Bad Girl Kit 2"
You an purchase this awesome kit at her store HERE
Template #400 by Millie HERE
Xero Radiance
Xero Fritillary
Open template - Shift D to duplicate then close out original
Resize all layers 90%
Canvas size 700x700
Delete copyright & layer 4
paste a paper of choice from the kit - I used paper45
selection invert delete
select none delete the original
paste a paper of choice from the kit - I used paper6
selection invert delete
select none delete the original
paste a paper of choice from the kit - I used paper10
selection invert delete
select none delete the original
paste a paper of choice from the kit - I used paper58
selection invert delete
select none delete the original
add new layer & flood fill with color of choice
select none delete the original
add new layer & flood fill with gradient of choice
select none delete the original
add noise with settings of choice
Add Xero Radiance with settings of choice
I used the following:
Element 3
Element 4
Element 11
Element 17
Element 19
Element 20
Element 45
Element 48
Element 49
Element 67
Element 73
Element 87
Element 88
Element 92
Element 99
Element 108
Element 111
Element 135
Open elements 94&95 and place on each side
apply Xero Fritillary with settings of choice
Merge the two together
Duplicate and mirror
Add the Copyright and your License Number for the tube
Resize to your liking and save as PNG
This tutorial was created on October 30,2013 by Rhonda
Any resemblance to another Tag or Tutorial is purely coincidental

Labels:PTU,Tiny Turtles | 0
comments
Sunday, October 27, 2013
Supplies Needed:
Tube of choice: Im using the wonderful art work of Maryline Cazenave
You must obtain a license to use this art at CDO HERE
FTU Scrapkit from Designs by Sarah
You can download this awesome kit by liking her page on facebook HERE
Open blank canvas 700x700
Open frame 2 and place as new layer
Click inside frame with magic wand
Selections modify expand by 5
Open paper 10 and paste as new layer
Selections invert delete
Move paper under frame
I used:
Flower 2
Flower 3
Flower 4
Trick or Treat Lights
Print 1&2
Add the Copyright and your License Number for the tube
Resize to your liking and save as PNG
This tutorial was created on October 27,2013 by Rhonda
Any resemblance to another Tag or Tutorial is purely coincidental

Friday, October 25, 2013
Supplies Needed:
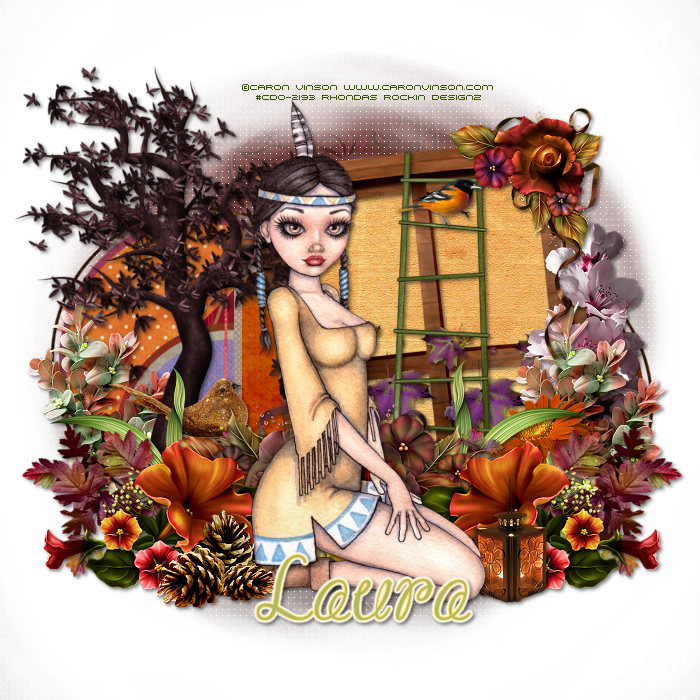
Tube of choice: Im using the wonderful art work of Caron Vinson
You can purchas these tubes at CDO HERE
PTU Scrap Kit by Laura from Tiny Turtle Design called "Indian Summer"
You can purchase this awesome kit at her store HERE
Template #8 by Lucky Star Scraps HERE
Mask #94 by Rosesblack HERE
Don't forget to leave a thank you when downloading
Open template - Shift D to duplicate then close out original
Canvas size 700x700
Delete copyright,mask & layers 9-11
paste a paper of choice from the kit - I used paper15
selection invert delete
select none delete the original
paste a paper of choice from the kit - I used paper11
selection invert delete
select none delete the original
paste a paper of choice from the kit - I used paper14
selection invert delete
select none delete the original
paste a paper of choice from the kit - I used paper28
selection invert delete
select none delete the original
paste a paper of choice from the kit - I used paper31
selection invert delete
select none delete the original
paste a paper of choice from the kit - I used paper15
selection invert delete
select none delete the original
paste a paper of choice from the kit - I used paper5
selection invert delete
select none delete the original
paste a paper of choice from the kit - I used paper21
selection invert delete
select none delete the original
paste a paper of choice from the kit - I used paper22
selection invert delete
select none delete the original
paste a paper of choice from the kit - I used paper24
selection invert delete
select none delete the original
paste a paper of choice from the kit - I used paper32
selection invert delete
select none delete the original
paste a paper of choice from the kit - I used paper26
selection invert delete
select none delete the original
paste a paper of choice from the kit - I used paper30
selection invert delete
select none delete the original
paste a paper of choice from the kit - I used paper19
selection invert delete
select none delete the original
I used the following:
Element 13
Element 39
Element 49
Element 51
Element 54
Element 55
Element 63
Element 68
Element 84
Element 89
Element 95
Element 96
Element 97
Element 100
Element 104
Open paper 8 & apply mask
I added a weave effect also
Add the Copyright and your License Number for the tube
Resize to your liking and save as PNG
This tutorial was created on October 25,2013 by Rhonda
Any resemblance to another Tag or Tutorial is purely coincidental

Labels:PTU,Thanksgiving,Tiny Turtles | 0
comments
Supplies Needed:
Tube of choice: I'm using the wonderful art work of Keith Garvey
You can purchase his tubes at his own store HERE
FTU kit by Jen from Sweet Temptations called "Harvest Special" HERE
Please leave some love when you download
Just place your elements where you want them
Open blank canvas 700x700
Place your main tube where you want it to be on tag
Add elements around the tube
Here are the ones I used:
Branch
Crow 1
Gazebo
Harvest
Owl
Pumpkins
Scarecrow
Squirrel
Turkey
Add the Copyright and your License Number for the tube
Resize to your liking and save as PNG
This tutorial was created on November 8,2012 by Rhonda
Any resemblance to another Tag or Tutorial is purely coincidental

Labels:FTU,Jens Sweet Temptations,Thanksgiving | 0
comments
Supplies Needed:
Tube of choice: Im using the wonderful art work of Elias Chatzoudis
You can purchase his work at his store HERE
PTU Scrap Kit by Jen from Sweets Temptations called "Pumpkin Spice"
You an purchase this awesome kit HERE
Thanksgiving Template #111 by Leah HERE
Mask of choice
Don't forget to leave a thank you when downloading
Xero Radiance
Filters Unlimited
Open template - Shift D to duplicate then close out original
Resize 110% all layers
Canvas size 700x675
delete top 3 layers
add noise to all the frame layers
paste a paper of choice from the kit - I used paper10
selection invert delete
select none delete the original
paste a paper of choice from the kit - I used paper7
selection invert delete
select none delete the original
add a brown color
apply Filters Unlimited Fine Canvas
select none delete the original
paste a paper of choice from the kit - I used paper2
selection invert delete
select none delete the original
paste a paper of choice from the kit - I used paper9
selection invert delete
select none delete the original
paste a paper of choice from the kit - I used paper6
selection invert delete
select none delete the original
paste a paper of choice from the kit - I used paper1
selection invert delete
select none delete the original
Xero radiance with settings of choice
I used the following:
Bow
Branch
Cake
Candle
Cup
Cupcake 1&3
Jar
Pies
Turkey
Apply mask
Add the Copyright and your License Number for the tube
Resize to your liking and save as PNG
This tutorial was created on November 18,2012 by Rhonda
Any resemblance to another Tag or Tutorial is purely coincidental

Labels:Jens Sweet Temptations,PTU,Thanksgiving | 0
comments
Thursday, October 24, 2013
Supplies Needed:
Tube of choice: Im using the wonderful art work of Caron Vinson
You can find her art at CDO HERE
PTU Scrap Kit by Jen from Sweet Temptations called Midnight Fright
You can purchase this kit at her blog HERE
Mask of choice
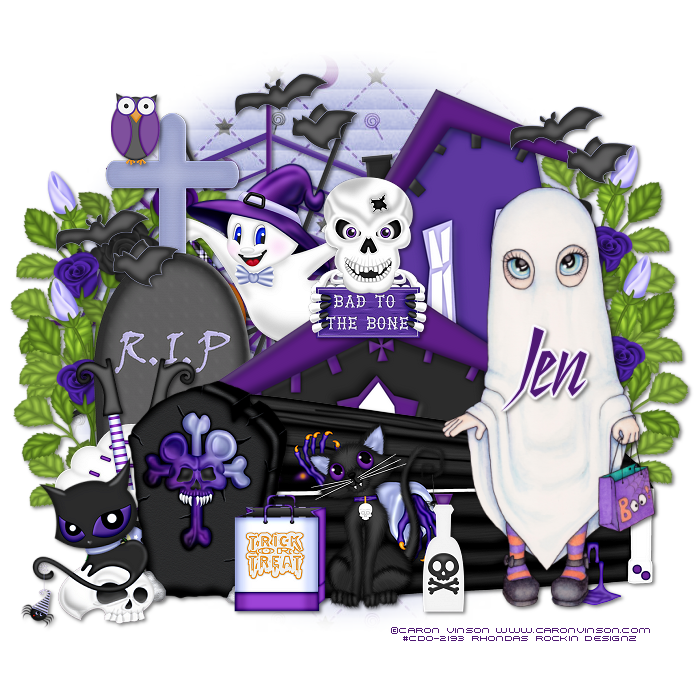
Open blank canvas 700x700
Open elements of choice and place where desired
I used the following:
Bad to the Bone
Bag
Bats
Bottle
Coffin
Flowers
Ghost 1
Grave
Haunted House
Owl
Kitty
Tombstone
Web
Witch Cupcake
Open paper 10 & apply mask
Add the Copyright and your License Number for the tube
Resize to your liking and save as PNG
This tutorial was created on October 24,2013 by Rhonda
Any resemblance to another Tag or Tutorial is purely coincidental

Labels:Halloween,Jens Sweet Temptations,PTU | 0
comments
Tuesday, October 22, 2013
Supplies Needed:
Tube of choice: Im using the wonderful art work of The Hunter
You can purchase his tubes at SATC HERE
PTU Scrap Kit by Mizteeque from called "Steampunk 2"
You an purchase this awesome kit HERE
Template #24 by Flaminsal HERE
Mask by Chaos HERE
Don't forget to leave a thank you when downloading
Open template - Shift D to duplicate then close out original
Delete copyright & wordart
paste a paper of choice from the kit - I used paper5
selection invert delete
select none delete the original
paste a paper of choice from the kit - I used paper1
selection invert delete
select none delete the original
paste a paper of choice from the kit - I used paper10
selection invert delete
select none delete the original
paste a paper of choice from the kit - I used paper7
selection invert delete
select none delete the original
paste a paper of choice from the kit - I used paper8
selection invert delete
select none delete the original
paste a paper of choice from the kit - I used paper6
selection invert delete
select none delete the original
paste a paper of choice from the kit - I used paper2
selection invert delete
select none delete the original
I used the following:
Element 1
Element 3
Element 4
Element 6
Element 11
Element 13
Element 15
Element 17
Element 18
Element 22
Element 24
Element 25
Element 26
Element 28
Element 29
Element 31
Open paper 1 and apply mask
Add the Copyright and your License Number for the tube
Resize to your liking and save as PNG
This tutorial was created on October 22,2013 by Rhonda
Any resemblance to another Tag or Tutorial is purely coincidental

Labels:Mizteeque,PTU | 0
comments
Thursday, October 17, 2013
Labels:Show Off | 0
comments
Supplies Needed:
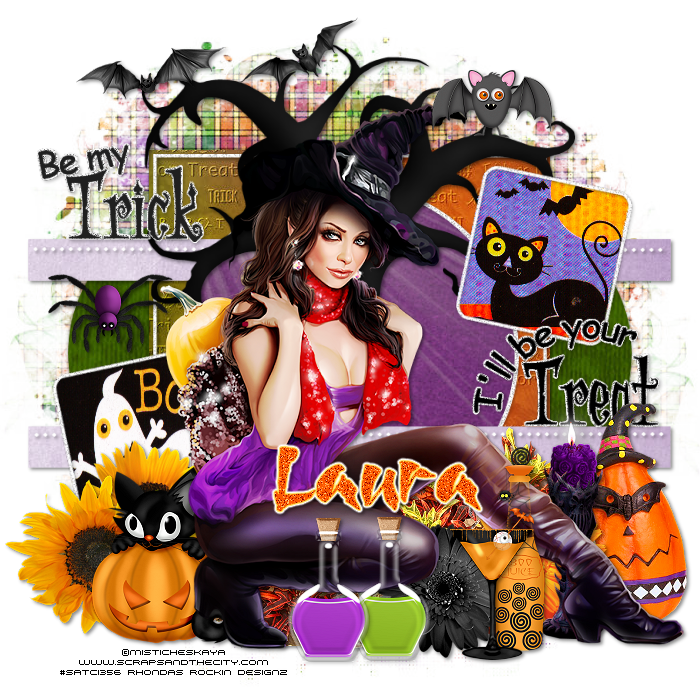
Tube of choice: Im using the wonderful art work of Misticheskaya
You can purchase this artists tubes at SATC HERE
PTU Scrap Kit by Laura from Tiny Turtle Design called "Spookyween"
You an purchase this awesome kit at her store HERE
Halloween Template #2 by TwyztedT's Playroom HERE
Mask #400 by Vix HERE
Font is Goombella HERE
Xero Radiance
Open template - Shift D to duplicate then close out original
Resize template 87% all layers
Canvas 700x700
Delete copyright
paste a paper of choice from the kit - I used paper9
selection invert delete
select none delete the original
paste a paper of choice from the kit - I used paper32
selection invert delete
select none delete the original
paste a paper of choice from the kit - I used paper31
selection invert delete
select none delete the original
paste a paper of choice from the kit - I used paper23
selection invert delete
select none delete the original
add new layer
I used elements 93&123 and pasted into image
delete original
I left all the shadowed layers as they were
apply Xero Radiance with settings of choice
I used the following:
Element 14
Element 18
Element 20
Element 27
Element 35
Element 51
Element 53
Element 54
Element 63
Element 70
Element 77
Element 88
Element 94
Element 95
Element 96
Element 107
Element 114
Element 126
Merge your layers
Open paper 16 & apply mask
Add the Copyright and your License Number for the tube
Resize to your liking and save as PNG
This tutorial was created on October 17,2013 by Rhonda
Any resemblance to another Tag or Tutorial is purely coincidental

Labels:Halloween,PTU,Tiny Turtles | 0
comments

Labels:Chick News | 0
comments
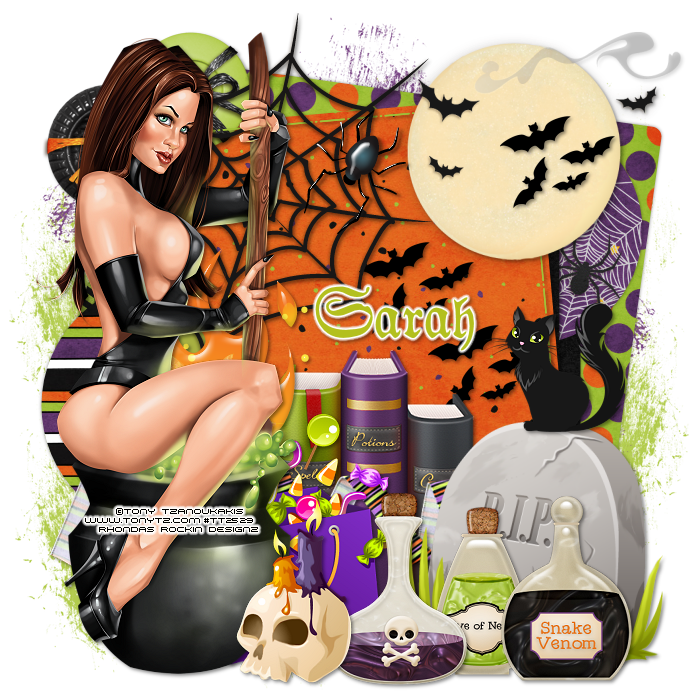
Supplies Needed:
Tube of choice: Im using the wonderful art work of Tony Tzanoukakis
You must obtain a license to use his art HERE
PTU Scrap Kit from Designs by Sarah called "Halloween Hijinks"
You an purchase this awesome kit at Pimp My Tags With Scraps HERE
Template #10 from Dangerous Delicious Designz HERE
Font used is Auld Magic HERE
Open template - Shift D to duplicate then close out original
Canvas size 700x700
delete copyright,wordart & star
paste a paper of choice from the kit - I used paper8
selection invert delete
select none delete the original
paste a paper of choice from the kit - I used paper3
selection invert delete
select none delete the original
paste a paper of choice from the kit - I used paper3
selection invert delete
select none delete the original
paste a paper of choice from the kit - I used paper7
selection invert delete
select none delete the original
paste a paper of choice from the kit - I used paper1
selection invert delete
select none delete the original
paste a paper of choice from the kit - I used paper9
selection invert delete
select none delete the original
paste a paper of choice from the kit - I used paper5
selection invert delete
select none delete the original
add new layer & flood fill with color of choice
select none delete the original
I used the following:
Bats
Black Cat
Buttons 1&2
Couldron Flames
Moon
Potion 1,2&3
Print 1&2
Ribbon 2
Skull Candles
Tomdstone
Web
Add the Copyright and your License Number for the tube
Resize to your liking and save as PNG
This tutorial was created on October 17,2013 by Rhonda
Any resemblance to another Tag or Tutorial is purely coincidental

Labels:Halloween,Pimp My Tags With Scraps,PTU | 0
comments
Wednesday, October 16, 2013
Supplies Needed:
Tube of choice: Im using the wonderful art work of Very Many
Which you must obtain a license to use at PFD HERE
PTU Scrap Kit by WD Designs called "Magical Darkness"
You an purchase this awesome kit at Designer Scraps HERE
Texture of choice HERE
Mask #156 by Vaybs HERE
Please leave a thank you when downloading freebies
Open blank 700x700 image
Open frame 6 & paste as new layer
Grab the magic wand and click inside frame
Selections modify expand by 6
Open paper 14 & paste as new layer
Selections invert delete
Move paper under frame
Open texture of choice and place as new layer
Selections modify expand by 6
Selections invert delete
Change blend mode to Luminance
I used the floowing:
Element 10
Element 25
Element 35
Element 38
Element 39
Element 40
Element 42
Element 50
Element 56
Element 57
Element 64
Element 65
Element 72
Element 75
Element 84
Open paper 17 & apply mask
Add the Copyright and your License Number for the tube
Resize to your liking and save as PNG
This tutorial was created on October 16,2013 by Rhonda
Any resemblance to another Tag or Tutorial is purely coincidental

Labels:Designer Scraps,Halloween,PTU | 0
comments
Subscribe to:
Posts
(Atom)
Grab My Blinkie

About Me
Hello friends and welcome to my blog!!! My name is Rhonda and I live in South East Ga., little town called Lumber City. I have 2 sons, 2 DIL's and 3 grandchildren. I work in healthcare as an RN.
When not working, I enjoy playing in PSP. It has been my passion over 20 years. PSP is relaxing and takes my mind away from troubles of life. I enjoy writing tutorials on my downtime.
I am expanding my creations to frames, clusters, templates and hopefully masks. I have NEVER made a mask but I have the time to learn now and I am excited. These will be FTU, all I ask is please download from the blog and if you are in a group or forum please send others to my blog and DO NOT HOTLINK. I would love to see your creations and show them off.
If you need to contact me with any questions concerning my tutorials or creations, send me an email. I am aware some of my older tutorials have links that are no longer working due to designers closing their blog. This is beyond my control. I am unable to share anything which was not shareable before. I honor all designers TOU.
I CT For
T.O.U.
All tutorials that are on my blog have been written by me. Any resemblance to another tag or tutorial is purely coincidental. Please do not copy and claim as your own. You are welcome to use these tutorials in any groups or forums but please link back to my blog. I would love to see any tag that is made using my tutorial. If you have any questions or concerns you can contact me at rsheath31549@yahoo.com.
Cluster Frames are Personal Use ONLY!!!! Please do not claim them as your own or rip them apart. You are welcome to use in forums or groups but please link back to blog. My TOU are included in the downloads. I would love to see any creations you make with my tuts or other creations. Send them to me and I will display them.
My goal for this blog is to make creations others can use and enjoy. I want to focus on being positive through difficult times. Show importance of accepting others, no judging, just respect. Showing kindness to others can change another's life, even for a brief time
Powered by Blogger.
Search
Categories
- Adrienne Designs
- Alicia Mujica
- April Shareables
- Art-Content
- Awards
- Awareness
- Barbara Jensen
- Beth Show-Off
- Birthday
- Black Widow Creations
- Blog Train
- BLT Dezingz
- Breast Cancer Awareness
- CC Excluisve
- CDO
- Chachaz Creations
- Chichi Designz
- Chick News
- Chris Pastel
- Christmas
- Cluster Frame Tuts
- Cluster.
- Cluster. FTU Cluster Frames
- Coffee Arts Design's
- Country
- Daelmans Designs
- Dangerously Delicious Designz
- Deedles and Doodles
- DeesSign Depot
- Designer Scraps
- Designz By Anorie
- Designz by Shelly
- Diamond Creations
- Digital Art Heaven
- Doodle By Design
- Dreaming With Bella
- Easter
- Elegance Fly
- Elli's
- Facebook Freebie
- Fall
- FTU
- FTU Cluster Frames
- FTU Tube
- General
- GraphFreaks
- Halloween
- Hania Design
- Here2Help Mirella
- Icy Blue Mystic Designs
- Inzpired Creationz
- Inzpired Creationz Store
- Jens Sweet Temptations
- July 4th
- Kathy's PSP Designs
- Kizzed by Kelz
- Limited FTU
- MardiGras
- Military
- Misticheskaya
- Mizteeque
- Mother's Day
- motivational
- My Tagging Addiction
- New Years
- News
- News about kits
- No Scraps
- Pammers Passion
- Patriotic
- Personal
- PFD
- Pimp My Tags With Scraps
- Pink Paradox
- PTU
- PTU Clusters
- PTU now FTU
- Purple Dreams
- Retired Kits
- s
- S&Co
- School
- Scrap it Studio
- Show Off
- Snags
- Spring
- St Patricks Day
- Steampunk
- Summer
- Tagcatz Design
- Tags with no Tuts
- Thanksgiving
- The Taggers Lounge
- The Taggers Lounge Exclusive
- Tiny Turtles
- Tiny Turtles Store
- Updates
- Valentine
- VeryMany
- VM Artists
- VMArtists
- Western
- Wicked Princess Scraps
- Winter
- Wonderland
- WordArt
- Zindy Zone
- Zlatam Store
Blog Archive
-
▼
2013
(304)
-
▼
October
(42)
- Santas Gift Babe - PTU
- Letter to the North Pole - FTU
- All Dreams - FTU
- Santa's Naughty Little Helper - FTU
- Spearmint Christmas - FTU
- This Way to Christmas - FTU
- Just a Little Present - FTU
- Christmas Joy - FTU
- Spreading Garv Cheer - PTU
- Christmas Train - PTU
- Dear Santa - PTU
- North Pole Cutie - FTU
- Gift for Me - PTU
- Winter Wonderland - PTU
- So Damn Sexy - PTU
- Wake me on Halloween - FTU
- Indian Summer - PTU
- Pilgrim Harvest - FTU
- What's Cooking - PTU
- Ghost Fright - PTU
- Steampunk 2 - PTU
- Show off from Skia
- Be my Trick - PTU
- Halloween with the Chicks
- Stirring Some Magic - PTU
- Magical Vampire - PTU
- Happy Halloween from the Chicks - Exclusive
- Tag Results from my tutorials
- Pink is my Color - PTU
- Geek Talk - PTU
- Check Your Bumps - FTU
- Skull Potion - FTU
- Potion Spells - PTU
- Witch of the Night - PTU
- Once Upon a Time - PTU
- Autumn Pickin - PTU
- Vampire Spider - PTU
- Come Fly With Me - PTU
- BCA - FTU
- Bright Colors of Fall - PTU
- Trick or Treat Train - PTU
- Beautiful - FTU
-
▼
October
(42)
