Showing posts with label Mizteeque. Show all posts
Showing posts with label Mizteeque. Show all posts
Sunday, November 19, 2023


Tuesday, May 23, 2023

Wednesday, February 22, 2023

Monday, May 17, 2021

This tutorial is written for those with knowledge of PSP
Supplies Needed:
Tube of choice: I'm using the wonderful art work of VeryMany
Tube was purchased at their store HERE
FTU kit by Mizteeque's Digital Designs HERE
Part of her great birthstone collection
Mask of choice
Ok Lets get Started:
Open blank canvas 700x700
Open frame 4 and place to center
Open frame 5 and place on top (resize if needed)
Open frame 1 (resize)
Click inside frame with magik wand, expand by 10
Open new layer under frame
Paste paper of choice into selection
Place tube and start building tag
Use any elements of choice. I used the following:
Element 4
Element 6
Element 7
Element 10
Element 11
Element 19
Element 23
Element 29
Element 35
Element 39
Element 41
Element 50
Merge layers and add mask of choice
Place your name where you like it
Add the Copyright and your License Number for the tube
Resize to your liking and save as PNG
This tutorial was created on May 17,2021 by Rhonda
Any resemblance to another Tag or Tutorial is purely coincidental
Monday, May 3, 2021

This tutorial is written for those with knowledge of PSP
Supplies Needed:
Tube of choice: I'm using the wonderful art work of Attila
Tube was included in kit
Kit by Purple Dreams Scraps called Mothers day
Kit purchased at PFD HERE
Mask #303 by Mizteeques HERE
Ok Lets get Started:
Open blank canvas 700x700
Open element 43 and place to canvas
I rotated my frame to right a little
Place tube to canvas and start building
Use any elements of choice. I used the following:
Element 1
Element 3
Element 5
Element 27
Element 29
Element 42
Element 45
Element 48
Element 49
Element 50
Element 52
Element 56
Element 59
Element 60
Element 64
Element 72
Element 78
Element 79
Element 80
Merge layers and add mask of choice
Place your name where you like it
Add the Copyright and your License Number for the tube
Resize to your liking and save as PNG
This tutorial was created on May 3,2021 by Rhonda
Any resemblance to another Tag or Tutorial is purely coincidental
Friday, June 17, 2016
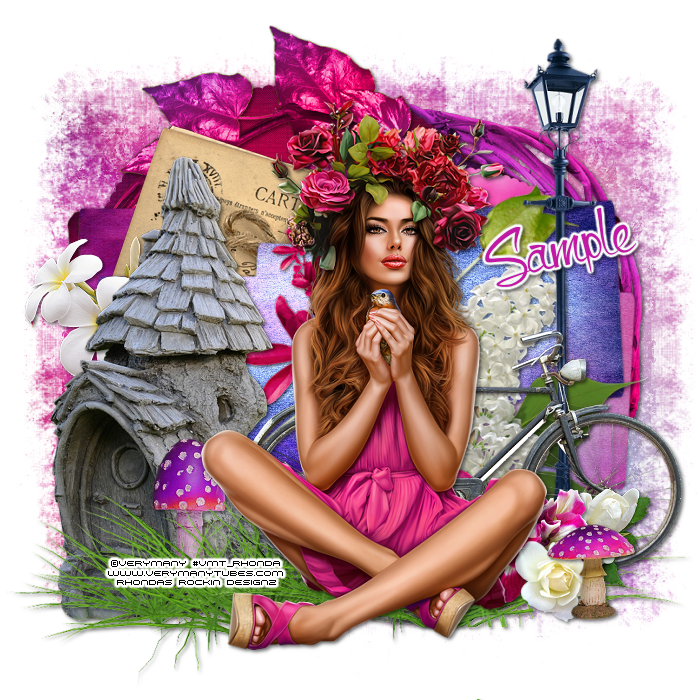
This tutorial is written for those with knowledge of PSP
Supplies Needed:
Tube of choice: I'm using the wonderful art work of VeryMany
Which you must obtain a license to use HERE
FTU Scrapkit by MizTeeques HERE
Template #195 by HorsePlay's Pasture HERE
Mask #14 by Crispied HERE
Ok Lets get Started:
Open template - Shift D to duplicate then close out original
Canvas size 700x700
Delete copyright
Click on raster 1&2 selections,select all, float,defloat
paste a paper of choice from the kit - I used paper6
selection invert delete
select none delete the original
Click on raster 3 selections,select all, float,defloat
paste a paper of choice from the kit - I used paper4
selection invert delete
select none delete the original
Click on raster 4 selections,select all, float,defloat
paste a paper of choice from the kit - I used paper13
selection invert delete
select none delete the original
Click on raster 5,9&10 selections,select all, float,defloat
paste a paper of choice from the kit - I used paper2
selection invert delete
select none delete the original
Click on raster 6,7&8 selections,select all, float,defloat
paste a paper of choice from the kit - I used paper12
selection invert delete
select none delete the original
Place your tube
Xero Radiance with settings of choice
Now time to add our elements
I used the following:
Element 6
Element 8
Element 11
Element 12
Element 17
Element 22
Element 23
Element 33
Element 34
Element 36
Element 38
Element 42
Element 43
Element 47
Merge your layers
Open paper of choice and apply mask
Place your name where you like it
Add the Copyright and your License Number for the tube
Resize to your liking and save as PNG
This tutorial was created on June 17,2016 by Rhonda
Any resemblance to another Tag or Tutorial is purely coincidental

Saturday, April 9, 2016
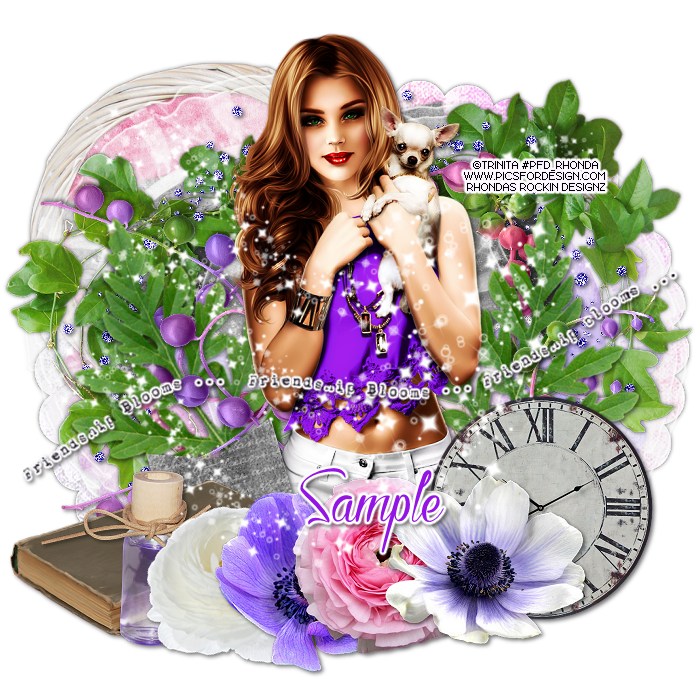
This tutorial is written for those with knowledge of PSP
Supplies Needed:
Tube of choice: I'm using the wonderful art work of Trinita
You can purchase these tubes at PFD HERE
FTU Scrapkit by MizTeeques HERE
Template #1 by Brutal Designs HERE
Mask of choice
Don't forget to leave a thank you when downloading
Ok Lets get Started:
Open template - Shift D to duplicate then close out original
Canvas size 700x700
Delete copyright and wordart
Click on grey circle selections,select all, float,defloat
paste a paper of choice from the kit - I used paper6
selection invert delete
select none delete the original
Click on blk circle selections,select all, float,defloat
paste a paper of choice from the kit - I used paper3
selection invert delete
select none delete the original
Click on pink rec selections,select all, float,defloat
paste a paper of choice from the kit - I used paper14
selection invert delete
select none delete the original
Click on blk line selections,select all, float,defloat
paste a paper of choice from the kit - I used paper9
selection invert delete
select none delete the original
Click on grey rec selections,select all, float,defloat
paste a paper of choice from the kit - I used paper16
selection invert delete
select none delete the original
Click on dark grey sqaures selections,select all, float,defloat
paste a paper of choice from the kit - I used paper4
selection invert delete
select none delete the original
Add noise to frames
Place your tube
apply Xero radiance with settings of choice
Now add any other elements of choice
I used the following:
Element 1
Element 4
Element 6
Element 11
Element 17
Element 18
Element 36
Element 37
Element 44
Element 47
Element 48
Element 49
Element 52
Element 53
WA 2
Merge your layers & apply mask of choice
Place your name where you like it
Add the Copyright and your License Number for the tube
Resize to your liking and save as PNG
This tutorial was created on April 9,2016 by Rhonda
Any resemblance to another Tag or Tutorial is purely coincidental

Wednesday, September 10, 2014

This tutorial is written for those with knowledge of PSP
Supplies Needed:
Tube of choice: I'm using the wonderful art work of Elias Chatzoudis
This tube was purchased at MPT which has closed
You can purchase his tubes at his store HERE
PTU Scrap Kit by Mizteeque from called "Jeepers Creepers"
You an purchase this awesome kit HERE
Template #5 by Chrissy HERE
Mask & Word art is included in kit
Don't forget to leave a thank you when downloading
Xero Radiance
Open template - Shift D to duplicate then close out original
Canvas size 700x700
Delete copyright
We will work from bottom up
paste a paper of choice from the kit - I used paper13
selection invert delete
select none delete the original
paste a paper of choice from the kit - I used paper15
selection invert delete
select none delete the original
paste a paper of choice from the kit - I used paper10
selection invert delete
select none delete the original
paste a paper of choice from the kit - I used paper16
selection invert delete
select none delete the original
add new layer & flood fill with solid color
select none delete the original
add noise
paste a paper of choice from the kit - I used paper1
selection invert delete
select none delete the original
add new layer & flood fill with solid color
select none delete the original
Apply Xero Radiance with settings of choice
I used the following:
Element 13
Element 16
Element 17
Element 33
Element 39
Element 41
Element 47
Element 52
Element 53
Element 61
Element 64
Element 71
Open paper of choice and apply mask
Add the Copyright and your License Number for the tube
Resize to your liking and save as PNG
This tutorial was created on September 10,2014 by Rhonda
Any resemblance to another Tag or Tutorial is purely coincidental

Monday, August 11, 2014

This tutorial is written for those with knowledge of PSP
Supplies Needed:
Tube of choice: I'm using the wonderful art work of Misticheskaya
You can purchase these tubes at PFD HERE
PTU Scrap Kit by Mizteeque from called "Hydrangeas"
You an purchase this awesome kit HERE
Fall Template #2 by TwystedT's Playground HERE
Mask of choice
Don't forget to leave a thank you when downloading
Xero Porcelin
Open template - Shift D to duplicate then close out original
Resize all layers 90%
Canvas size 704x700
Delete copyright,layers 2&11
paste a paper of choice from the kit - I used paper9
selection invert delete
select none delete the original
paste a paper of choice from the kit - I used paper10
selection invert delete
select none delete the original
paste a paper of choice from the kit - I used paper11
selection invert delete
select none delete the original
paste a paper of choice from the kit - I used paper3
selection invert delete
select none delete the original
paste close-up of tube inside frames
selection invert delete
select none delete the original
apply Xero Porcelin at default settings
I used the following:
Element 1
Element 7
Element 8
Element 9
Element 10
Element 11
Element 16
Element 17
Element 18
Element 25
Element 27
Element 28
Open paper and apply mask
I added 2 masks to my tag
Add the Copyright and your License Number for the tube
Resize to your liking and save as PNG
This tutorial was created on August 11,2014 by Rhonda
Any resemblance to another Tag or Tutorial is purely coincidental

Saturday, August 9, 2014

This tutorial is written for those with knowledge of PSP
Supplies Needed:
Tube of choice: I'm using the wonderful art work of Very Many
You can purchase this tubes at their store HERE
FTU Scrap Kit by Mizteeque called "Sweet Lime"
You can purchase this awesome kit on her blog HERE
Mask #47 by Rosesblack HERE
Open canvas size 700x700
Open element 21 & paste as new layer
Click inside frame with magic wand
Selections modify 10
add new layer under frame
Open paper 14 and paste into selections
select none
I used the following elements:
Element 3
Element 4
Element 6
Element 7
Element 9
Element 14
Element 16
Element 24
Element 32
Element 49
Element 50
Element 52
Open paper 5 and apply mask
Add the Copyright and your License Number for the tube
Resize to your liking and save as PNG
This tutorial was created on August 9,2014 by Rhonda
Any resemblance to another Tag or Tutorial is purely coincidental
Friday, August 1, 2014

This tutorial is written for those with knowledge of PSP
Supplies Needed:
Tube of choice: I'm using the wonderful art work of Alex Prihodko
You can purchase these tubes at PFD HERE
FTU Scrap Kit by Mizteeque from called "WheatFields"
You an purchase this awesome kit HERE
Template #504 by Millie HERE
Masks of choice
Xero Porcelin
Open template - Shift D to duplicate then close out original
Increase Canvas size 700x700
Delete copyright
paste a paper of choice from the kit - I used paper7
selection invert delete
select none delete the original
paste a paper of choice from the kit - I used paper7
selection invert delete
select none delete the original
paste a paper of choice from the kit - I used paper13
selection invert delete
select none delete the original
paste a paper of choice from the kit - I used paper9
selection invert delete
select none delete the original
paste a paper of choice from the kit - I used paper11
selection invert delete
select none delete the original
paste a paper of choice from the kit - I used paper12
selection invert delete
select none delete the original
apply Xero Radiance
I used the following:
Element 1
Element 5
Element 6
Element 9
Element 10
Element 12
Element 14
Element 16
Element 17
Element 22
Element 26
Element 27
Element 28
Element 32
Add the Copyright and your License Number for the tube
Resize to your liking and save as PNG
This tutorial was created on August 1,2014 by Rhonda
Any resemblance to another Tag or Tutorial is purely coincidental
Thursday, July 3, 2014

This tutorial is written for those with knowledge of PSP
Supplies Needed:
Tube of choice: I'm using the wonderful art work of Barbara Jensen
You can purchase these tubes at her store HERE
FTU Scrap Kit by Mizteeque HERE
Template #238 by Toxic Desirez HERE
Mask #30 by Moonbeams & Spiderwebs HERE
Don't forget to leave a thank you when downloading
Xero Radiance
Xero Fritillary
Open template - Shift D to duplicate then close out original
Resize template
Canvas size 700x700
Delete copyright,rasters 4&11
paste a paper of choice from the kit - I used paper3
selection invert delete
select none delete the original
add new layer & flood fill with solid color of choice
select none delete the original
add noise
paste a paper of choice from the kit - I used paper7
selection invert delete
select none delete the original
paste a paper of choice from the kit - I used paper5
selection invert delete
select none delete the original
paste a paper of choice from the kit - I used paper1
selection invert delete
select none delete the original
add new layer & flood fill with solid color of choice
select none delete the original
add blinds effect
add new layer & flood fill with solid color of choice
select none delete the original
add Xero Fritillary
add new layer & flood fill with solid color of choice
select none delete the original
add noise
add new layer & flood fill with solid color of choice
select none delete the original
add noise
paste a paper of choice from the kit - I used paper6
selection invert delete
select none delete the original
apply Xero Radiance
I used the following:
Element 2
Element 4
Element 11
Element 18
Element 22
Element 34
Element 41
Element 44
Open paper 8 & apply mask
Add the Copyright and your License Number for the tube
Resize to your liking and save as PNG
This tutorial was created on July 3,2014 by Rhonda
Any resemblance to another Tag or Tutorial is purely coincidental
Monday, May 19, 2014

This tutorial is written for those with knowledge of PSP
Supplies Needed:
Tube of choice: I'm using the wonderful art work of Very Many
You can purchase this tube HERE
FTU Scrap Kit by Mizteeque HERE
Template by Scraps Dimensions HERE
Mask of choice
Don't forget to leave a thank you when downloading
Xero Radiance
Xero Fritillary
Tramages Mo'Jellyfish
Open template - Shift D to duplicate then close out original
Increase Canvas size 700x700
Delete copyright and flower layers
paste a paper of choice from the kit - I used paper1
selection invert delete
select none delete the original
paste a paper of choice from the kit - I used paper2
selection invert delete
select none delete the original
add new layer and flood fill with solid color of choice
select none delete the original
add noise with settings of choice
apply Tramages Mo'Jellyfish at default settings
paste a paper of choice from the kit - I used paper8
selection invert delete
select none delete the original
apply Xero Fritillary with settings of choice
apply Xero Radiance
I used the following:
Element 2
Element 5
Element 6
Element 9
Element 11
Element 13
Element 14
Element 18
Element 20
Element 24
Element 25
Element 31
Element 33
Element 34
Add the Copyright and your License Number for the tube
Resize to your liking and save as PNG
This tutorial was created on May 18,2014 by Rhonda
Any resemblance to another Tag or Tutorial is purely coincidental
Monday, May 5, 2014

This tutorial is written for those with knowledge of PSP
Supplies Needed:
Tube of choice: I'm using the wonderful art work of Ninaste
You can purchase these tubes at beehive Studio HERE
PTU Scrap Kit by Mizteeque from called "Springtastic"
You an purchase this awesome kit HERE
Masks 4 by Rachel HERE
Xero Radiance
Open blank canvas 700x700
Open element 69 - resize and paste as new layer
Click inside frame with magic wand
Selections modify expand by 6
Open paper 3 and paste as new layer
Selections invert delete
Move paper under frame
Apply Xero Radiance with settings of choice
I used the following:
Element 2
Element 5
Element 7
Element 8
Element 9
Element 19
Element 20
Element 32
Element 54
Element 71
Open paper 1 & apply mask
Add the Copyright and your License Number for the tube
Resize to your liking and save as PNG
This tutorial was created on May 4,2014 by Rhonda
Any resemblance to another Tag or Tutorial is purely coincidental
Wednesday, April 30, 2014

This tutorial is written for those with knowledge of PSP
Supplies Needed:
Tube of choice: I'm using the wonderful art work of Keith Garvey
You can purchase his tubes at his store HERE
PTU Scrap Kit by Mizteeque from called "Live in the Moment"
You an purchase this awesome kit HERE
Template #446 by Missy HERE
Mask of choice
Don't forget to leave a thank you when downloading
Xero Radiance
Open template - Shift D to duplicate then close out original
Canvas size 700x700
Delete copyright,wordart,small square
paste a paper of choice from the kit - I used paper3
selection invert delete
select none delete the original
paste a paper of choice from the kit - I used paper10
selection invert delete
select none delete the original
paste a paper of choice from the kit - I used paper2
selection invert delete
select none delete the original
paste a paper of choice from the kit - I used paper4
selection invert delete
select none delete the original
paste a paper of choice from the kit - I used paper12
selection invert delete
select none delete the original
add new layer and flood fill with color of choice
select none delete the original
add noise with settings fo choice
paste a paper of choice from the kit - I used paper14
selection invert delete
select none delete the original
paste a paper of choice from the kit - I used paper10
selection invert delete
select none delete the original
paste a paper of choice from the kit - I used paper8
selection invert delete
select none delete the original
paste a paper of choice from the kit - I used paper1
selection invert delete
select none delete the original
paste a paper of choice from the kit - I used paper13
selection invert delete
select none delete the original
paste a paper of choice from the kit - I used paper11
selection invert delete
select none delete the original
Repeat the Radiance settings
I used the following:
Element 2
Element 5
Element 9
Element 17
Element 18
Element 18
Element 20
Element 21
Element 22
Element 24
Element 27
Element 30
Element 35
Element 36
Element 37
Element 42
Element 44
Element 45
Open paper of choice and apply mask
Add the Copyright and your License Number for the tube
Resize to your liking and save as PNG
This tutorial was created on April 30,2014 by Rhonda
Any resemblance to another Tag or Tutorial is purely coincidental
Saturday, April 19, 2014

This tutorial is written for those with knowledge of PSP
Supplies Needed:
Tube of choice: I'm using the wonderful art work of Orkusart
You can purchase these tubes at PFD HERE
PTU Scrap Kit by Mizteeque from called "Moonlight"
You an purchase this awesome kit HERE
Masks of choice
Xero Porcelin
Open blank canvas 700x700
Open element 16 - resize and paste as new layer
Click inside frame with magic wand
Selections modify expand by 6
Open paper 1 and paste as new layer
Selections invert delete
Move paper under frame
Apply Xero Porcelin
I used the following:
Element 7
Element 8
Element 10
Element 11
Element 12
Element 15
Element 17
Element 26
Element 28
Element 35
Element 36
Element 40
Element 45
Open paper of choice & apply mask
Add the Copyright and your License Number for the tube
Resize to your liking and save as PNG
This tutorial was created on April 19,2014 by Rhonda
Any resemblance to another Tag or Tutorial is purely coincidental
Thursday, April 10, 2014

This tutorial is written for those with knowledge of PSP
Supplies Needed:
Tube of choice: I'm using the wonderful art work of Sonia Roji
You can purchase her tubes at CDO HERE
PTU Scrap Kit by Mizteeque called "Love Never Fails"
You an purchase this awesome kit HERE
Template #544 by Millie HERE
Gems Mask #22 HERE
Don't forget to leave a thank you when downloading
Open template - Shift D to duplicate then close out original
Canvas size 700x700
Delete copyright
paste a paper of choice from the kit - I used paper5
selection invert delete
select none delete the original
paste a paper of choice from the kit - I used paper1
selection invert delete
select none delete the original
paste a paper of choice from the kit - I used paper3
selection invert delete
select none delete the original
paste a paper of choice from the kit - I used paper11
selection invert delete
select none delete the original
paste a paper of choice from the kit - I used paper6
selection invert delete
select none delete the original
paste a paper of choice from the kit - I used paper8
selection invert delete
select none delete the original
I used the following:
Element 1
Element 3
Element 8
Element 10
Element 14
Element 22
Element 24
Element 32
Element 35
Element 38
Element 39
Element 40
Element 47
Element 49
Open paper 10 & apply mask of choice
Add the Copyright and your License Number for the tube
Resize to your liking and save as PNG
This tutorial was created on April 10,2014 by Rhonda
Any resemblance to another Tag or Tutorial is purely coincidental
Monday, March 31, 2014

This tutorial is written for those with knowledge of PSP
Supplies Needed:
Tube of choice: I'm using the wonderful art work of Very Many
You can purchase this tubes at their store HERE
FTU Scrap Kit by Mizteeque called "Chicks New Year"
You can download this awesome kit on our blog HERE
FTU Cluster by Tee on our blog HERE
Mask of choice
Open cluster frame - Shift D to duplicate and close original
Resize frame and make canvas size 700x665
Click inside frame with magic wand
Selections modify 15
Open paper 2 and paste as new layer
Selections invert
Move paper under frame
I used the following elements:
Element 2
Element 4
Element 6
Element 8
Element 15
Element 23
Element 25
Element 33
Element 34
Open paper 12 and apply mask
Add the Copyright and your License Number for the tube
Resize to your liking and save as PNG
This tutorial was created on March 9,2014 by Rhonda
Any resemblance to another Tag or Tutorial is purely coincidental
Sunday, February 16, 2014

This tutorial is written for those with knowledge of PSP
Supplies Needed:
Tube of choice: Im using the wonderful art work of Wendy Gerber
This tube was purchased at SATC which has closed
You can purchase these tubes at now at AIL HERE
FTU Scrap Kit by Mizteeque from called "A Hint of Goth"
You can download this awesome kit HERE
Mask of choice
Xero Radiance
Open blank 700x700 canvas
Open element 66 & paste as new layer
Using the magic wand click inside frame
Selections modify expand by 8
Open paper 1 & paste as new layer
Selections invert delete
Move paper under frame
Open close-up of tube and paste to left side of frame
Apply Xero Radiance with settings of choice
Apply Xero Radiance again
I always build around my tube
Element 7
Element 8
Element 20
Element 29
Element 31
Element 35
Element 43
Element 56
Element 57
Element 58
Element 61
Open paper 9 & apply mask of choice
Add the Copyright and your License Number for the tube
Resize to your liking and save as PNG
This tutorial was created on Februray 16,2014 by Rhonda
Any resemblance to another Tag or Tutorial is purely coincidental
Sunday, February 2, 2014

This tutorial is written for those with knowledge of PSP
Supplies Needed:
Tube of choice: I'm using the wonderful art work of Misticheskaya
You can purchase his tubes at Pics for Design HERE
PTU Scrap Kit by Mizteeque from called "Blue Ice"
You an purchase this awesome kit HERE
Masks of choice
Xero Radiance
Open blank canvas 700x700
Open element 20 - resize and pasye as new layer
Click inside frame with magic wand
Selections modify expand by 6
Open paper 8 and paste as new layer
Selections invert delete
Move paper under frame
I used the following:
Element 23
Element 28
Element 39
Element 40
Element 62
Element 63
Element 64
Element 70
Element 72
Element 73
Open paper of choice & apply mask
Add the Copyright and your License Number for the tube
Resize to your liking and save as PNG
This tutorial was created on February 2,2014 by Rhonda
Any resemblance to another Tag or Tutorial is purely coincidenta
Subscribe to:
Posts
(Atom)
Grab My Blinkie

I CT For



Blogs I Visit
























