Friday, May 5, 2017
This tutorial is written for those with knowledge of PSP
Supplies Needed:
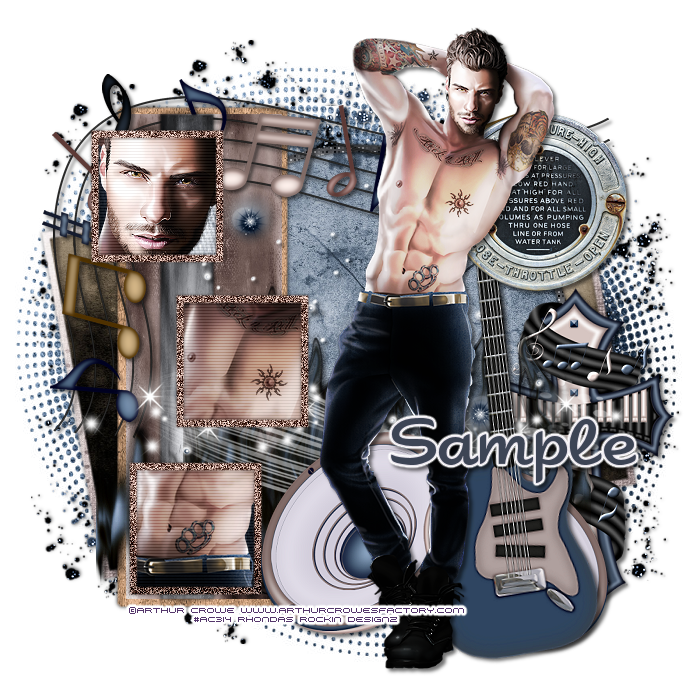
Tube of choice: I'm using the wonderful art work of Arthur Crowe
You can purchase his work at his store HERE
PTU Scrapkit by Creation by Sanie called RocknRoll
Kit can also be purchased at Crowes Store and can be bought as a bundle HERE
Template #51 by Melissaz Creationz HERE
Mask of choice
Don't forget to leave a thank you when downloading
Ok lets get started:
Open template - Shift D to duplicate then close out original
Resize template 123% all layers
Increase canvas size 700x700
Deleted copyright
Click on bottom rectangle selections,select all, float,defloat
paste a paper of choice from the kit - I used paper7
selection invert delete
select none delete the original
Click on bottom rectangle frame selections,select all, float,defloat
paste a paper of choice from the kit - I used paper2
selection invert delete
select none delete the original
Click on circle selections,select all, float,defloat
paste a paper of choice from the kit - I used paper11
selection invert delete
select none delete the original
Click on circle frame selections,select all, float,defloat
paste a paper of choice from the kit - I used paper5
selection invert delete
select none delete the original
add Xero Fritillary with settings of choice
Click on rectangle frame selections,select all, float,defloat
paste a paper of choice from the kit - I used paper3
selection invert delete
select none delete the original
Click on rectangle selections,select all, float,defloat
paste a paper of choice from the kit - I used paper6
selection invert delete
select none delete the original
Click on narrow rectangle selections,select all, float,defloat
paste a paper of choice from the kit - I used paper5
selection invert delete
select none delete the original
Click on squares selections,select all, float,defloat
paste a paper of choice from the kit - I used paper7
selection invert delete
select none delete the original
Add close-up of tubes in each square
apply PhotoEffex Scanlines at default settings
apply Xero Radiance with settings of choice
Click on square frames selections,select all, float,defloat
paste a paper of choice from the kit - I used paper9
selection invert delete
select none delete the original
Place your tube
Xero Porcelin with settings of choice
Now time to add our elements
I used the following:
Element 3
Element 4
Element 5
Element 8
Element 14
Element 21
Element 22
Element 23
Element 31
Merge your layers
Open paper of choice and apply mask
Place your name where you like it
Add the Copyright and your License Number for the tube
Resize to your liking and save as PNG
This tutorial was created on May 2,2017 by Rhonda
Any resemblance to another Tag or Tutorial is purely coincidental

Subscribe to:
Post Comments
(Atom)
Grab My Blinkie

I CT For


Blogs I Visit


0 comments:
Post a Comment