This tutorial is written for those with knowledge of PSPI managed another tutorial!!!!!Trying hard to find my mojo fairy before ChristmasSupplies Needed:Tube of choice: I'm using the wonderful art work of StellaFelice7Tube purchased at PFD HEREPTU Kit by Tiny Turtle Design called Fall Days Kit can be purchased at Laura's store HEREWA of choice Geo Mask #1 by Dee HERE
Resize elements to your liking and don't forget the dropshadow
Ok let's get started:Open canvas 700x700Open element 20 and paste as new layer to middleOpen element 28 and paste behind element 20Open tube of choice and paste to right hand side
Use any elements of choice from kit. I used the following:Element 8Element 14Element 25Element 38Element 73Element 83Element 84Element 89Element 90Element 93Element 95Element 98Element 108
Merge layers and open any paper from kitApply mask
Place your name where you like itAdd the Copyright and your License Number for the tubeResize to your liking and save as PNGThis tutorial was created on November 7,2022 by RhondaAny resemblance to another Tag or Tutorial is purely coincidental

This is the FIRST tutorial I have been able to write inwell over a month. Been busy and no energy. I was lookingfor that inspiration. TYSM Kathy for sending me thisamazing kit yesterday. I feel I got some mojo back!!!!!!
This tutorial is written for those with knowledge of PSPSupplies Needed:Tube of choice: I'm using the wonderful artwork of AttilaTube was purchased at EleganceFly Store HEREPTU Kit by Kathy's PSP Designs called HauntingKit can be purchased at PFD HERECheck out Kathy's blog for other goodies HEREHalloween mask from Zombie Graphics HERE
Ok Lets get Started:Open blank canvas 700x700Open element 19 and place to left of canvasOpen tube and place in front of house to right
Use any elements of choice. I used the following:Element 1Element 7Element 15Element 16Element 17Element 24Element 25Element 26Element 46Element 47Element 58Element 61Element 71Element 87
Merge layers and add mask
Place your name where you like itAdd the Copyright and your License Number for the tubeResize to your liking and save as PNGThis tutorial was created on October 10,2022 by RhondaAny resemblance to another Tag or Tutorial is purely coincidental
I have been so busy past several weeks and haven't hadtime to play in PSP or upload to my blog.I LOVE seeing tags created using my tutorialsI can see different tubes used and usually love them betterTY to ATP and TTL for supporting me

This tutorial is written for those with knowledge of PSPSupplies Needed:Tube of choice: I'm using the wonderful artwork of Sheena PikeTubes was purchased at CDO HEREPTU Scrapkit by Bella Caribena called Feeling So MagicKit can be purchased at her store HEREWA from Penny at Venomous Cherries Creations HEREMask of choice
Ok Let's get Started:Open canvas 700x700Open element 147, resize and place to right cornerOpen element 141 and place to left cornerOpen element 61, resize and place to left corner in front of wallOpen element 67 and place to right sideApply your tubes to tag (I waited to the end)
Save your tag as PSP so you can use laterStart building your tag with other elements from kitI used the following:Elements 15Elements 44Elements 50Elements 52Elements 60Elements 97Elements 113
Apply WA to tagI used 3 of the artists tubes and 1 from kit
Place your name where you like itAdd the Copyright and your License Number for the tubeResize to your liking and save as PNGThis tutorial was created on July 26,2022 by RhondaAny resemblance to another Tag or Tutorial is purely coincidental
Ok Let's get Started:Open cluster 2 from packDuplicate and resize to fit your tag (I like my tags 700x700)Add new rater layer under cluster and fill with whiteOpen embellishment 2 and place to left side of tagResize to fit cluster and erase any leftoversUsing embellishment 2 apply behind frame layerAgain, erase any leftovers you may haveI used the bees layer from my tube and applied to tagApply your tube to tag
Save your tag and label so you can find laterI have started leaving my layers open
For mask open embellishment 3 and apply behind tagUsing Mura Meister wallpaper filter create a paperDuplicate paper so you can use againApply mask #7 and move to top leftDuplicate and move to bottom rightApply mask #8 and move to top right cornerDuplicate and move to bottom left corner
Place your name where you like itAdd the Copyright and your License Number for the tubeResize to your liking and save as PNGThis tutorial was created on July 19,2022 by RhondaAny resemblance to another Tag or Tutorial is purely coincidental
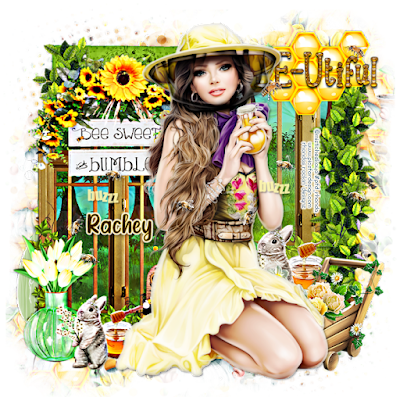
This tutorial is written for those with knowledge of PSPSupplies Needed:Tube of choice: I'm using the wonderful artwork of Stella FeliceTube was included in kit when purchasedPTU Scrapkit by Savage Dezines called BeeYoutiful DayKit purchased at Scraps N Company HEREMask of choice
Ok Let's get Started:Open 700x700 canvasAdd tube to canvas and build around itUse following elements to make circle frame behind tubeUse Mura Meister Encircle Filter for framesElement 14Frame 1Frame 3Frame 2
Continue using elements from kit to complete tagI used the following:Element 2Element 3Element 6Element 7Element 11Element 12Element 15Element 16Element 23Element 33Element 39Element 49Element 57Element 58Element 61Element 95Element 101
Merge layers and add mask
Place your name where you like itAdd the Copyright and your License Number for the tubeResize to your liking and save as PNGThis tutorial was created on July 18,2022 by RhondaAny resemblance to another Tag or Tutorial is purely coincidental

Ok Let's get Started:Open cluster, duplicate and close originalI resized my frame 115%Click inside frames and expand by 20Open texture (whatever you use) and paste as new layerSelections invert deleteAdd close up of tubes inside each frameSelections invert deleteApply Xero Radiance and Porcelain with settings of choiceChange blend mode to burn (modify your tag to match your background)Apply full tube to tagAdd Xero RadianceOpen WA and use papers, gradients,textures to decorateI added gradient glow to minePlace WA to tag
Merge layers and add mask
Place your name where you like itAdd the Copyright and your License Number for the tubeResize to your liking and save as PNGThis tutorial was created on July 16,2022 by RhondaAny resemblance to another Tag or Tutorial is purely coincidental

Ok Let's get Started:Open blank canvas 700x700Open frame 7, resize and place to centerClick inside frame with magic wand and expand by 10Open new layer under frame and paste paper of choice into selectionOpen element 54, resize 34% and place on paper just above the waveChange blend mode to overlayOpen element 52, resize around 36%, place on paper right at wave Change blend mode to screenAdd tube to center of frame
Start building your tag with other elements from kitI used the following:Element 8Element 15Element 27Element 28Element 37Element 38Element 50Element 55Element 57Element 95Element 100Element 103Element 107Element 113 **For the Sea WA change blend mode to Luminance Legacy**
Merge layers and add maskI used 2 different papers with same mask
Place your name where you like itAdd the Copyright and your License Number for the tubeResize to your liking and save as PNGThis tutorial was created on July 9,2022 by RhondaAny resemblance to another Tag or Tutorial is purely coincidental

This tutorial is written for those with knowledge of PSPSupplies Needed:Tube of choice: I'm using the wonderful artwork of Cuddly Rigor MortisTube purchased at CDO HEREPTU kit by Ladyhawwk Designs to match tubeKit can be purchased at CDO HEREWA from Venomous Cherries Creations HEREMask #7 by Rachey from Scraps of Enchantment HERE
Ok Let's get Started:Open blank canvas 700x700Open element 5 and place to centerOpen elements 3,6,14,23 & place behind the floral designAdd tube to left hand side of tag
Start building your tag with other elements from kitI used the following:Element 2Element 7Element 9Element 10Element 12Element 13Element 15Element 16Element 18Element 20Element 25Element 26Element 27Element 29
Add WA and decorate to your styleMerge layers and add mask
Place your name where you like itAdd the Copyright and your License Number for the tubeResize to your liking and save as PNGThis tutorial was created on July 4,2022 by RhondaAny resemblance to another Tag or Tutorial is purely coincidental
This tutorial is written for those with knowledge of PSPSupplies Needed:Tube of choice: I'm using the wonderful artwork of VeryManyTube was purchased at their store HEREFTU to use cluster from Sonja's Sazzy World HERE WA from Venomous Cherries Creations HEREMask #754 from Rachels Designs HERE
Ok Let's get Started:Open cluster, duplicate and close originalResize if neededDuplicate frame again and send to bottomUsing Mura's Meister Wallpaper filter & apply Open tube of choice and place on canvasDuplicate mask and move up in front of duplicate tubeI resized mine by 85% to fit my tagOpen WA and place where you wantYou have a created an awesome tag!!!!!!!!!!!!!!
Place your name where you like itAdd the Copyright and your License Number for the tubeResize to your liking and save as PNGThis tutorial was created on July 4,2022 by RhondaAny resemblance to another Tag or Tutorial is purely coincidental
My friends at The Taggers Lounge and Artistic Tag Passions have beenusing my tutorials and I appreciate it so much!!!!!!!!!!!!!!!!I love seeing what others do with my tutorials and 100% of thetime I like their tag more than mine. TY again ladies!!!!One of these tags was created using a FTU clusteron my blog.


